The Employees area is for tracking the people on your team. An employee is a contact record flagged as an employee, so they stay separate from your vendors and customers in selectors and reports. The same record is the shared backbone for everything you do with a team member: paying back out-of-pocket expenses, running payroll, tracking time off, the employee self-service portal, and crediting whoever closed a sale. The examples below use our sample business, Demo Company Inc.
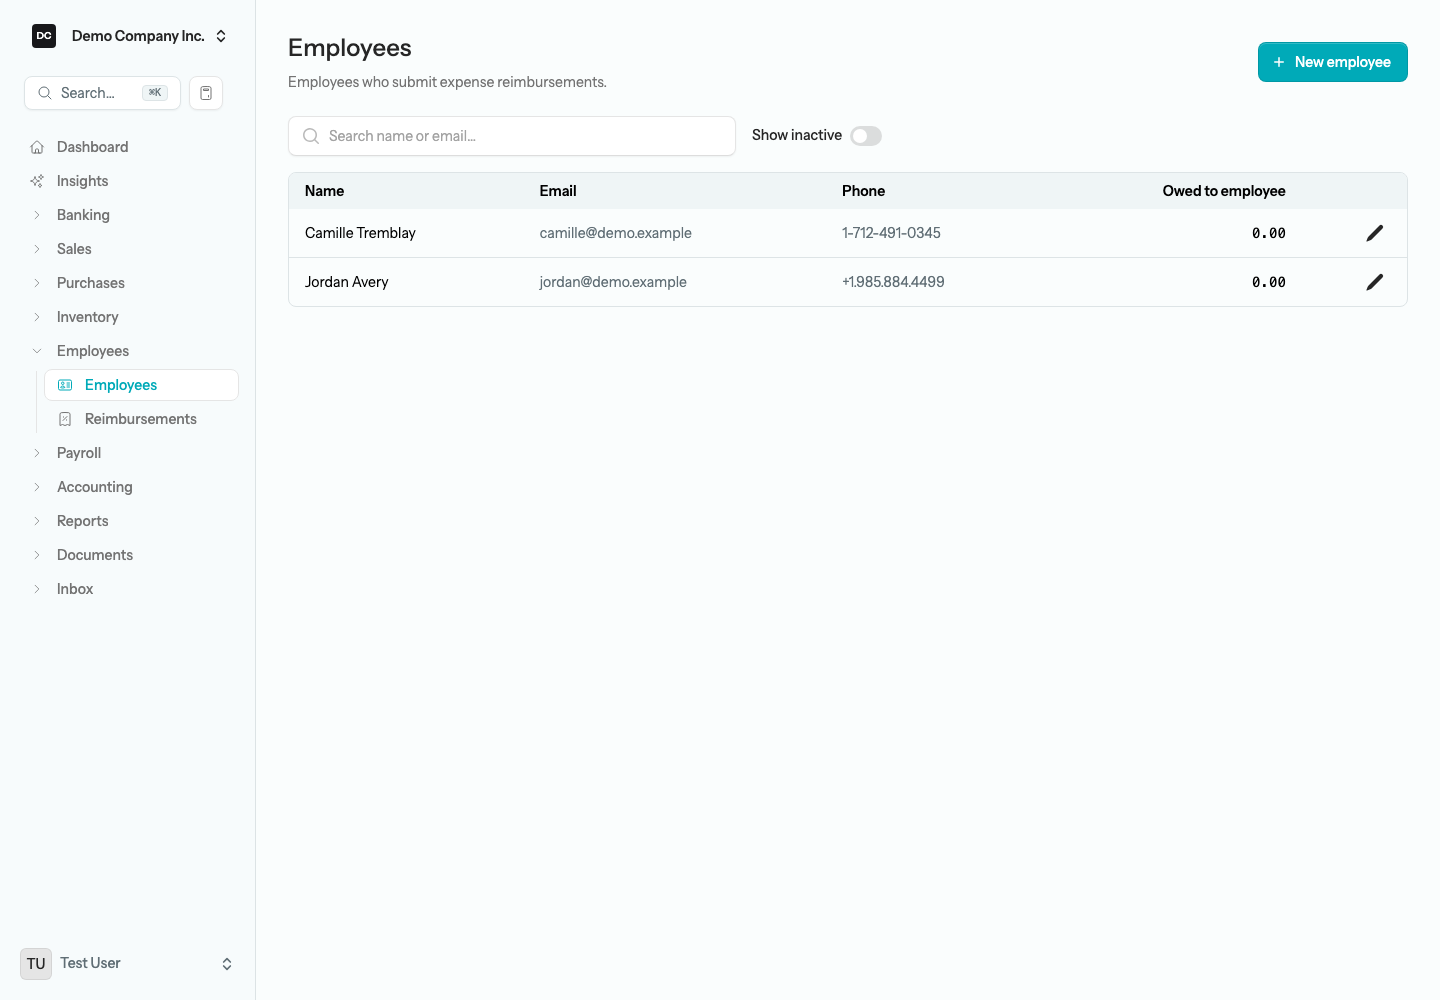
Open Employees from the sidebar to see the list. Each row shows the employee’s name, email, and phone, plus an Owed to employee column. Use the search box to find someone by name or email, or switch on “Show inactive” to include people who have left the team.
Add an employee
Set up an employee once so you can reimburse them, put them on payroll, and attribute sales to them later. Only a display name is required — fill in the rest as you have it.
To add an employee:
- Open Employees from the sidebar.
- Select New employee in the top-right corner.
- Enter a Display name — this is what you will pick from lists everywhere else in the app.
- Fill in any contact details you have: First name, Last name, Email, and Phone. Email is what the app uses to send a self-service portal invite.
- Optionally record a Job title and an Employee ID (your own payroll code, such as EMP-014), plus a mailing address (Address, City, Province, Postal code) and any Notes.
- Leave Active on for a current team member, then select Save.
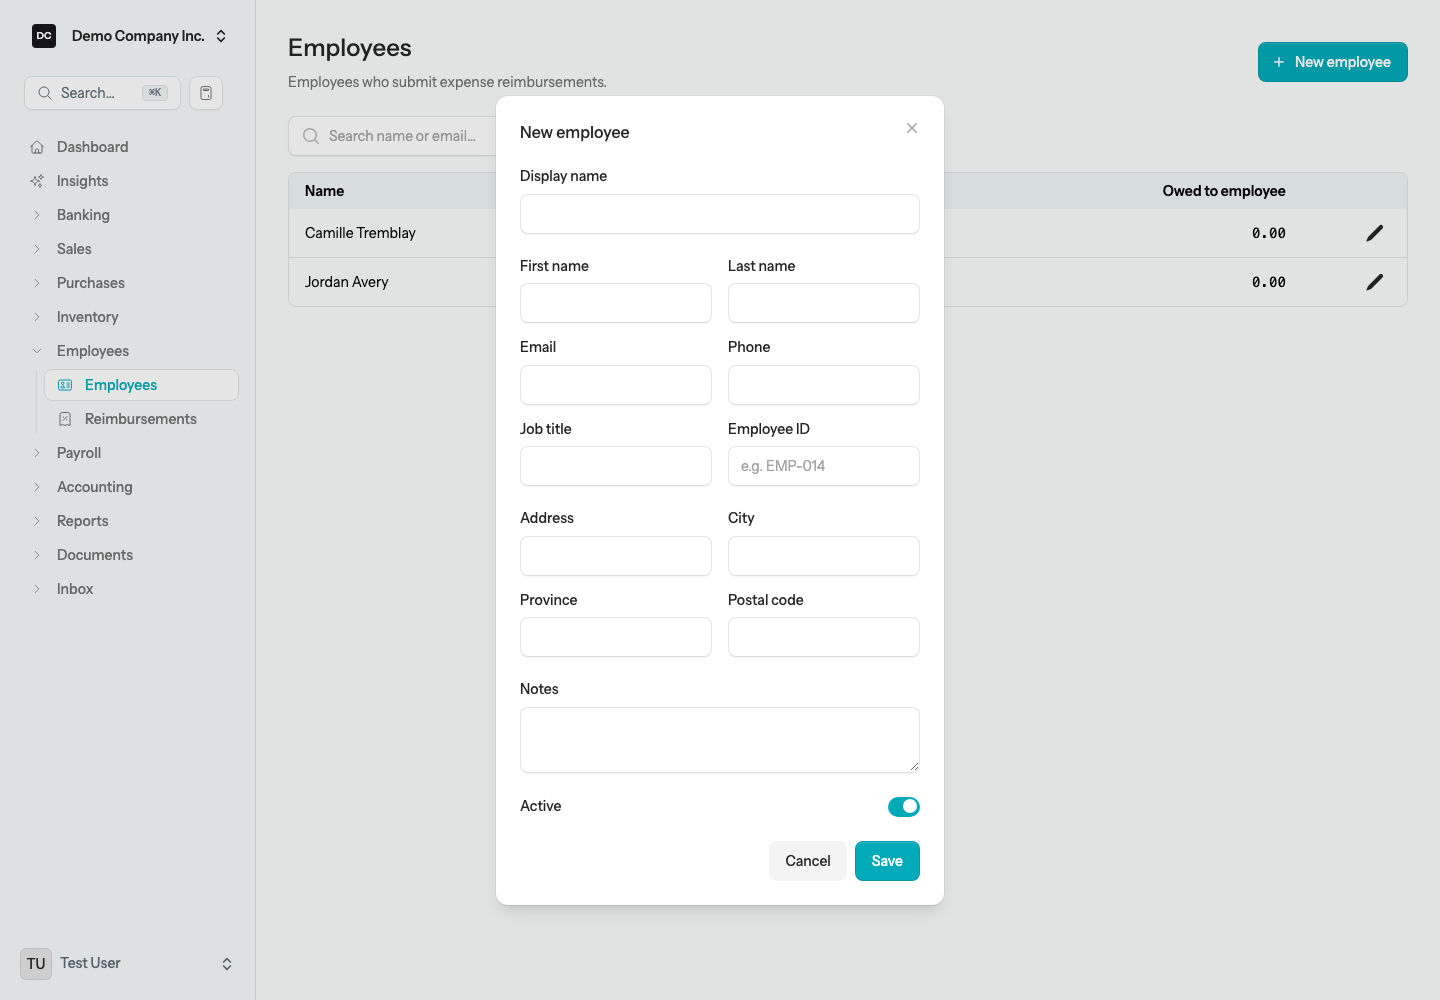
Open an existing employee and the dialog also shows a read-only Contact ID (API). It is different from the Employee ID you typed: it is the number an integration passes as sales_rep_id to credit this person with a sale, or as contact_id on their expense records. See the API guide if you connect other software.
Tip. When someone leaves the team, mark them inactive instead of deleting: they drop out of selectors but their reimbursement and payroll history stays intact for your records.
Note — One person edits a record at a time. If a teammate already has an employee open in the edit dialog, you see who is editing instead of the form; the reimbursement form and reimbursement page work the same way, and voiding or deleting waits until they are done. Owners and Admins can take over. See Settings → Edit locks for how locks are released.
Other ways to add or open an employee
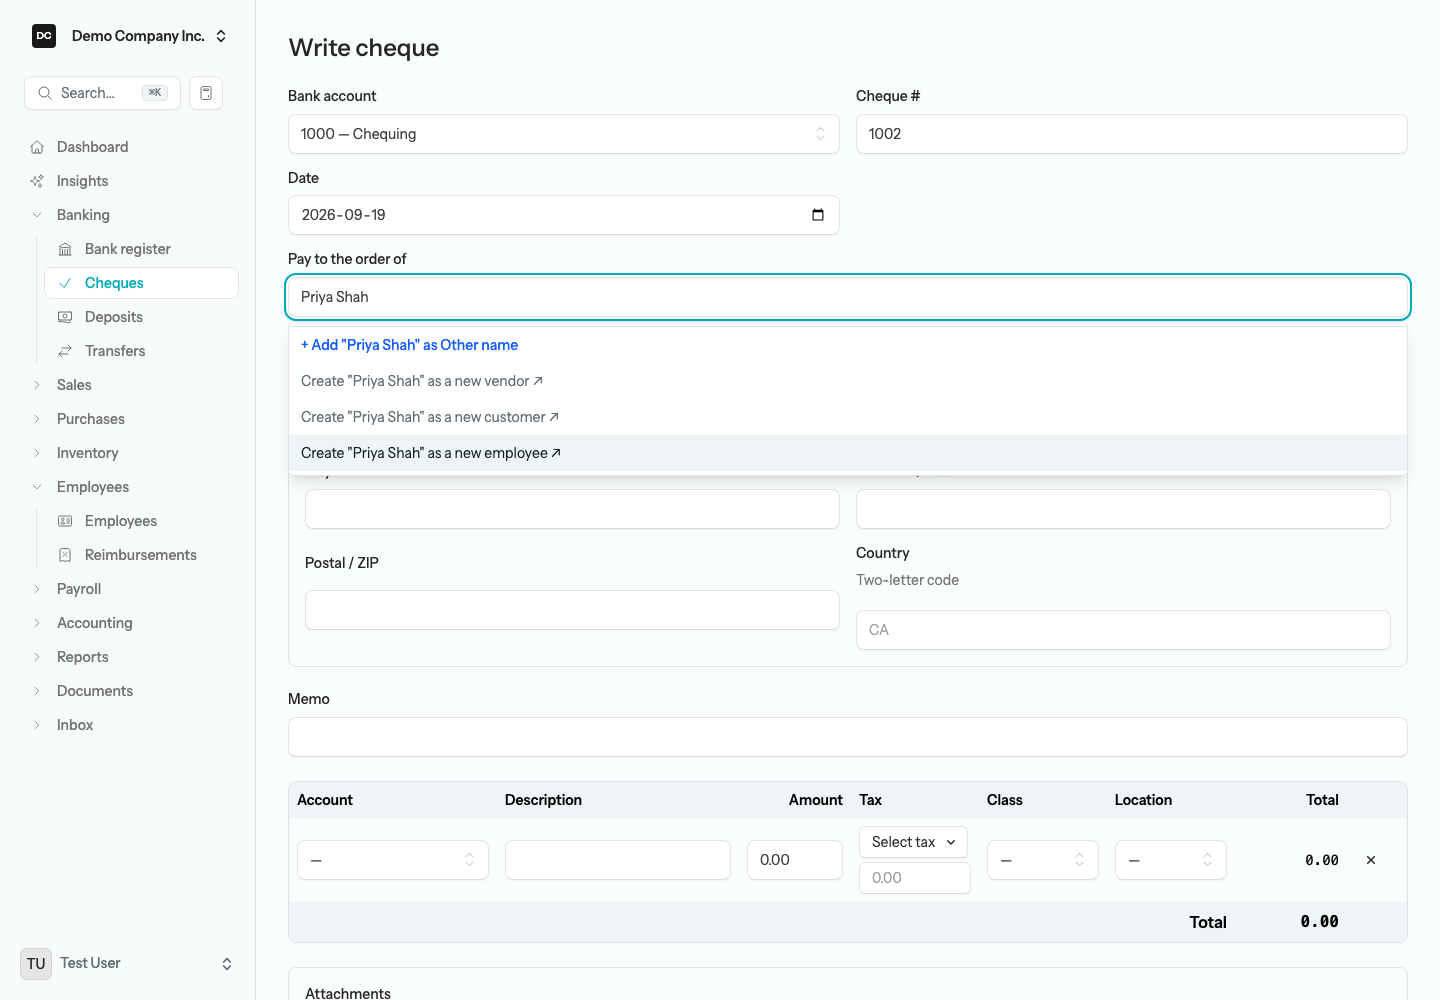
You do not have to start from the Employees list. When you are writing a cheque or recording an expense, the Pay to the order of (or Paid to) picker searches vendors, customers, employees, and other names together, with a badge showing each person’s role. Type a name nobody has yet and the picker offers Create “…” as a new employee: it opens the Employees page in a new tab with the New employee dialog already filled in with that name, so the cheque you were writing stays put. Save the employee, switch back, and pick them.
Going the other way, an employee’s name on a cheque, an expense, or a search result links straight back to their record here. And if you set someone up as an Other name before they joined the team, Settings → Lists → Other names can convert that record into an employee in one step — see the Lists guide.
Reimbursements
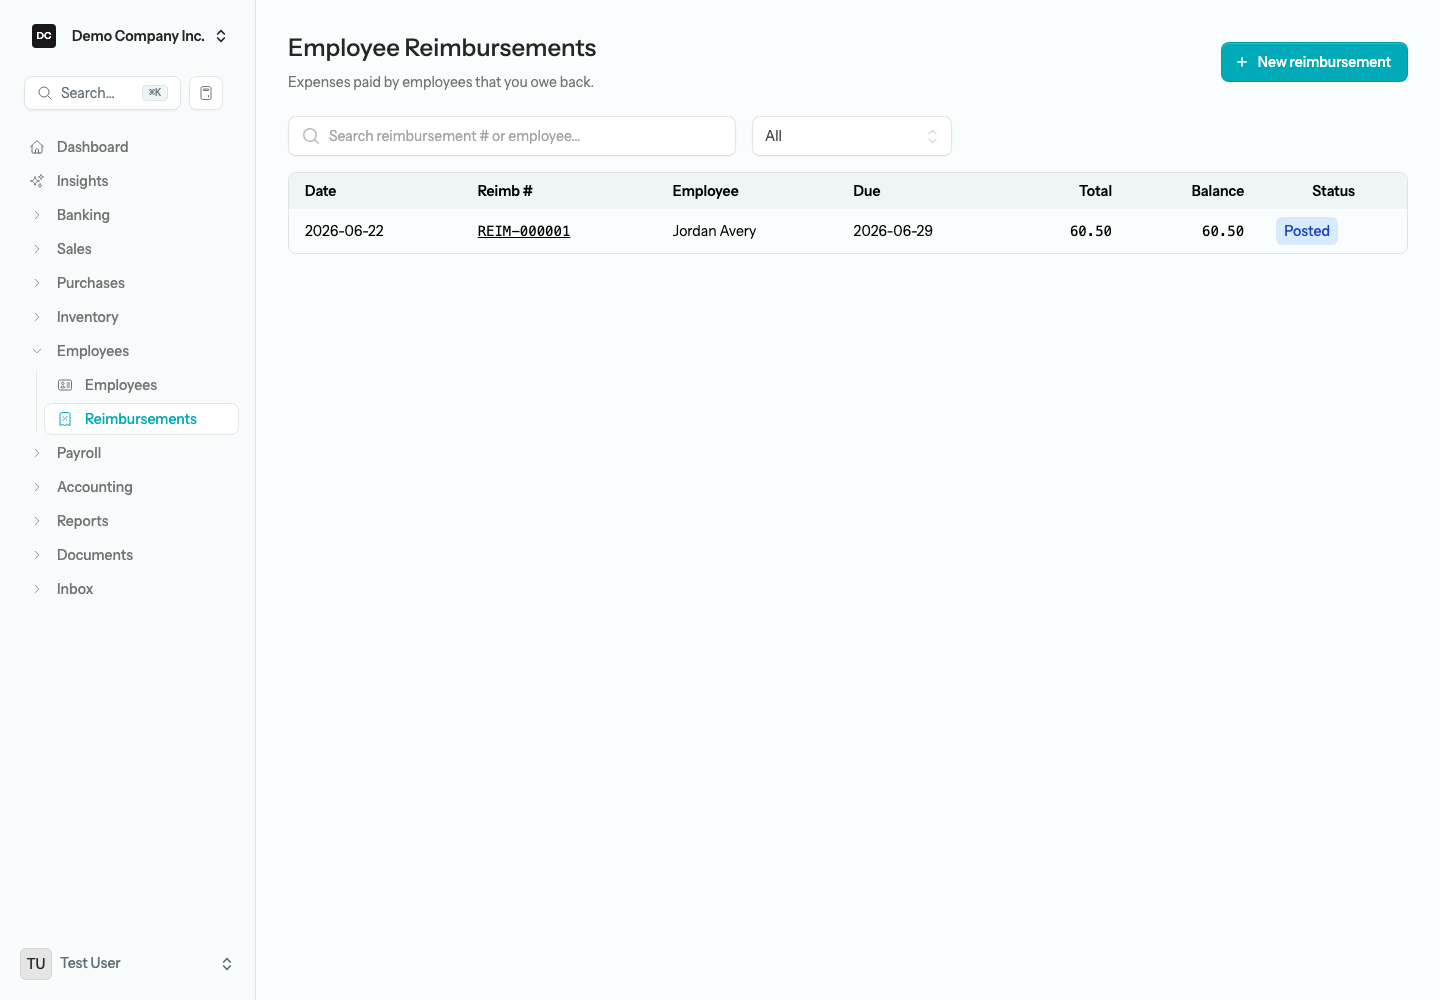
When an employee pays for something out of pocket, you owe them back. Reimbursements are their own area under Employees — open Employees → Reimbursements from the sidebar. Each reimbursement is numbered automatically (REIM-…) and works much like a vendor bill, except the money is owed to a teammate instead of a supplier and it is tracked in its own liability account.
To create a reimbursement:
- Open Employees → Reimbursements, then select New reimbursement.
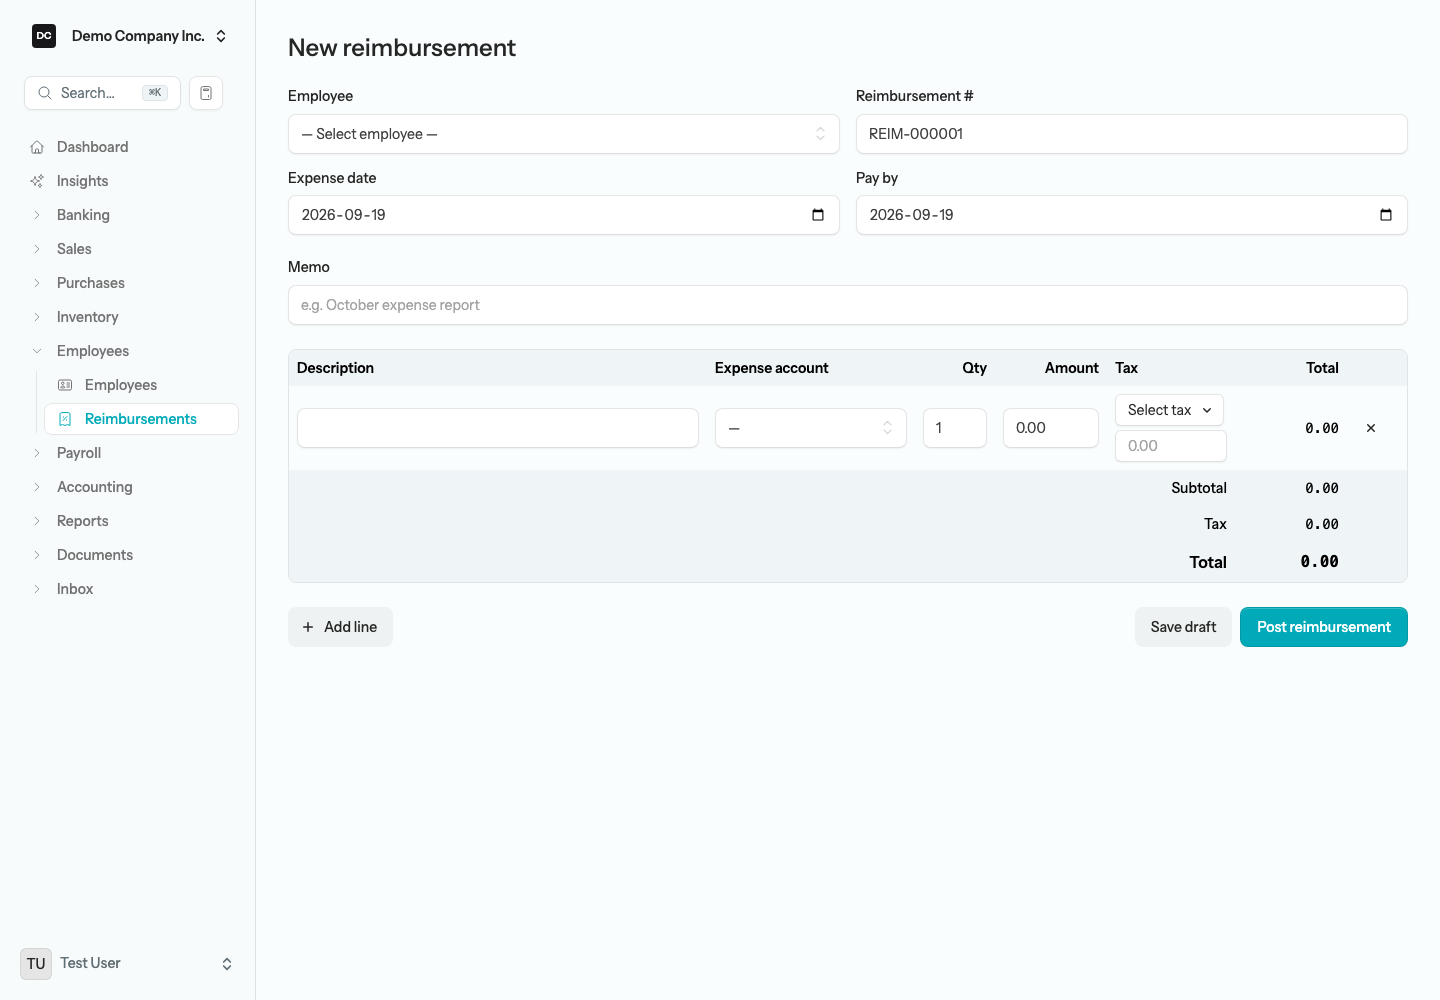
- Choose the Employee. The Reimbursement # fills in automatically — change it if you number expense reports your own way. Set the Expense date and the Pay by date (a click anywhere in a date field opens the calendar), and add a Memo such as “October expense report”.
- On each line, enter a Description, pick the Expense account the cost belongs to, and enter the Qty and Amount. The line Total calculates as you type, and the Amount cell doubles as a calculator — type 42.50+18.25 and press Enter.
- Open the Tax picker on the line if the expense included recoverable tax. You can tick up to two codes (say GST and PST), and the tax for each is worked out for you. Each code you tick gets its own box below the picker, labelled with the code and showing its calculated amount in grey; type over a box when the receipt shows a different figure for that tax. Enter each tax in its own box, never the receipt’s combined tax in one.
- Select Add line for each further receipt, then select Post reimbursement to finalize it, or Save draft to keep working on it later.
Note — What posting does to your books. Posting a reimbursement debits the expense account on each line, debits any recoverable tax to its tax account, and credits Employee Reimbursements Payable (account 2300) — a current liability of its own, separate from Accounts Payable. That keeps what you owe staff distinct from what you owe suppliers on the balance sheet; it also means reimbursements do not appear on AP Aging. Reimbursements are always in your home currency. Each line’s Description carries through as the memo on the journal entry, so the ledger reads like the expense report.
To pay an employee back:
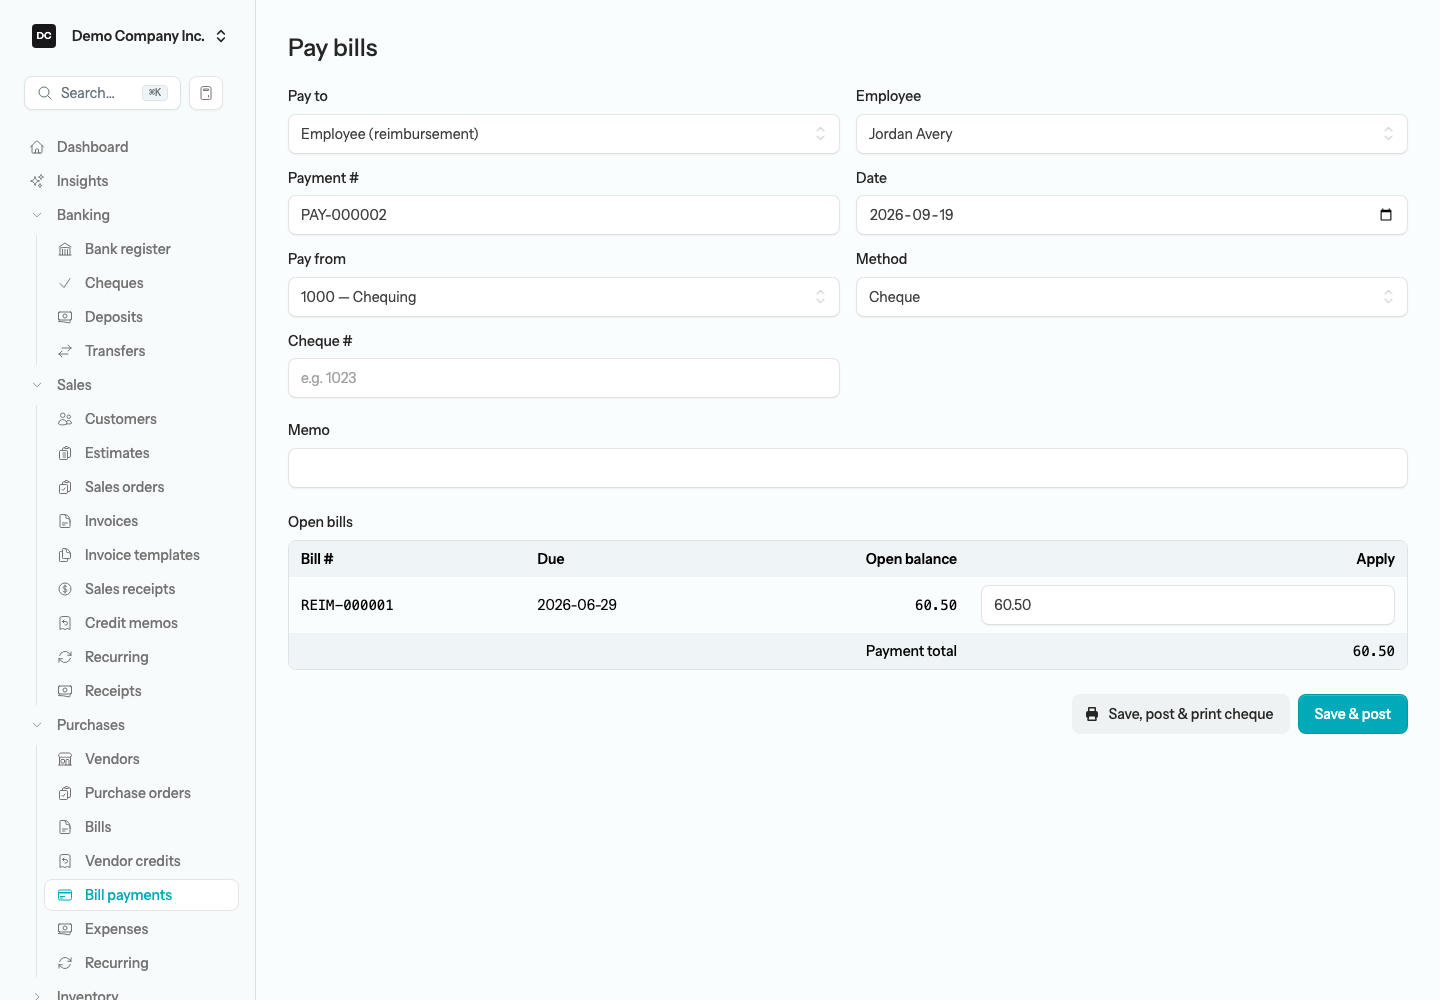
- Open the posted reimbursement and select Pay employee. The Pay bills form opens with Pay to set to Employee (reimbursement) and the employee already chosen.
- Check the Payment # and Date, then choose the bank account in Pay from and a Method. For a cheque, enter the Cheque #; for anything else, an optional Reference.
- Under Open bills, every unpaid reimbursement for this employee is listed. Type the amount you are paying in the Apply column for each one — a partial payment is fine — and check the Payment total.
- Select Save & post, or Save, post & print cheque when the method is a cheque.
Note. The payment debits Employee Reimbursements Payable and credits the bank account you paid from, and the reimbursement moves to Partial or Paid. Each payment is for one employee, but it can settle all of that person’s open reimbursements at once. You can also start one without opening a reimbursement: open Purchases → Bill payments, select Pay bills, choose Employee (reimbursement) under Pay to, and pick the Employee. The Pay multiple suppliers button on that page is for vendor bills only and never lists reimbursements.
Paying from a bank statement import
If you sent the money by e-transfer or online bill payment, you can settle the reimbursement while importing your bank statement instead of recording the payment first. On the Import statement wizard (or the For Review page), set the outflow’s payee to the employee, select Pay bills…, and enter the amount against each open reimbursement in the Pay bills from this transaction dialog — reimbursements are badged so you can tell them from vendor bills. Confirming the line posts the same payment the Pay employee button would. Three rules apply: the payee must be an employee, a single line cannot pay vendor bills and reimbursements together, and the bank account must be in your home currency. See the Banking guide for the import itself.
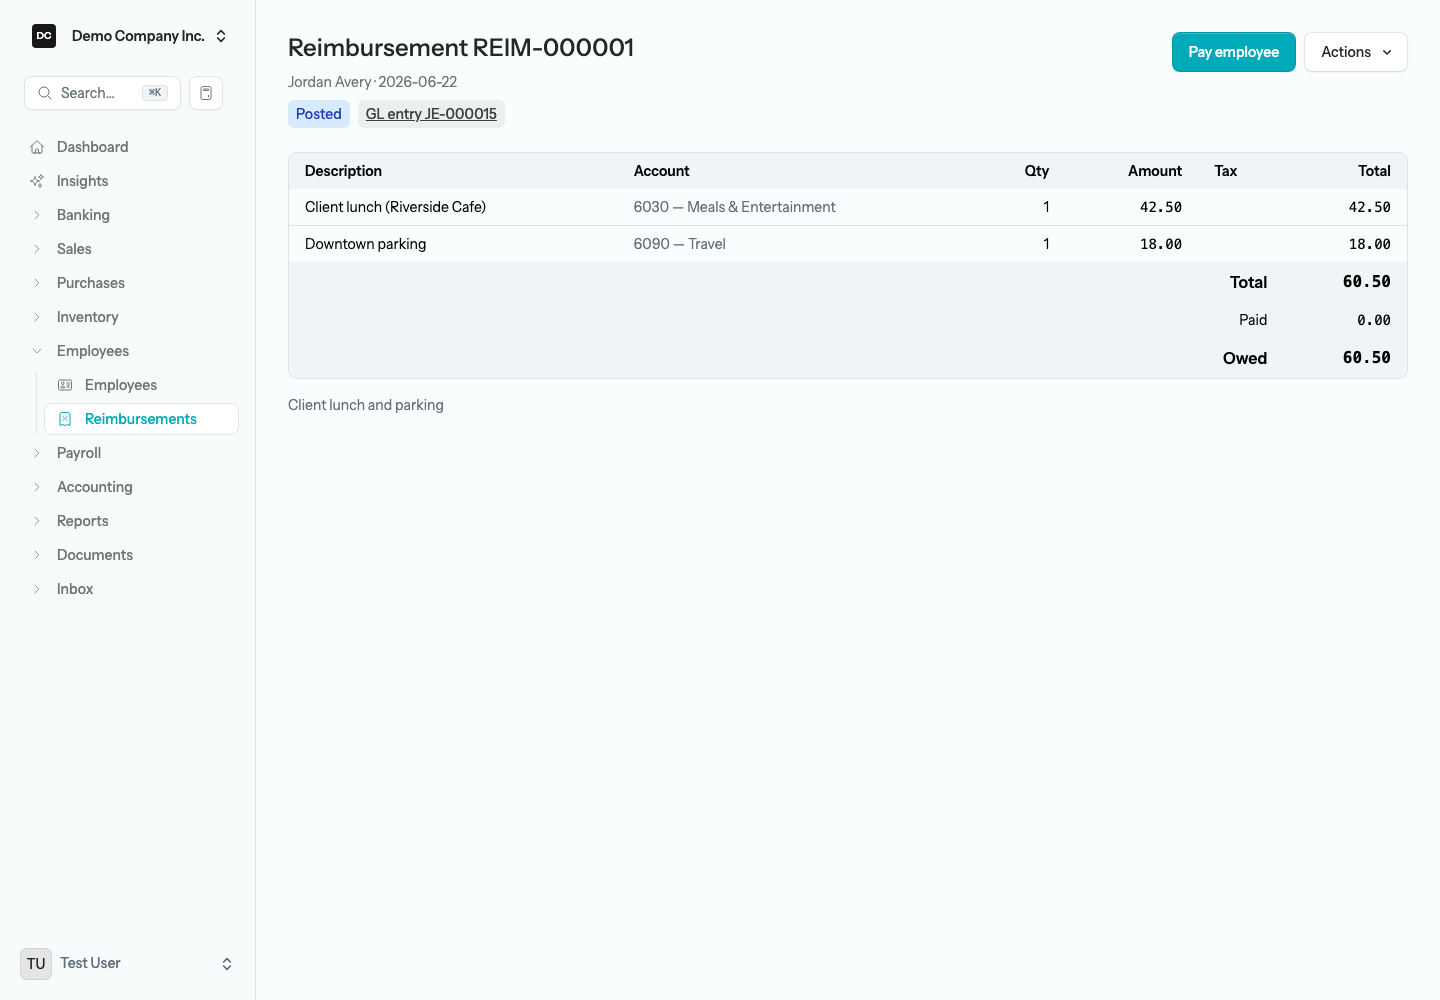
A posted reimbursement shows its status badge, a GL entry link to the journal entry it created, the lines with their tax breakdown, and the Paid and Owed totals. The Actions menu lets you Print it, Edit it, Void it, or — for a draft that has not been posted yet — Delete draft. Editing a posted reimbursement rewrites the same journal entry in place; the button reads Save changes rather than Post reimbursement.
Heads up. A posted reimbursement should not simply be deleted — that would leave a gap in your numbered REIM records. To cancel one, void it: the app reverses the ledger entry and keeps the voided reimbursement on file for your audit trail. Only drafts that were never posted can be deleted outright.
Put an employee on payroll
The same employee records feed payroll. To start paying someone, open Payroll → Employee setup and complete their payroll profile — province of employment, pay basis and rate, TD1 claim amounts, and vacation handling. Payroll appears only when it is turned on for your organization.
Pay runs, CPP/EI deductions, remittances, and T4 / RL-1 slips all live in the Payroll area. See the Payroll guide for the full walkthrough.
Time off and the staff calendar
Open Payroll → Staff calendar to see who is away at a glance; its Time-off requests button opens the list of requests where you approve or deny leave. Time-off policies, which set how each kind of leave accrues, are a setup screen under Settings → Payroll → Time-off policies. Each employee’s vacation and accrual balances tie back to the same employee record you set up here. The Payroll guide covers them in detail.
The employee self-service portal
Each organization has an employee self-service portal — a separate, employee-facing site where your team can see their own pay statements, year-to-date totals, vacation balances, and tax slips, request time off, log hours, and update their own address and TD1 amounts, without ever seeing your books or anyone else’s records.
To invite someone, give them an email address here, save their payroll profile under Payroll → Employee setup, and select Send portal invite at the top of that profile — the button appears once the profile has been saved, and the invite only goes out to an active employee with an active profile. Signing in is passwordless by default.
Sales-rep attribution
Employees can also be credited for sales. The invoice, credit memo, estimate, and sales order forms each have a Sales rep field that lists your active employees — pick whoever closed the work, and it stays with the document. On invoices and credit memos the field is shown by default; if someone has hidden it, open the Fields menu in the top-right corner of the form and tick Sales rep to bring it back. The field only exists while the Employees feature is on, since reps are drawn from the employee list.
Camille Tremblay, Demo Company Inc.’s sales associate, is the natural rep for its customer invoices. Sales receipts have no rep field — they are paid on the spot and are not part of rep reporting.
Reporting on a sales rep
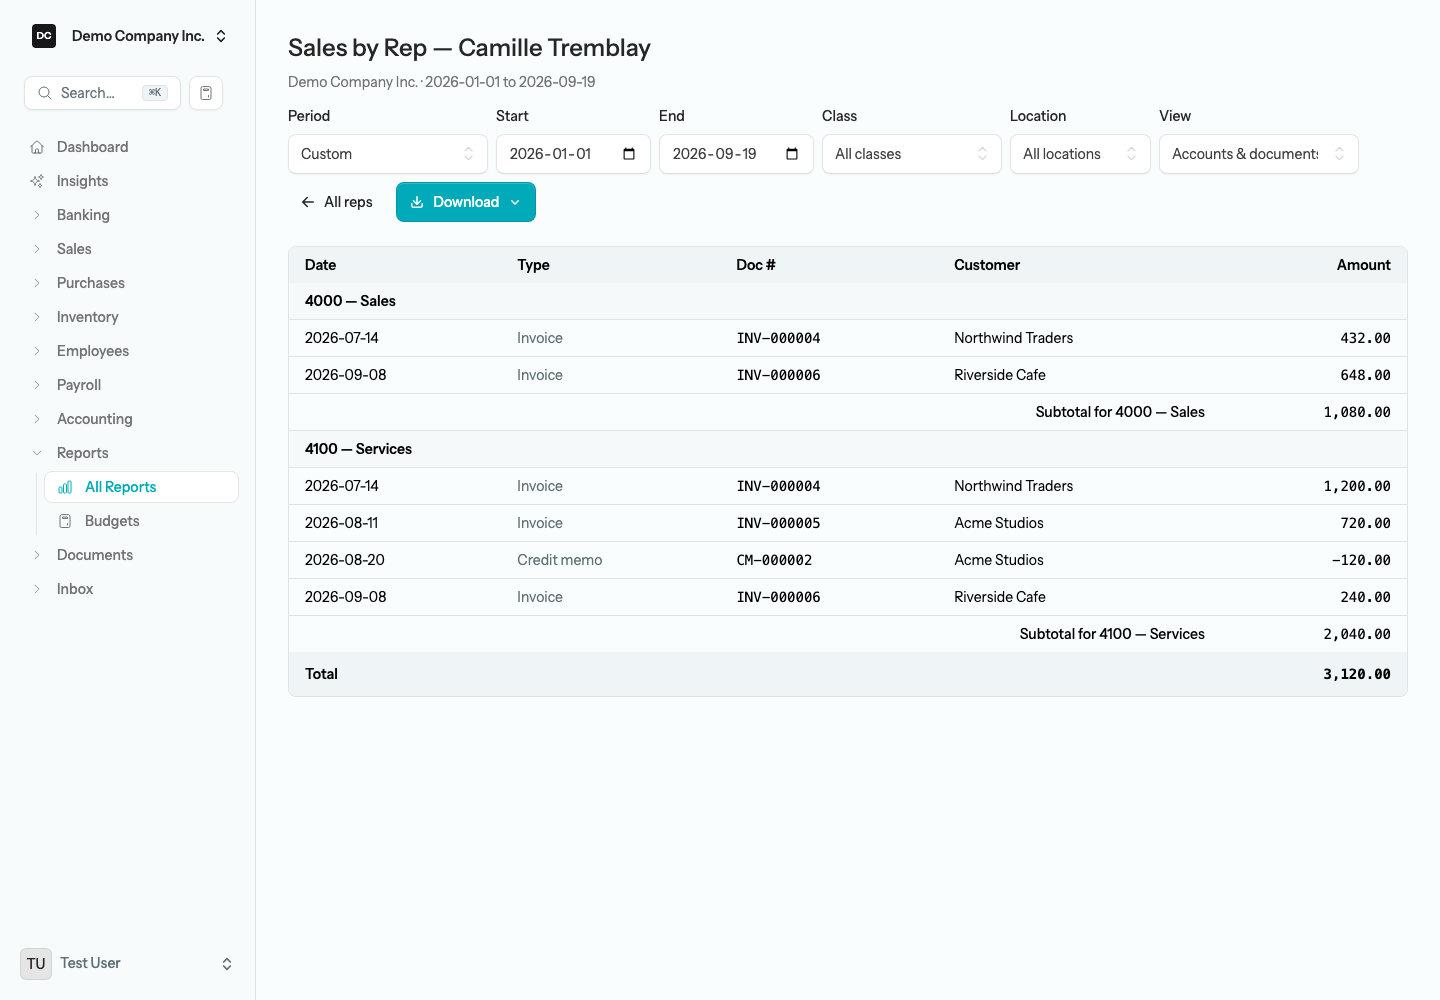
Reports → Sales by Rep totals each rep’s revenue for the period — invoices less credit memos, at pre-tax line amounts — with a No sales rep row for documents nobody was credited on. The Compare dropdown adds Prior, Change, and % Change columns against the prior period or prior year.
Select a rep’s name to open their drill-down. The default View, Accounts & documents, groups their invoices and credit memos under each revenue account with a subtotal per account, so you can see both what they sold and which documents make up the number. Switch View to Accounts only for one row per revenue account, read like an income statement; on that view the Compare dropdown and the Prior, Change, and % Change columns are available too. CSV export follows whichever view is showing, and All reps takes you back to the summary.
The customer statement you run from Reports also shows a Rep column — on screen, in CSV and Excel, and on the staff PDF — so you can see who looked after each document on a customer’s account. That column is for your team only: the statement you send a customer, and the copy they download from the customer portal, never include it.
Note. Connected software can credit sales too. The API accepts sales_rep_id on invoices and credit memos — the Contact ID (API) shown on the employee dialog — and an AI assistant connected over MCP can ask for the sales report grouped by rep. See the API guide.
Note. The whole Employees area — including reimbursements — can be hidden for organizations that do not need it: open Settings → Organizations, open your organization’s edit page, and switch off Employees under Features. Access is also governed by the Employees section permission, so you can let some team members manage people and reimbursements while keeping it out of view for everyone else.
Reports tied to this area
- Sales by Rep — revenue per sales rep over a period, with a drill-down into each rep’s invoices and credit memos by revenue account.
- Contact statement (customer) — every transaction on a customer’s account, with a Rep column on the staff view.
- Balance Sheet and General Ledger — the Employee Reimbursements Payable account (2300) is the total still owed to staff, and the ledger shows every reimbursement and payment behind it.
- Payroll Register, T4 Slips, RL-1 Slips, and Record of Employment — per-employee payroll reporting, covered in the Payroll guide.