A sales receipt is for a sale the customer pays in full right away — a walk-in purchase, a point-of-sale transaction, a deposit-and-done job. One posted document records the revenue, breaks out the sales tax, and lands the money in your bank, all at once. There is no “you owe me” stage, because nothing is owed: the customer already paid. The examples below use our sample business, Demo Company Inc.
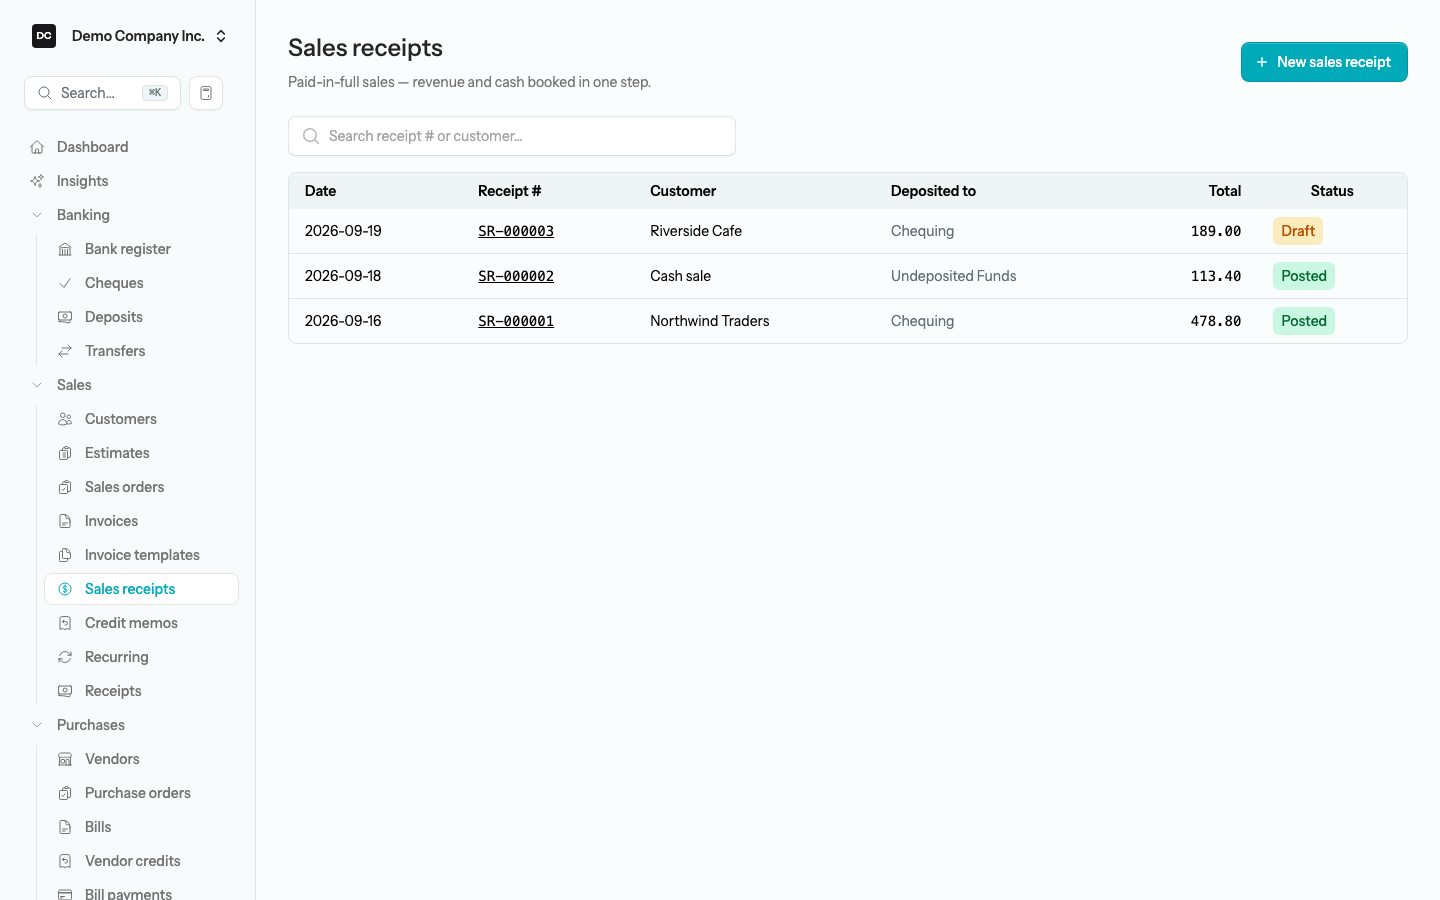
Open Sales → Sales receipts from the sidebar to see the list (on a non-profit organization the group is called Revenues instead of Sales). Each row shows the date, the receipt number, the customer (or “Cash sale” when there is none), the account the money was deposited to, the total, and the status. Search by receipt number or customer name to narrow the list.
How it differs from an invoice
An invoice is for a sale on credit: it records what the customer owes you (Accounts Receivable), and later — when they pay — you record a separate receipt to clear that balance and bank the cash. That is two documents for one sale that happened to be paid later.
A sales receipt collapses both steps into one. Because the money arrives at the same moment as the sale, there is no Accounts Receivable to track and no payment to chase. That is why a sales receipt has only three states — Draft, Posted, and Void — with no partial-paid or overdue lifecycle. Reach for an invoice when you will be paid later; reach for a sales receipt when you are paid now.
Tip — Which one should I use? Paid at the counter, by card, or cash on delivery → sales receipt. Billing a customer who will pay on terms → invoice, then a receipt when the money comes in. Invoices and customer receipts are covered on the Customers page.
Create a sales receipt
Creating a sales receipt looks a lot like writing an invoice, with one extra field — the account the money was deposited to — and no due date, because nothing is due.
To create a sales receipt:
- Open Sales → Sales receipts, then select New sales receipt.
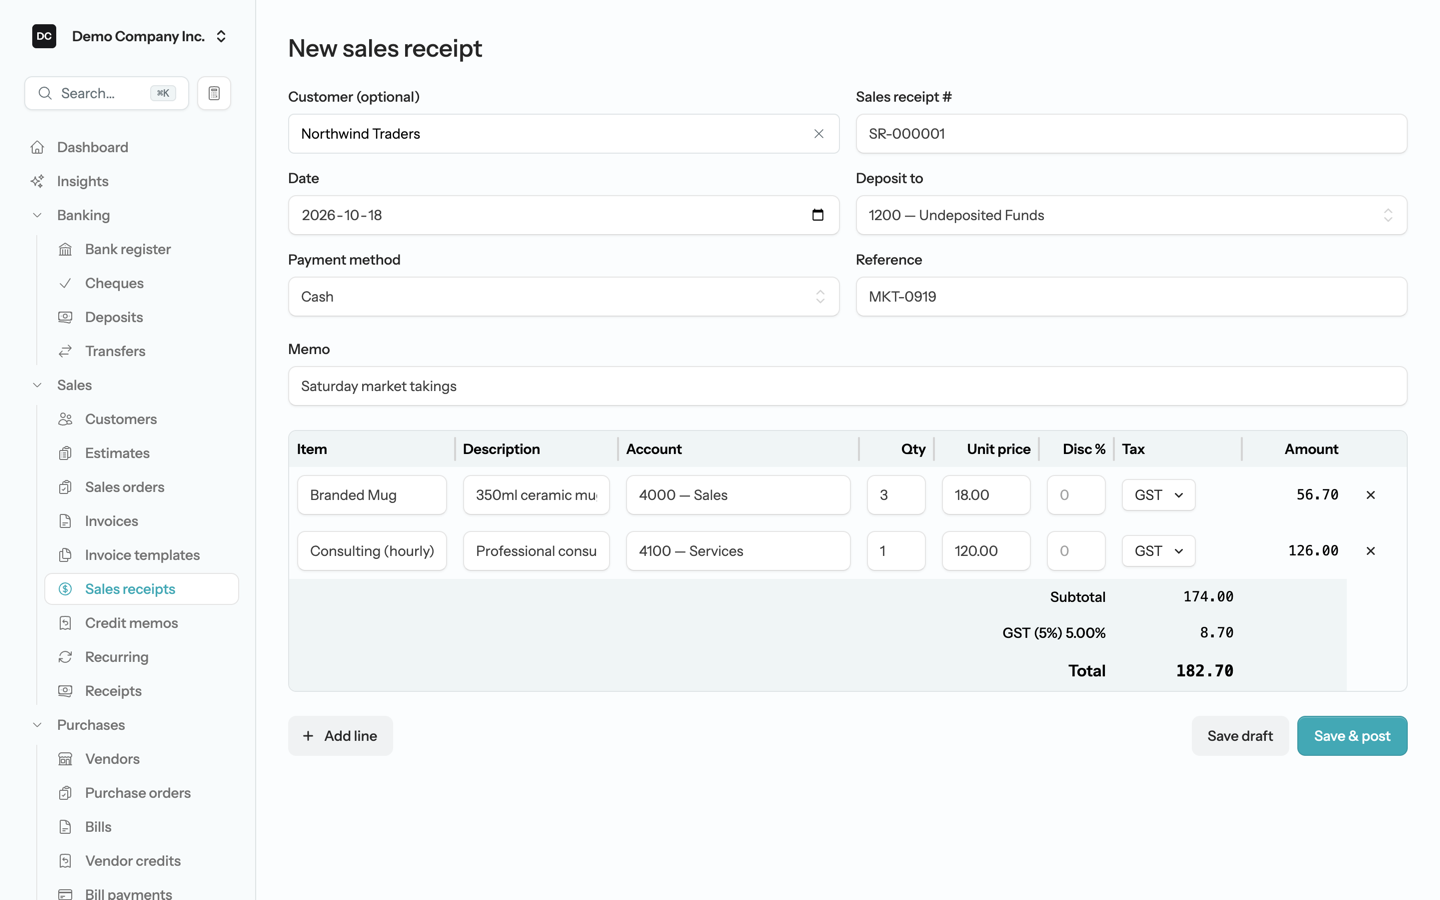
- Pick the Customer (optional) if you want the sale tied to one — start typing to search, or leave it blank for a cash sale or a walk-in you do not track by name. If the name is not on file yet, choose Add “…” as new customer to create the record on the spot. Choosing a customer also sets the Payment method to the one they prefer and fills the Tax on any line that does not have one yet with their default tax code.
- The Sales receipt # and Date fill in automatically — the next number in the SR- sequence and today’s date. Change either if you need to: a click anywhere in the date field opens the calendar, and a number you type must be unique among the organization’s sales receipts, so the form refuses one that is already in use.
- In Deposit to, choose where the money landed: a bank account, or Undeposited Funds if you are grouping it for a later bank deposit. Only bank and Undeposited Funds accounts are offered.
- Optionally record the Payment method (cash, card, cheque), a Reference such as a cheque number or card authorization code, and a Memo. The memo prints at the foot of the receipt and is what identifies the money on your bank register, so “Saturday market takings” beats leaving it blank.
- On each line, pick an Item or an Account, type a Description, and enter the Qty and Unit price. The Account starts out as the Default sales account from Settings → Invoices, and the Amount calculates as you type. Add a Disc % if you gave a discount on that line.
- Open the Tax dropdown and tick the tax code if the sale is taxable — up to two codes per line, for example GST and PST. Each tax then shows on its own row in the totals, with its rate.
- Select Add line for more than one item, then Save & post to finalize — or Save draft to finish later.
Tip — Keying receipts quickly. Every Unit price cell doubles as a calculator: type an expression such as 3*18.00 or 250/4, watch the tape pop up, and press Enter to commit the result. When you reach the last field of the last line, pressing Tab adds a new line and puts the cursor in its Item box, so a multi-line receipt never needs the mouse. Escape takes you back to the list when you are done — it asks “Leave this page?” first if you have unsaved changes, and you can turn the shortcut off under Settings → Appearance.
Note — The Deposit to account. Deposit to is the heart of a sales receipt. Choose a bank account to send the money straight there, or choose Undeposited Funds to hold it until you make a physical bank run — then batch it with other takings on a bank deposit, exactly like a customer receipt. A new receipt starts on Undeposited Funds whenever the organization has that account (Demo Company Inc. does), and otherwise on the first bank account in the chart.
Picking an Item fills in its account, description, default price, and tax codes for you — even on a line you have already priced, so pick the item first and adjust the price after. If the item is a bundle, the line expands into one prefilled line per component. A draft can still be changed or deleted freely. Posting writes the receipt into your books, but it does not freeze it: you can still open a posted receipt, change it, and save, and the app reposts the same journal entry in place (see Edit, below).
Note — What posting does to your books. Posting a sales receipt debits your Deposit to account (a bank or Undeposited Funds) for the total, credits your revenue accounts for the subtotal, and credits each tax agency’s payable account for the tax collected — all in one balanced journal entry, with no Accounts Receivable leg. If a line uses an inventory-tracked item, posting also reduces that item’s quantity on hand and books its cost to cost-of-goods-sold. The journal entry is titled “Sales receipt SR-000012 — Northwind Traders”, and the line on the Deposit to account reads “Deposit: your memo”, which is what a bank register row shows when the money went straight to a bank account. A receipt takes its currency from the customer when it is first saved (a cash sale is always in your home currency) and keeps it from then on; because the sale and the cash settle at the same instant, a foreign-currency receipt converts every line at one rate locked at posting, so it never produces an exchange gain or loss.
When posting is refused
Save & post checks a few things before it writes anything. If one fails, nothing is posted and the reason appears in red under the line grid so you can fix it and try again:
- The receipt is dated on or before the organization’s lock date. Closed periods stay closed — move the date forward, or ask an owner or admin to change the lock date.
- A sales tax return has already been filed for the period the receipt date falls in, and a line uses one of that agency’s tax codes. Void the return first if the receipt genuinely belongs in that period.
- The receipt has no lines, or its total is zero or less.
- A line sells more of an inventory-tracked item than you have on hand. The message names the item, the quantity requested, and the quantity available; receive the stock first, or reduce the quantity.
Editing a posted receipt runs the same checks against both its original date and its new one, so a receipt cannot be moved into or out of a locked or filed period. Voiding is refused, too, if today’s date is on or before the lock date, or if the receipt has already been ticked off in a completed bank reconciliation.
Deposit the money at the bank
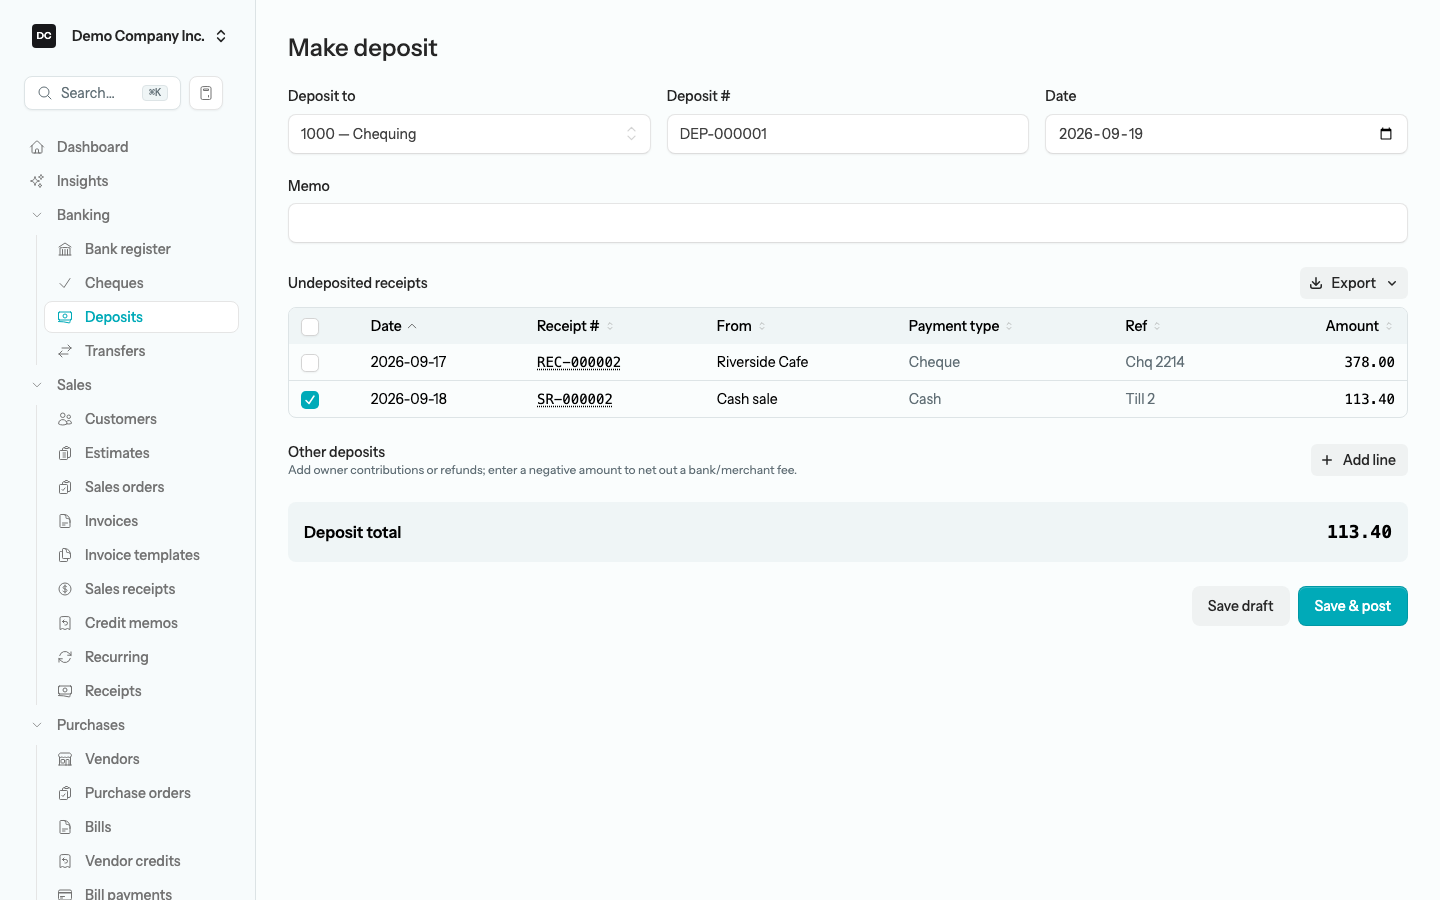
When you chose Undeposited Funds, the money is still sitting in that holding account. Open Banking → Deposits and select Make deposit: the Undeposited receipts list shows every posted pay-now sales receipt alongside your customer receipts, with a Payment type column so you can group the cash separately from the card takings. Tick the receipts that went to the bank together — the checkbox in the header ticks them all — and select Save & post. Each Receipt # links to the receipt’s edit page in a new tab if something needs fixing first, and once a receipt is on a deposit it drops out of the list. The rest of the deposit procedure is on the Banking page.
View, print, and void
Open any receipt from the list to see who it was for and where the money went, the Total, Method and Reference, its lines, a per-tax-code breakdown, and the memo at the foot. Once posted, a GL entry badge links to the journal entry it created.
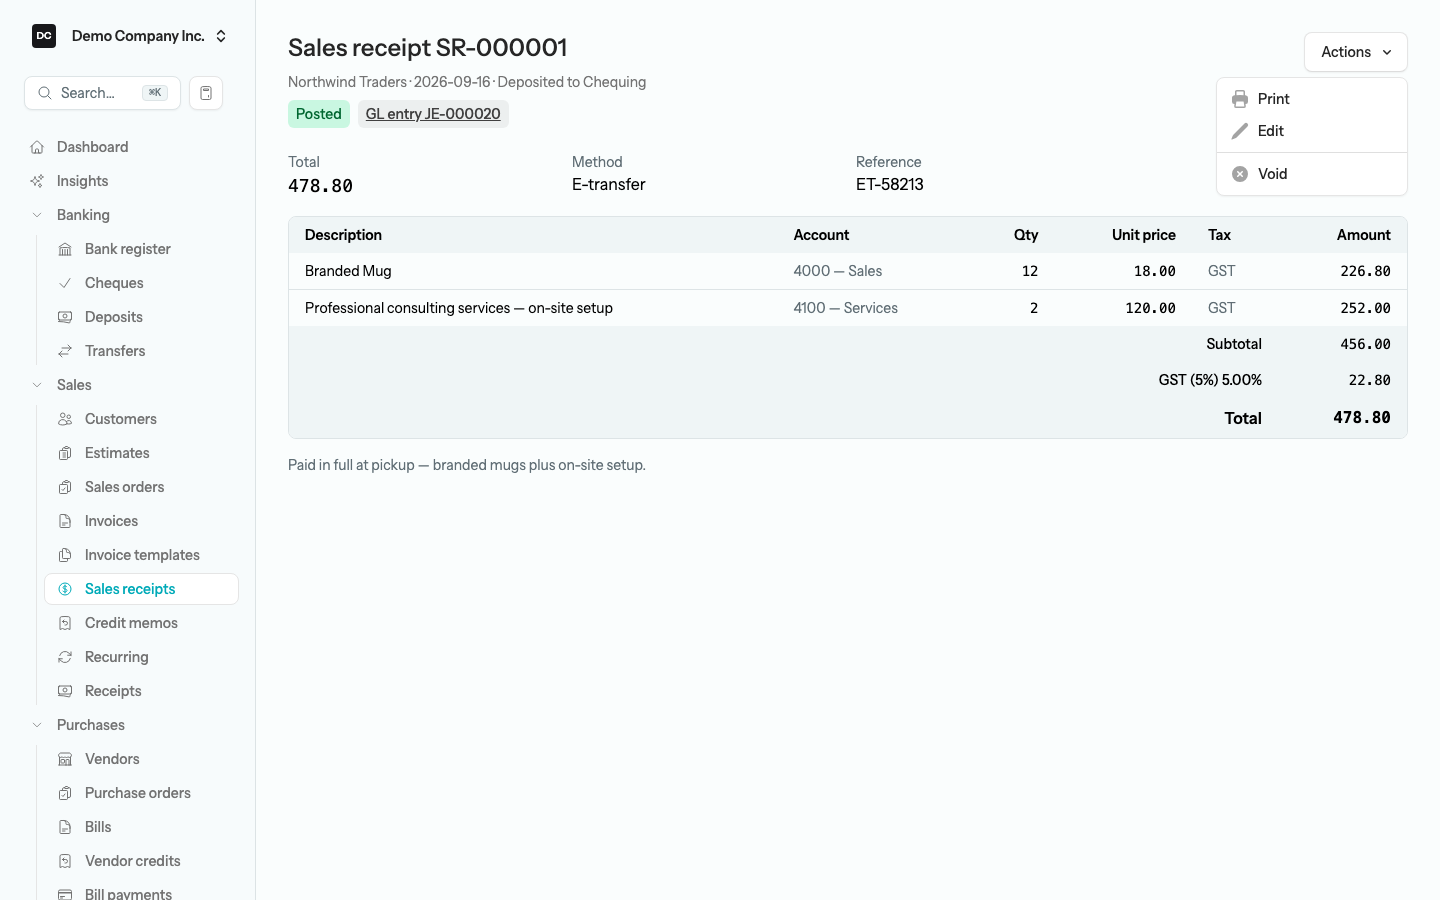
From the Actions menu you can:
- Print — open a PDF of the receipt in a new tab, headed SALES RECEIPT with a PAID stamp, a Sold To block, and a Total Paid line, ready to hand or email to the customer. Your logo, the tax registration line, and the footer message come from Settings → Invoices; the receipt’s own memo prints in the footer as well.
- Edit — change a draft freely, or update a posted receipt. On a posted receipt the buttons collapse to a single Save changes, and saving reposts it in place, adjusting the same journal entry rather than creating another. A voided receipt cannot be edited, so Edit disappears from its menu.
- Void — for a posted receipt, reverse it: after you confirm, the app writes a reversing journal entry dated today, returns any issued stock to inventory, and keeps the voided receipt on file.
- Delete draft — remove a receipt that was never posted, so it leaves no trace in your books.
Note — One person edits a receipt at a time. When a teammate has a sales receipt open for editing, its page says who is editing and Void and Delete draft wait until they are done; anyone else opening the edit page sees who has it instead of the form. Owners and Admins can take over. How locks are released is explained under Edit locks on the Settings page.
Heads up. A posted sales receipt should never simply be deleted — that would leave a gap in your numbered records. To cancel one, void it instead: the ledger entry and any stock movement are reversed, and the voided receipt stays on file for your audit trail. Voiding is permanent — a voided receipt is read-only, so if the sale really happened, create a fresh receipt rather than trying to bring the old one back.
Sales receipts are not available through the REST API — integrations that need to record a pay-now sale post an invoice and a customer receipt, or a journal entry, instead. See the API page for what is exposed.
Reports tied to this area
- Income Statement (Profit & Loss) — sales-receipt revenue appears alongside invoiced sales. A non-profit sees the same figures on the Statement of Operations.
- Sales Tax — tax you collected on sales receipts, ready for filing.
- Sales by Customer, Sales by Customer (Detail), and Sales by Item — totals across invoices and sales receipts, net of credit memos. Sales by Rep leaves sales receipts out, because a receipt carries no sales rep.
- Stock Status and Inventory Valuation — where the quantity and cost of any inventory-tracked item you sold on a receipt show up.