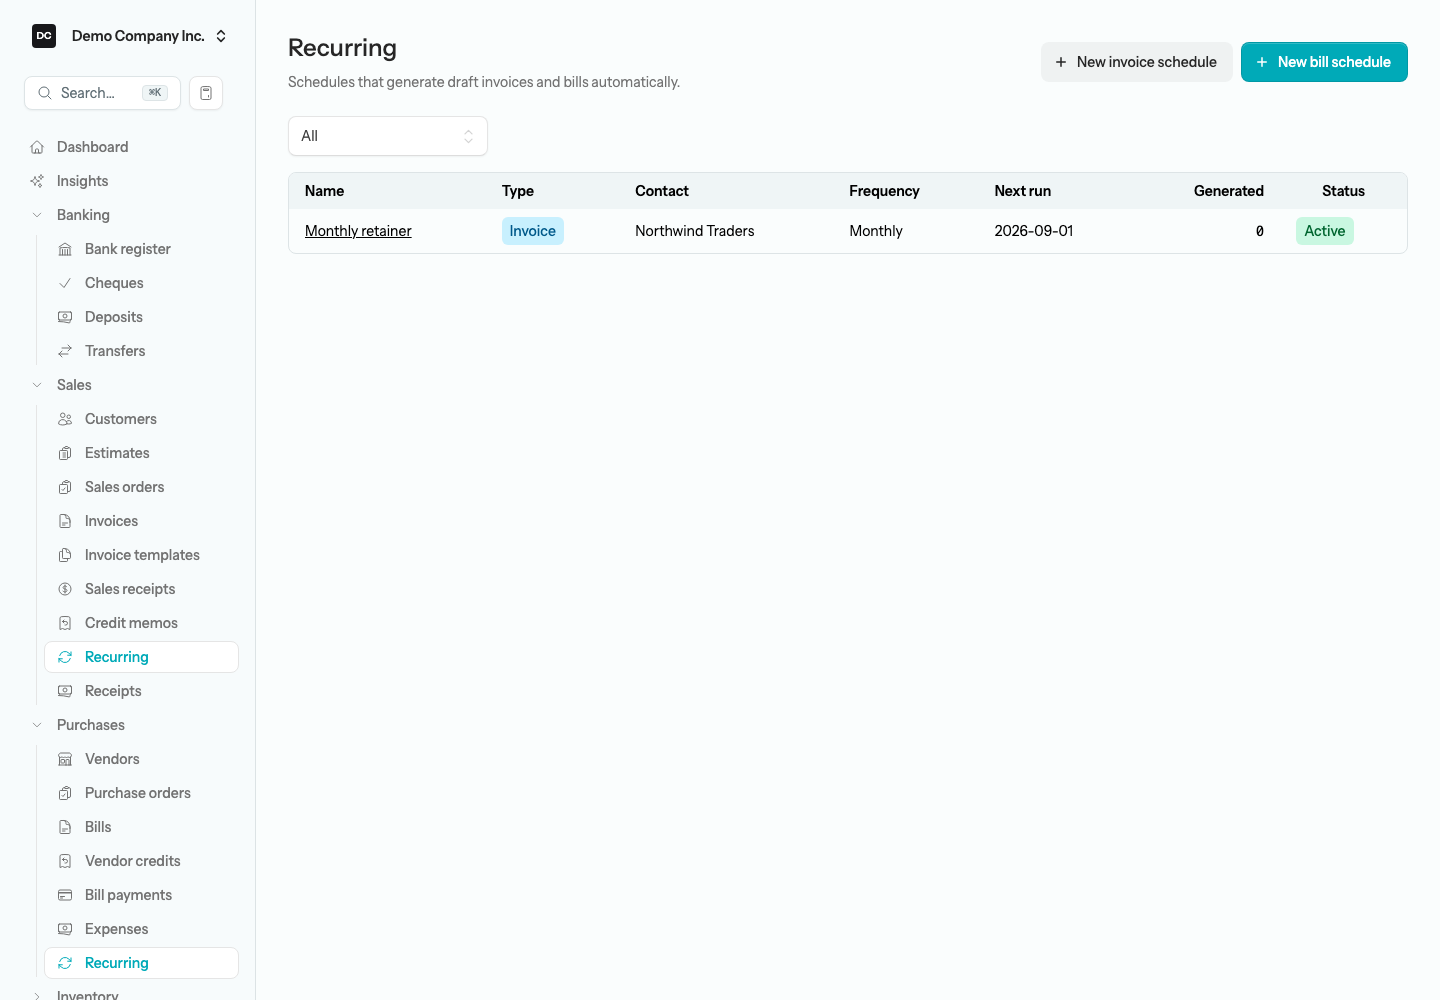
A recurring schedule is a saved document that the app turns into a real invoice or bill on a calendar — monthly retainers, rent, subscriptions, standing orders. One engine handles both sides: the same area sets up customer invoice schedules and vendor bill schedules. The examples below use our sample business, Demo Company Inc., whose “Monthly retainer” schedule bills Northwind Traders on the first of every month.
Open Sales → Recurring (Revenues → Recurring on a non-profit) or Purchases → Recurring from the sidebar. Both entries open the same Recurring list, pre-filtered to invoice schedules or bill schedules respectively; switch the All / Invoices / Bills selector above the table to see every schedule together. Each row shows the schedule Name, its Type (Invoice or Bill), the Contact, the Frequency, the Next run date, how many documents it has Generated, and a Status badge — Active, Ended, or Needs attention.
Note — Turning the feature on. Recurring invoices and recurring bills are each an optional feature. Whether they start switched on depends on the industry you chose when you created the organization — Health & Wellness turns on recurring invoices; every other preset leaves both off. If you do not see Recurring in the sidebar, open Settings → Organizations, open the organization, find the Features section, and switch on Recurring invoices or Recurring bills. Turning a feature back off later hides its Recurring item without deleting existing schedules — and those schedules keep generating on their nightly run until you pause them.
Not every schedule in this list was created here. On an organization with Membership turned on, switching Auto-renew on for a member creates a “Membership renewal” invoice schedule for their dues; on Demo Community Society, Priya Sharma and The Okafor Family each have one. Manage those from the member record rather than from this list (turning Auto-renew off pauses the schedule, so it shows here as Needs attention until you turn it back on) — see Members → How auto-renew works.
Create a recurring invoice or bill
A schedule has two parts: the document content (contact, terms, and lines, just like the real thing) and the cadence that says when to generate it. The form is titled New recurring invoice or New recurring bill depending on which button you started from.
To set up a schedule:
- Open Recurring, then select New invoice schedule or New bill schedule.
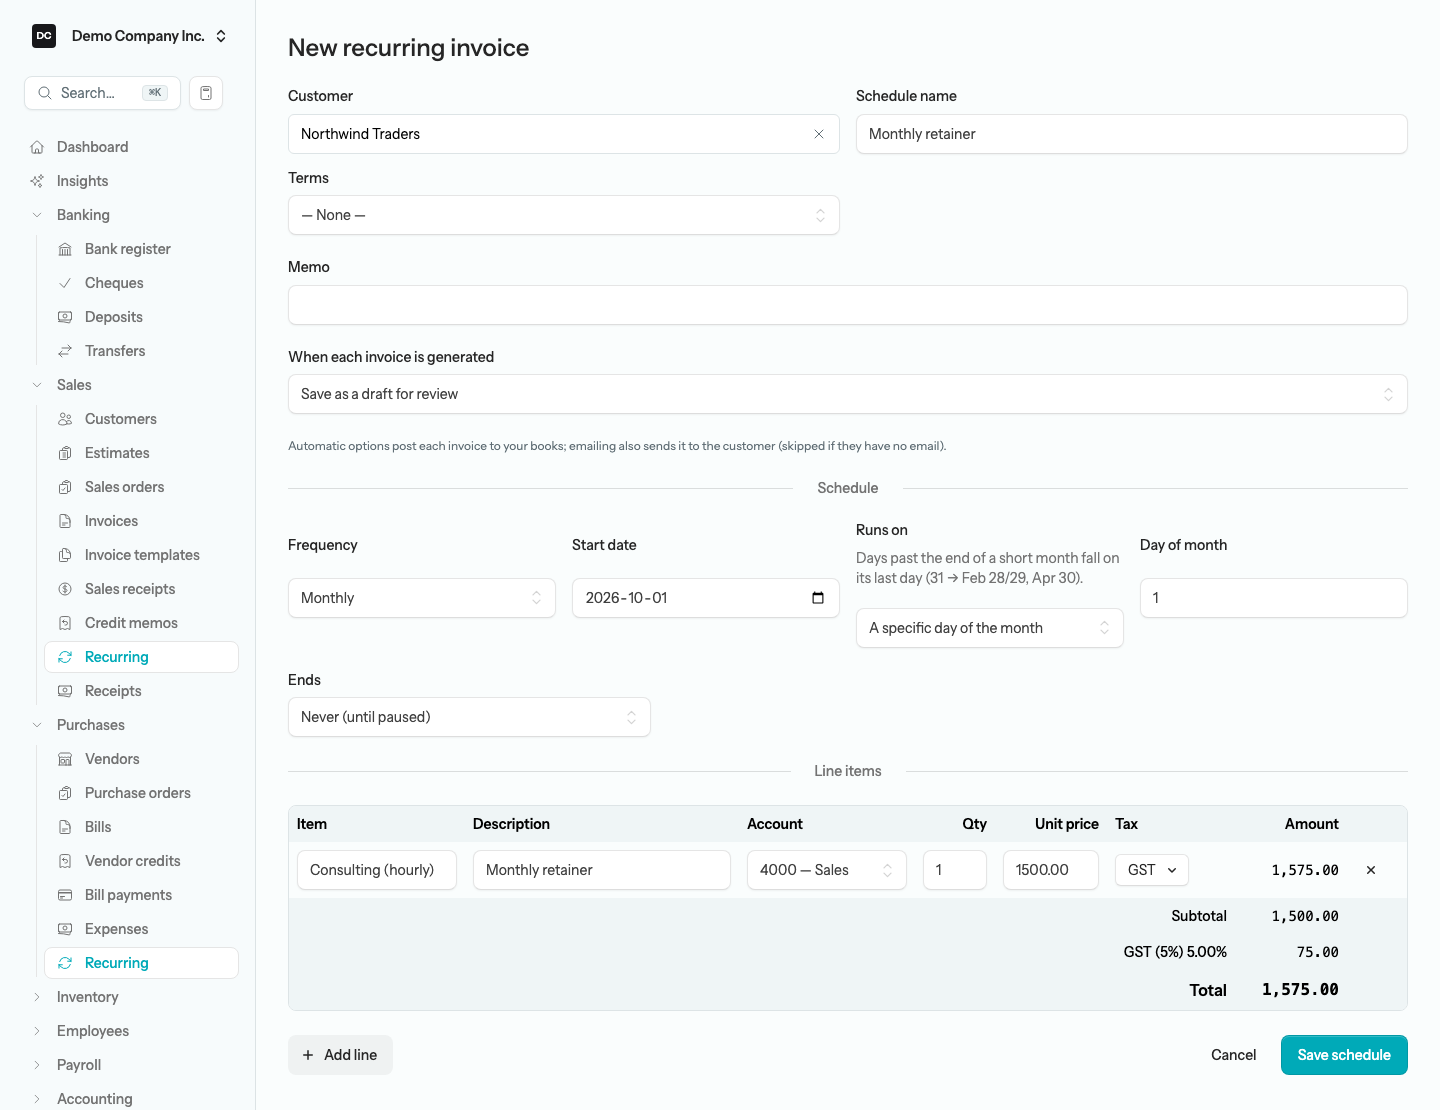
- Choose the Customer (or Vendor). Start typing to search, or type a name that is not in the list to add a new customer or vendor without leaving the form. Picking a contact fills in their default terms and applies their default tax code to any line that does not have one yet.
- Give the schedule a Schedule name like “Monthly retainer” so you can recognize it in the list, then set the Terms and a Memo if you need them. A bill schedule also has a Vendor reference field — the vendor’s own invoice number — which is copied onto every bill it generates.
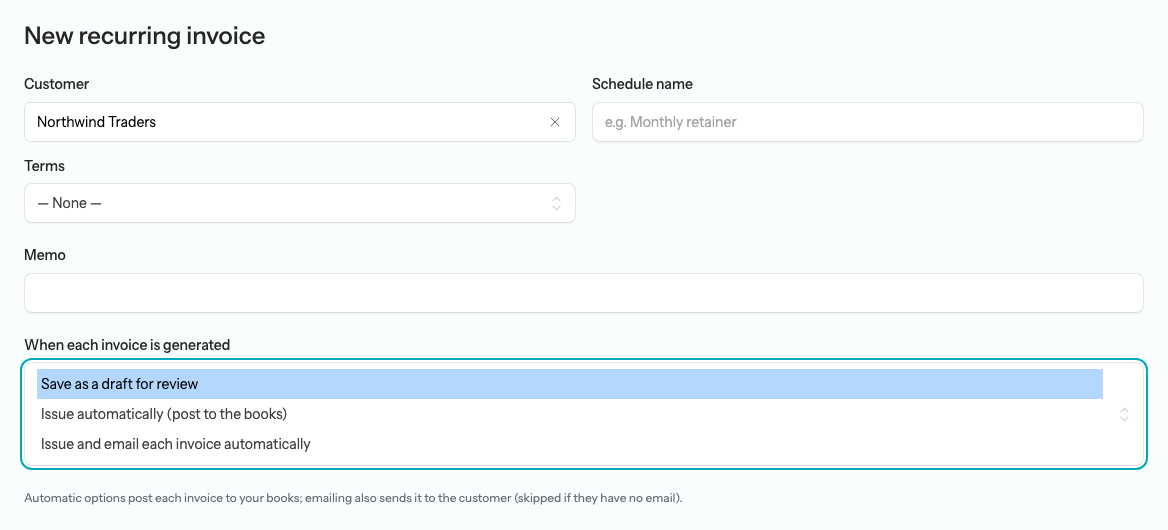
- On an invoice schedule, choose When each invoice is generated — keep new invoices as drafts to review, or let the app post (and optionally email) them automatically. See “How each invoice is issued” below.
- Under Schedule, pick a Frequency — Weekly, Monthly, Quarterly, Semi-annual, or Annual — and a Start date. For anything other than weekly, choose what it Runs on: a specific day of the month, the last day of the month, or the last business day. See “Choosing when it runs” below.
- Choose when it Ends: Never (until paused), On date (then set the End date), or After number of occurrences (then enter the Number of occurrences).
- Under Line items, fill in each line — Item, Description, Account, Qty, Unit price, and Tax. Account is required on every line; Item is optional, and picking one fills in the account, description, unit price, and tax codes from the item’s defaults. Select Add line for more, or press Tab from the last cell of the last row.
- Select Save schedule. The app opens the schedule’s own page with its first Next run date worked out for you.
Tip — Two taxes and quick math on a line. The Tax cell is a checklist rather than a single pick: tick up to two tax codes on one line (GST and PST, say), and the totals at the bottom of the form break the tax out per code and rate instead of showing one lump Tax figure. The Unit price cell doubles as a calculator — type an expression such as 1500/12 or 40*37.5 and press Enter to commit the result. Tax itself is not stored on the schedule; it is recalculated each time a document is generated, so a rate change flows through automatically.
Choosing when it runs
For monthly and longer cadences the Runs on picker decides which day of the month each document lands on. The help text under the picker changes with your choice:
- A specific day of the month — the default. Set the Day of month (1–31); it starts out set to today’s date. Days past the end of a short month fall on its last day, and spring back afterwards: a day of 31 gives Jan 31, Feb 28 (or 29), Mar 31, Apr 30. With this choice the Start date is the first run.
- Last day of the month — the calendar last day, 28 to 31 as the month dictates. The Day of month field disappears.
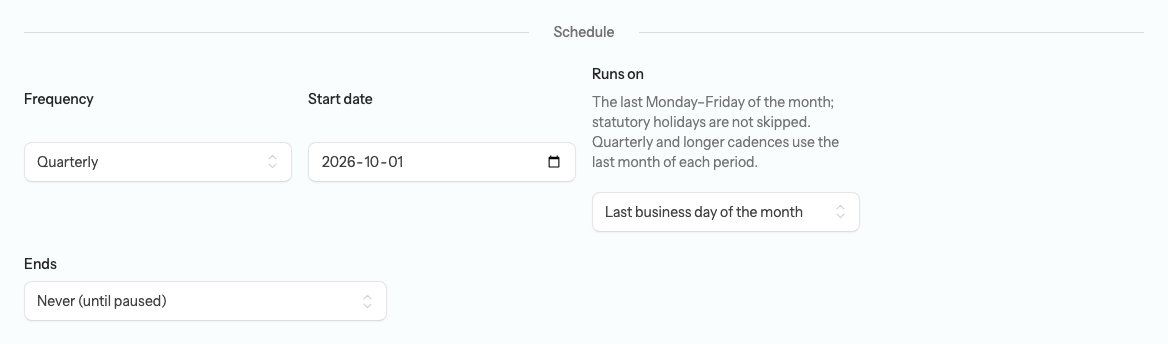
- Last business day of the month — the last Monday to Friday of the month. Statutory holidays are not skipped, so a month ending on a holiday Friday still runs that Friday.
With either “last” choice the Start date names the first period rather than the first run: the first document lands on that month’s last (business) day. Quarterly, semi-annual, and annual schedules apply the anchor to the last month of each period, so a quarterly schedule started in October with Last business day runs October 30 2026, then January 29, April 30, and July 30 2027. Weekly schedules ignore Runs on entirely and simply repeat every seven days from the Start date. A click anywhere in a date field opens the calendar.
The schedule page
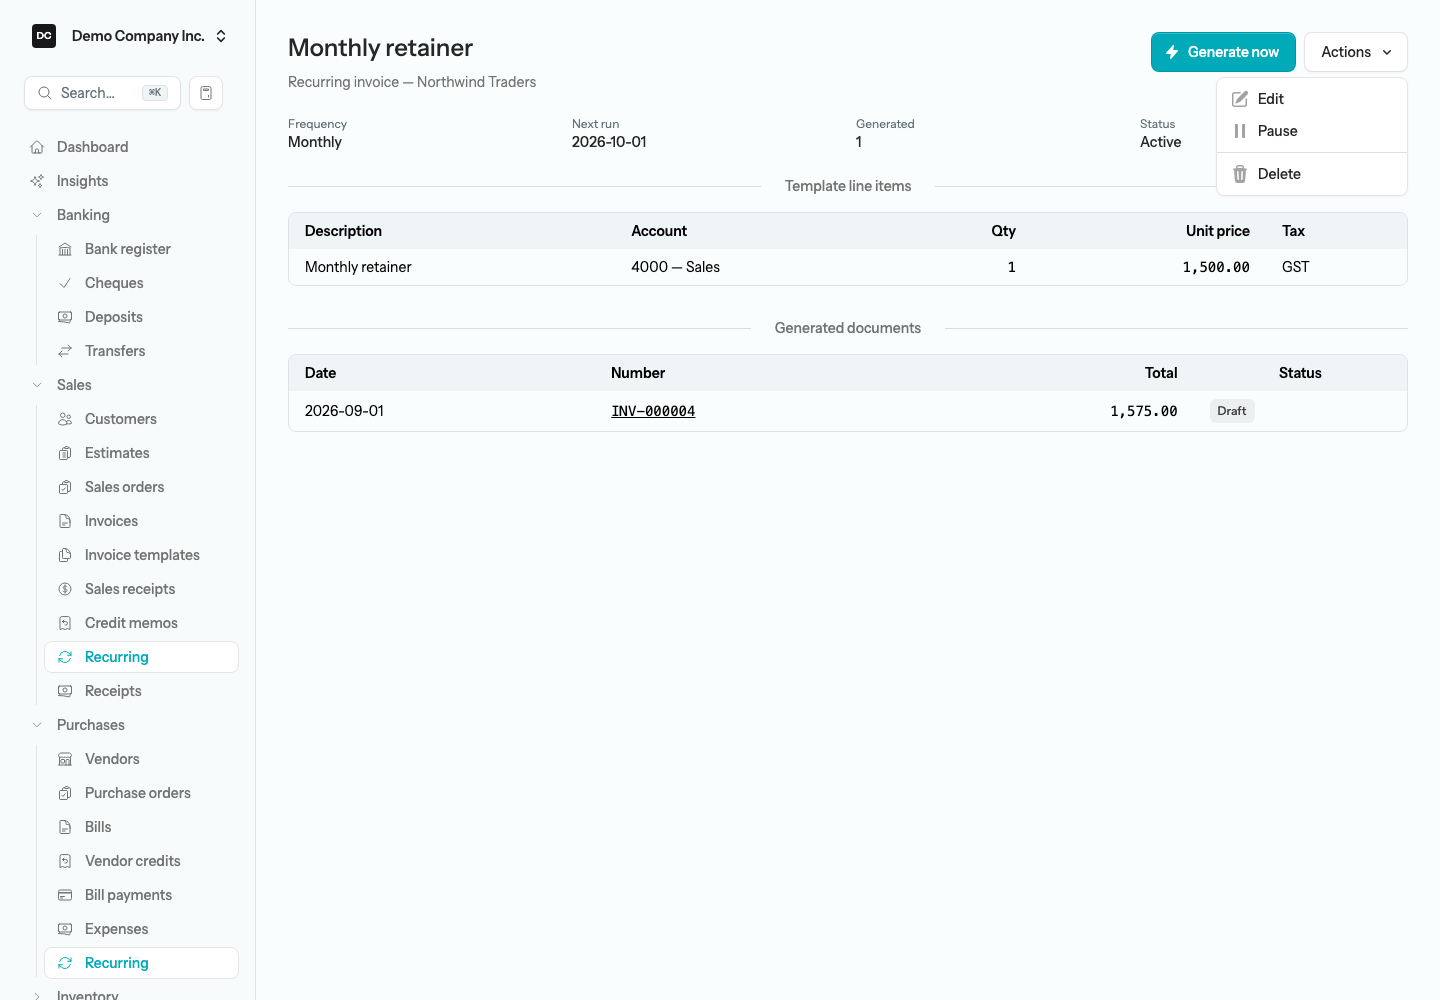
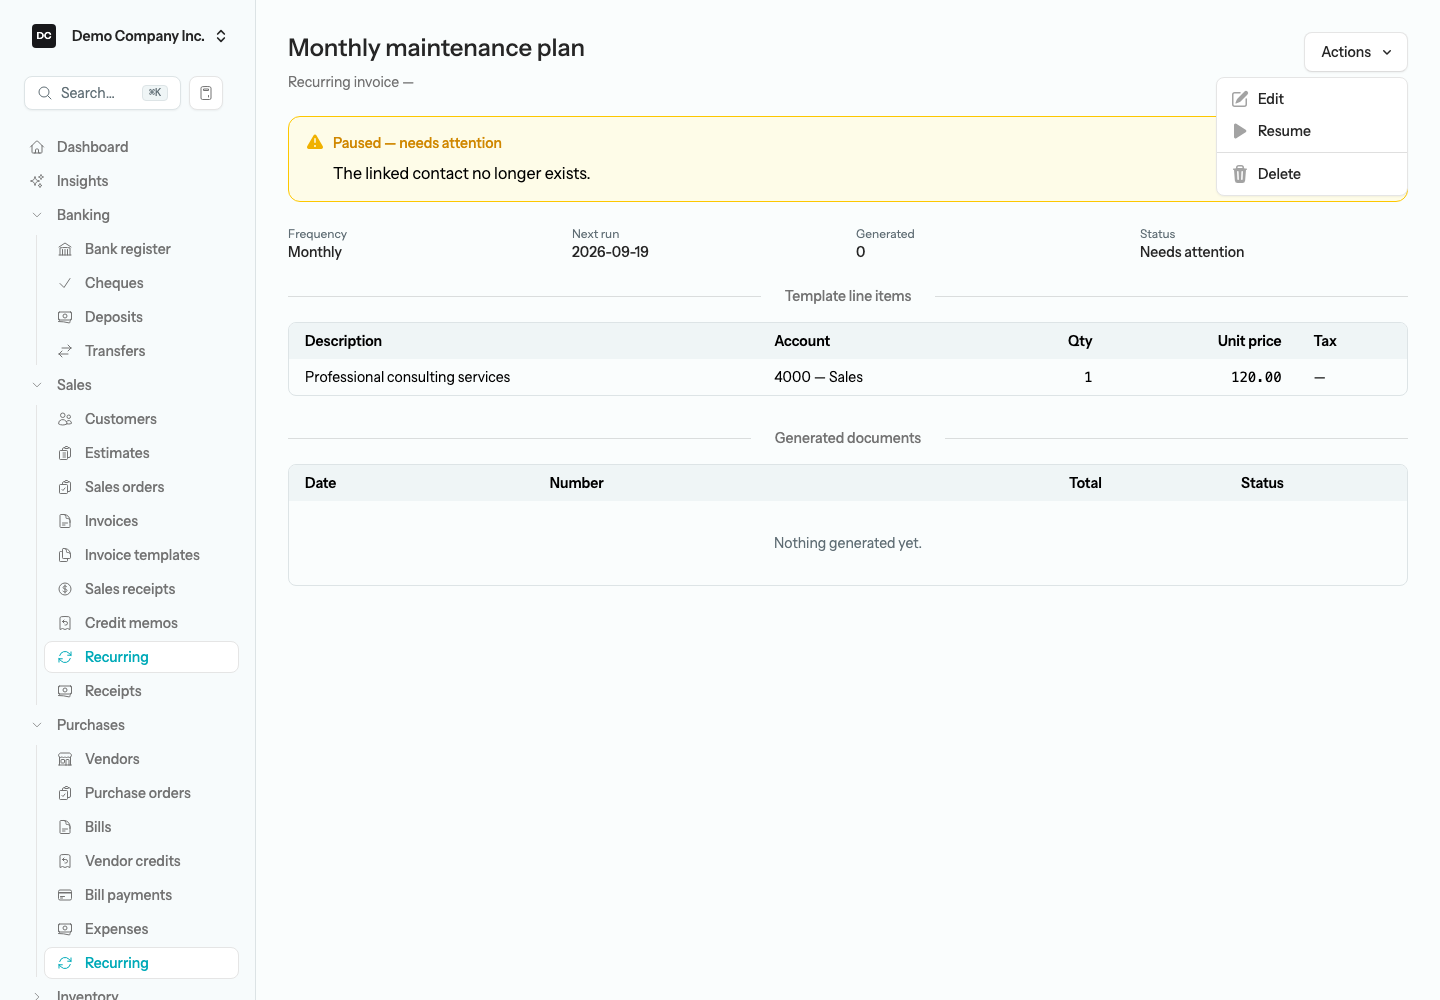
Select a schedule’s name in the list to open its page. The subheading tells you whether it is a Recurring invoice or a Recurring bill and for which contact, and four tiles summarize where it stands: Frequency (with the anchor spelled out when it is not a fixed day — “Quarterly · last business day”), Next run, Generated (how many documents so far), and Status — Active, Paused, Ended, or Needs attention.
Below the tiles, Template line items is a read-only copy of the lines the schedule will generate (Description, Account, Qty, Unit price, Tax), and Generated documents lists the most recent 50 invoices or bills it has produced — Date, Number, Total, and each one’s current Status — with every number linking to the document itself. A brand-new schedule reads “Nothing generated yet.”
The Generate now button sits in the top-right corner while the schedule is Active. Next to it, the Actions menu holds Edit, Pause (or Resume), and Delete; on a narrow screen Generate now moves into that menu too.
How each invoice is issued
On an invoice schedule, the When each invoice is generated setting decides how much the app does for you. Pick the level of automation Demo Company Inc. is comfortable with:
- Save as a draft for review — the default. The app creates an unposted draft and leaves it for you to check and post. Nothing hits your books without a look from you.
- Issue automatically (post to the books) — the app posts each generated invoice straight to the general ledger, no review step.
- Issue and email each invoice automatically — the app posts the invoice and emails it to the customer in one step, with the PDF attached and a one-click link to view and pay it online.
Note — What an automatic post does to your books. An invoice that is issued automatically posts exactly as one you post by hand: it debits Accounts Receivable for the total and credits the revenue account on each line, with any sales tax credited to its own tax account. If a line uses an inventory-tracked item, posting also reduces the quantity on hand and books its cost to cost of goods sold. The generated invoice takes the next invoice number in sequence; open it afterwards if you need to change the number, and the app will insist it stays unique.
Note — Bill schedules always draft. Automation applies to invoice schedules only. A vendor bill schedule always generates a draft for you to review and post — there is no auto-post option, because you decide when a bill is approved for payment.
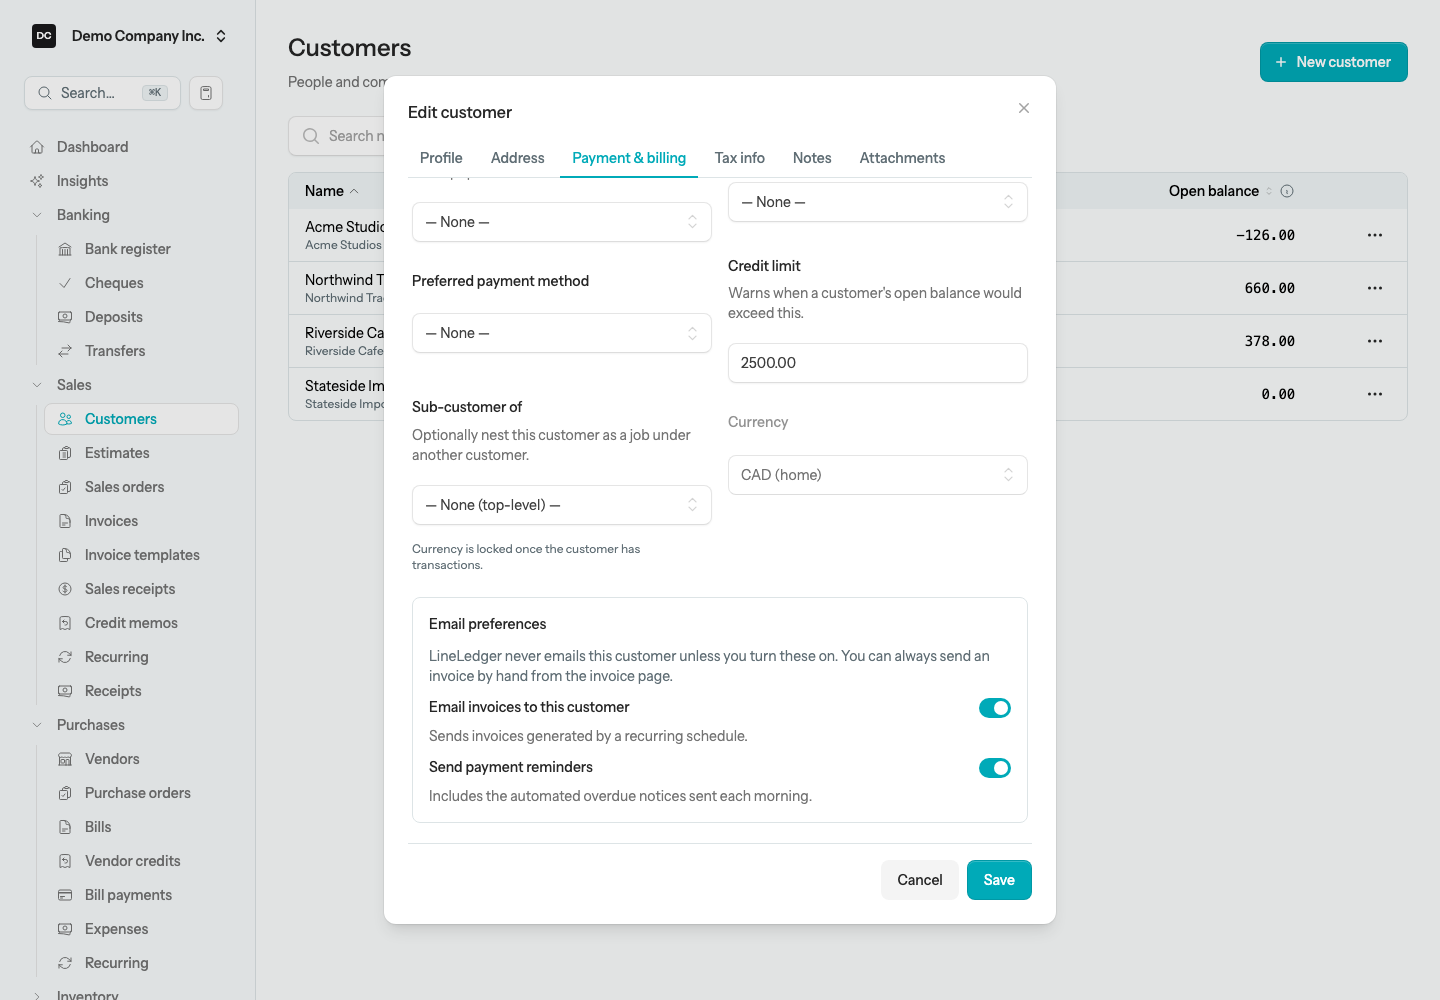
Heads up — Two things must be true before an email goes out. Issue and email only sends to a customer who has an email address on file and whose Email invoices to this customer switch is turned on — and that switch is off for every new customer. Open the customer, go to the Payment & billing tab, and switch it on under Email preferences. When either condition is missing, the invoice is still posted but nothing is sent, and the app does not warn you; the invoice simply sits in the Generated documents table unsent. If an automatic post would land in a locked period, the app leaves that invoice as a draft (which is never emailed) and keeps the run going instead of failing. The default email wording comes from Settings → Invoices.
What the scheduler does
A background task runs once a day at 2:00 a.m. UTC and generates every document that has come due, following each schedule’s automation setting: draft, post, or post-and-email. It judges “today” by your organization’s own time zone, and in Canada 2:00 a.m. UTC falls on the previous evening — around 10 p.m. in Toronto or 7 p.m. in Vancouver during daylight time. So a document due on the 1st is generated on the evening of the 1st, local time, not first thing that morning. The same run also generates your recurring journal entries (see Accounting → Recurring (memorized) journal entries). Tax is recalculated at generation time, so a rate change automatically flows through to future documents. To see what a schedule has produced, open the schedule: its Generated documents table links to each invoice or bill. The link only runs that way — an invoice or bill does not show which schedule created it.
If the scheduler misses a few days, or a schedule starts with a date in the past, it catches up the missed occurrences rather than skipping them — up to 60 in a single run, with anything beyond that picked up the following night. On a catch-up that generates several invoices at once, a post-and-email schedule posts them all but emails only the most recent one, so a backdated start date does not blast the customer with a stack of messages.
Tip — Generate one on demand. You do not have to wait for the nightly run. Open an Active schedule and select Generate now to create its next occurrence immediately, dated for the Next run date. It follows the same automation setting as a scheduled run, counts as that occurrence — Generated goes up by one and Next run moves on a period — and drops you straight into the new invoice’s or bill’s edit form. If the schedule’s contact or a line account no longer exists, Generate now tells you so instead of creating anything.
Edit, pause, resume, or delete a schedule
Everything you can change about a schedule after it is saved lives in the Actions menu on its page.
To change a schedule:
- Open the schedule and choose Actions → Edit. The Edit recurring schedule form is the same form you created it with.
- Change the contact, lines, cadence, or end rule as needed and select Save schedule.
New lines and amounts apply to the very next document. The Next run date, though, is only recalculated while the schedule has generated nothing yet; once it is running, the upcoming date stays put and a new frequency or Runs on choice takes effect from the hop after it.
Note — One person edits a schedule at a time. Opening a schedule to edit takes a short lease on it. Anyone else who opens the same schedule sees who is editing instead of the form, and Pause, Resume, Generate now, and Delete wait until they are done. Owners and Admins can take over. See Settings → Edit locks for the full picture.
Pausing and auto-pause
Choose Actions → Pause to stop a schedule generating until you choose Actions → Resume; its Status tile reads Paused in the meantime, and its Next run date is kept so it picks up exactly where it left off. One quirk worth knowing: the Recurring list badges a hand-paused schedule as Ended, because the list only distinguishes active, stopped, and needs-attention — open the schedule to see Paused.
A schedule that reaches its End date or its Number of occurrences stops on its own: Status reads Ended, Next run shows a dash, and there is no Resume. An ended schedule stays ended — to keep billing, set up a new schedule.
Note — Needs attention. If the contact or a line account a schedule depends on is deleted, the nightly run pauses the schedule automatically and records why, rather than failing silently. The list badges it Needs attention, and its page shows a “Paused — needs attention” notice with the reason (“The linked contact no longer exists.” or “A line account no longer exists.”). Fix or replace what is missing — usually with Actions → Edit — then choose Actions → Resume, which clears the notice. Schedules paused this way also surface as a daily insight, so they are hard to overlook; see Insights.
Deleting a schedule
Choose Actions → Delete and confirm. Deleting takes the schedule out of the list for good, and its page — Generated documents table included — can no longer be opened. The invoices and bills it already produced are untouched: they stay on file and keep their status, but nothing on them says which schedule created them, so if you want a record of what the schedule produced, check its Generated documents table before you delete. If you only want to stop billing for a while, Pause is the gentler choice, and it is also the one to reach for when you are not sure: a paused schedule can be resumed, a deleted one cannot.