An estimate is a quote — a proposed sale you send a customer before any money changes hands. Use it to put a price in front of someone and, once they say yes, turn it into the document that actually bills them. The examples below use our sample business, Demo Company Inc.
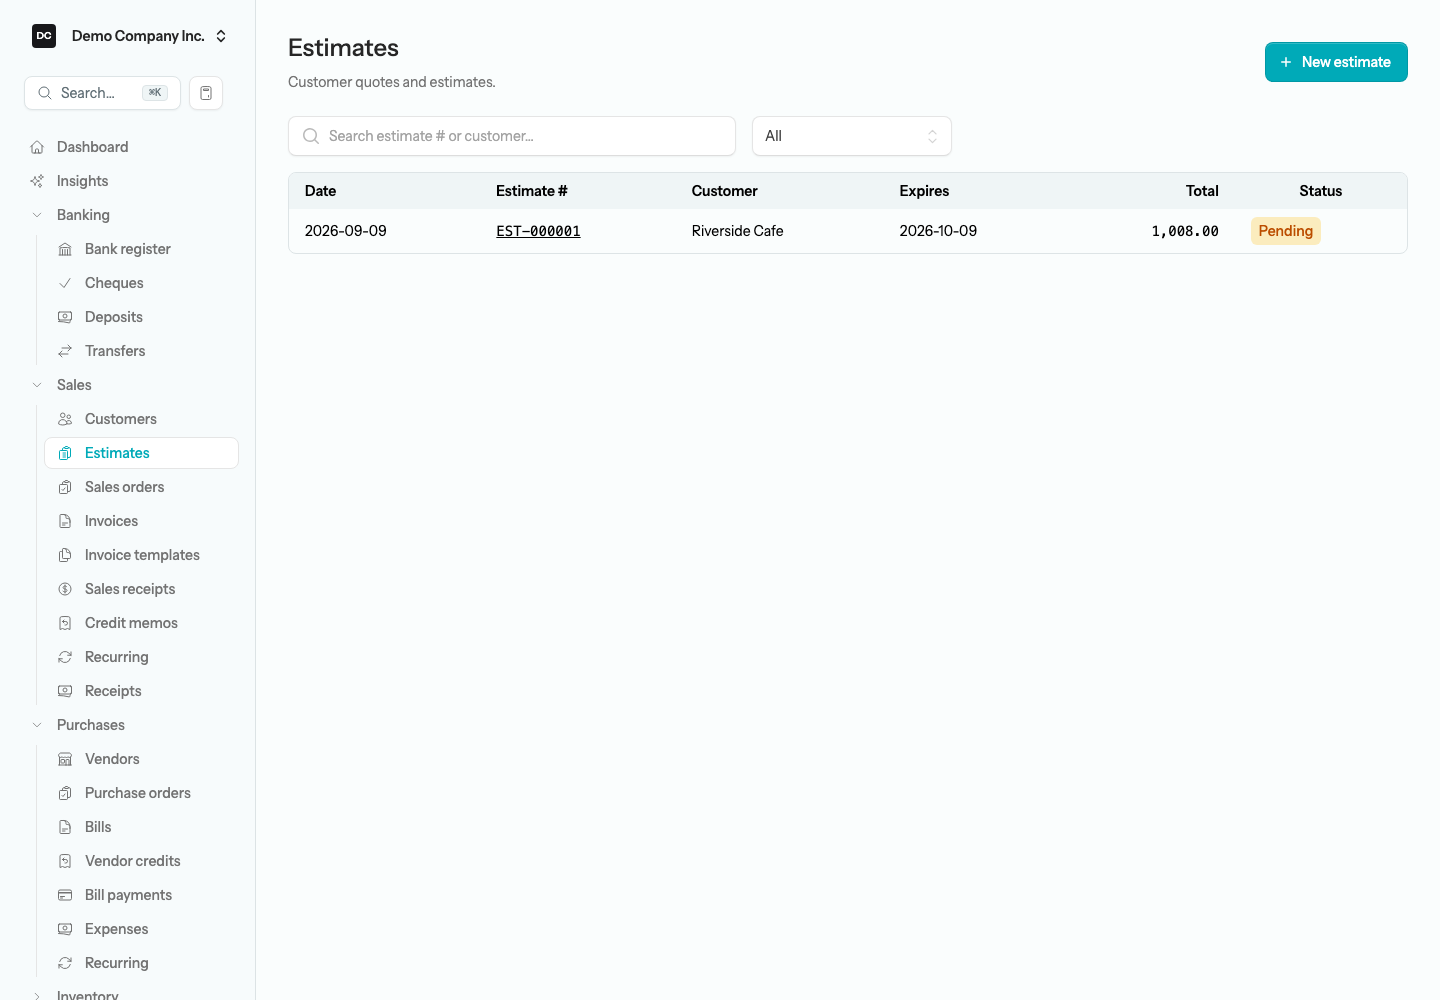
Open Sales → Estimates from the sidebar to see the list — a non-profit organization sees the same group as Revenues. Each row shows the Date, the Estimate #, the Customer, the Expires date, the Total, and the current Status, newest first. Use the search box to find an estimate by number or customer name, and the status filter to show only Pending, Accepted, Rejected, Converted, or Expired estimates. Select the Estimate # to open it — on a narrow window, where the list shows as cards, select the card.
Note — Estimates never touch your books. An estimate is non-posting: creating, editing, accepting, or rejecting one does not create a journal entry, a receivable, or any inventory movement. Nothing hits your ledger until you convert the estimate into an invoice and post that invoice.
Note — Not seeing Estimates in the sidebar? Estimates is a feature toggle, and whether it starts on depends on the industry you chose when you created the organization. The setup wizard’s Features step pre-ticks Estimates for Contractor / Construction, Manufacturing, and Professional services; for every other industry — including the default, General business — it starts off unless you tick it there. To change it later, open Settings → Organizations, select the organization, and flip the Estimates toggle in the Features section, then select Save. Turning it off only hides the sidebar entry — existing estimates are kept and reappear when you turn it back on.
Create an estimate
Build an estimate the same way you build an invoice — the difference is that it only proposes a sale rather than recording one.
To create an estimate:
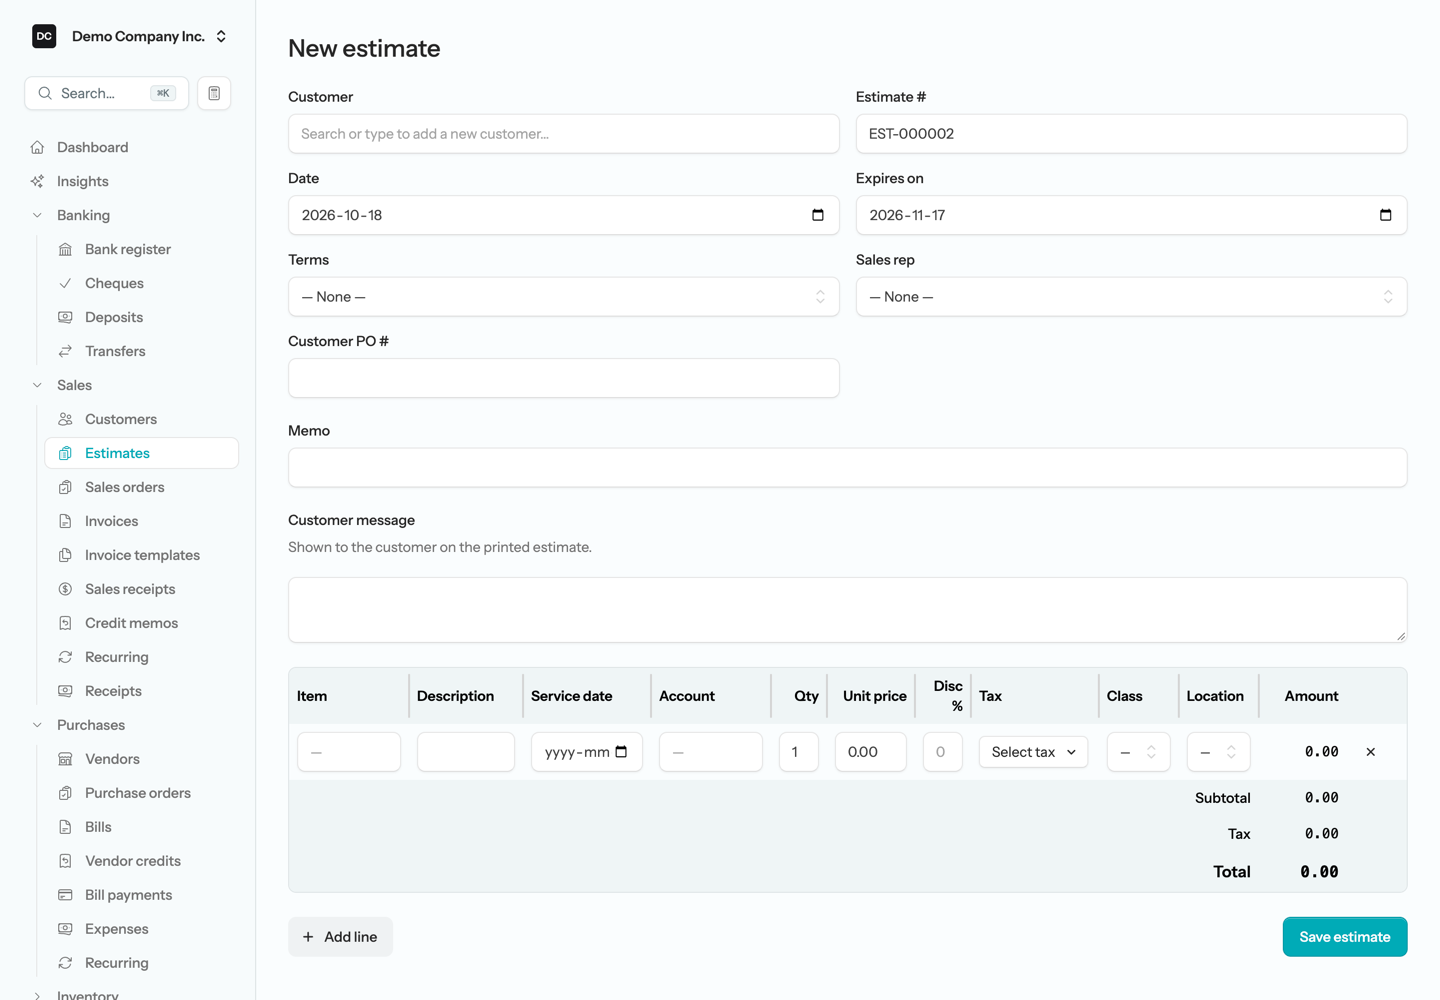
- Open Sales → Estimates, then select New estimate in the top-right corner.
- Choose the Customer. Start typing to search the list; if the name is not there yet, choose Add ”…” as new customer and the customer record is created when you save. Picking a customer applies their default payment terms, and their default tax code to any line that does not have one yet.
- The Estimate # (EST-000001 for your first one), the Date (today), and the Expires on date (30 days out) fill in automatically. Change any of them if you need to — a click anywhere in a date field opens the calendar.
- Optionally set Terms, a Sales rep, and a Customer PO #, and add a Memo for your own reference — the memo shows on the estimate inside the app but is not printed. Sales rep only appears when the Employees feature is on, because reps are drawn from your employees.
- Add a Customer message if you want a note to appear on the printed estimate.
- On each line, choose the Account the sale belongs to — it is the one thing every line must have. Picking an Item first is a shortcut: it fills the Account, Description, Unit price, and Tax from the item’s defaults, and you can change any of them afterwards. Type a Description, set the Qty (it starts at 1) and the Unit price, and add a Service date, a Disc %, and Class or Location if you use them. The Amount calculates as you type.
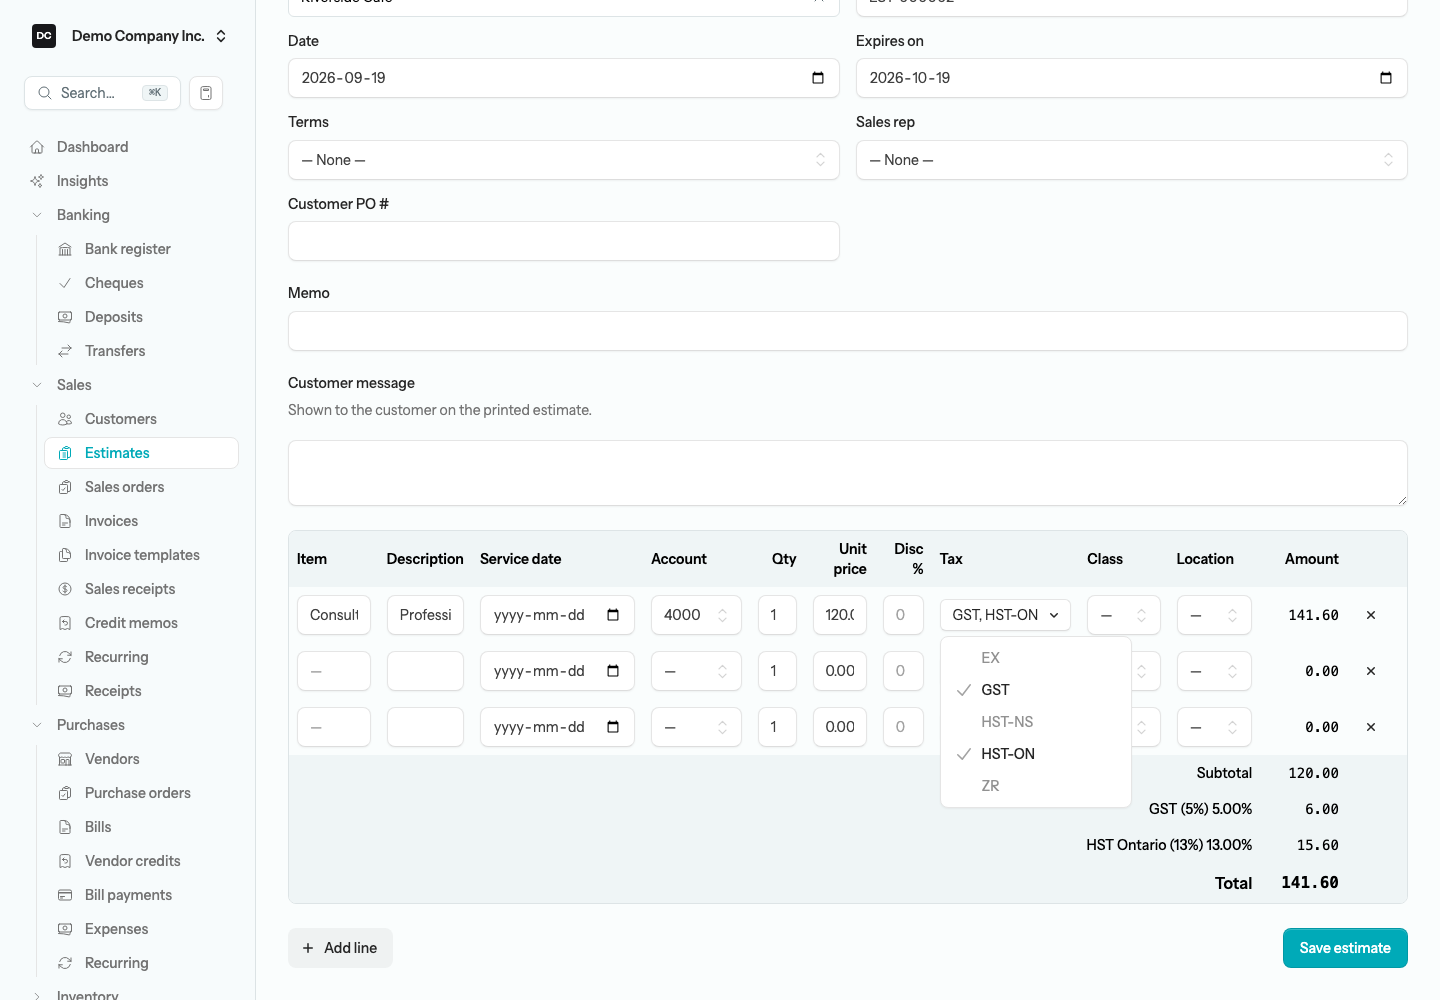
- In the Tax cell, tick the tax codes that apply. A line takes up to two codes — for a province that charges GST and PST separately — and the totals under the grid show one row per tax code with its rate.
- Select Add line for more than one thing on the same quote — or press Tab from the last cell of the last line and a new line appears with the cursor already in it.
- Select Save estimate. The estimate opens so you can review it, print it, or convert it.
Tip — Unit price doubles as a calculator. Type an expression such as 120*8 or 1050+52.50 into the Unit price cell and a small tape shows each step; press Enter, or move to the next cell, to commit the result. It handles + − × ÷ with the usual precedence, and x, × and ÷ all work for multiply and divide. The Qty and Disc % cells take plain numbers.
A new estimate starts as Pending. You can come back and change it — open the estimate and choose Edit from the Actions menu — at any point until it has been converted. Escape takes you back to the previous page; if you have unsaved typing on the form it asks “Leave this page?” first. That behaviour is a per-user switch, Escape goes back, under Settings → Appearance.
Note — One person edits an estimate at a time. If a teammate already has the estimate open for editing, you see who is editing instead of the form, and Accept, Reject, and the Convert actions wait until they are done. Owners and Admins can take over. See Settings for how edit locks work.
Estimate numbers
The Estimate # is yours to change, on a new estimate or when editing an existing one. Each number must be unique within the organization — type one that is already in use and the form refuses to save and points at the field. The suggested number is always the next free one: the app takes the highest estimate number you have used, adds one, and skips past anything already taken. If you adopt your own format, such as Q-2026-001, the next new estimate continues that pattern instead of falling back to EST-.
Statuses
An estimate moves through Pending, Accepted, Rejected, and Converted as you and the customer work through it. You set Accepted and Rejected yourself from the Actions menu; Converted is set for you when you convert the estimate.
- Pending — created and awaiting the customer’s decision. This is the starting status.
- Accepted — the customer has agreed to the quote.
- Rejected — the customer turned it down.
- Converted — you turned it into an invoice or a sales order; it is now locked.
Note — Expired is automatic. Expired is not a status you set. A Pending estimate shows as Expired on its own once the Expires on date has passed. An estimate you have already marked Accepted stays accepted even after that date. Leave Expires on blank and the estimate never expires.
Accept or reject an estimate
When the customer gets back to you, record their answer so the estimate’s status reflects where things stand. These actions only change the status — they never post anything to your books.
To accept or reject an estimate:
- Open the estimate.
- Open the Actions menu in the top-right corner.
- Choose Accept to mark it Accepted straight away, or Reject and confirm to mark it Rejected.
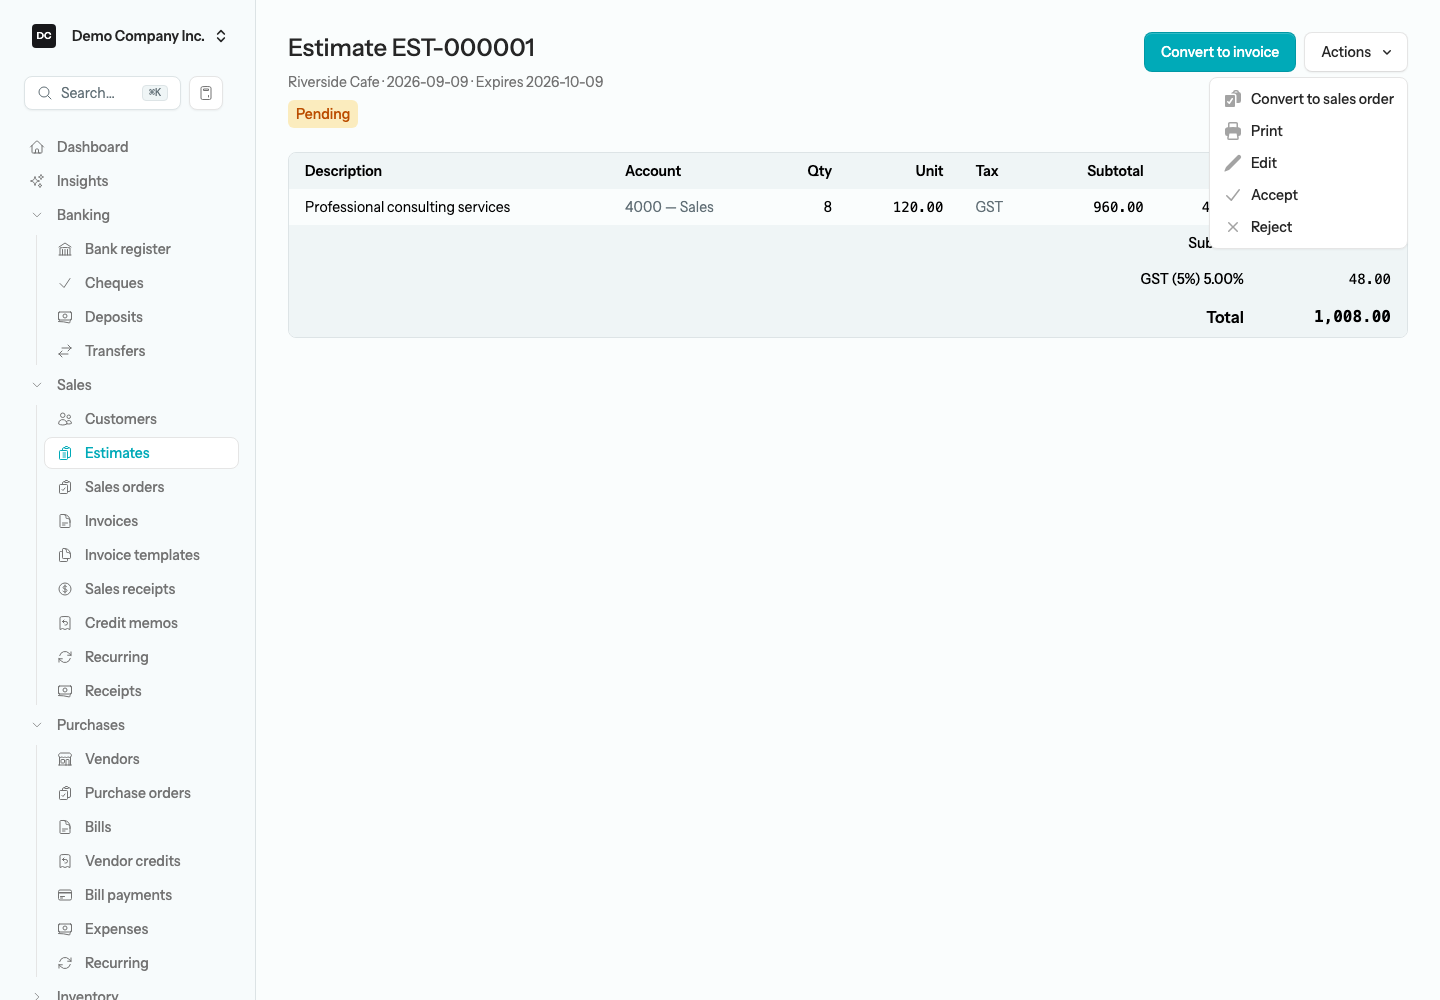
Note. Accept is offered only while the estimate is Pending; Reject is offered while it is Pending or Accepted. Accepting is optional — you can convert a still-Pending estimate straight to an invoice without marking it Accepted first. A Rejected estimate offers only Print and Edit. An Expired estimate cannot be converted, but it is still Pending underneath, so you can Accept it — it then shows as Accepted and can be converted — or edit it to push the Expires on date out.
Convert an estimate to an invoice
When the customer says yes and you are ready to bill, convert the estimate. This is what finally moves the quote onto your books — by creating an invoice you can post.
To convert an estimate to an invoice:
- Open the estimate you want to convert.
- Select Convert to invoice in the top-right corner and confirm.
- The app creates a Draft invoice and opens it for editing. It copies the customer, Terms, Sales rep, Customer PO #, Memo, and Customer message, and every line — item, account, description, service date, quantity, unit price, discount, tax codes, and class or location. The invoice is dated today, its due date comes from the Terms, and the tax is recalculated at the tax codes’ current rates. The Expires on date is not carried over.
- Post the invoice when you are ready, or keep it as a draft to finish later.
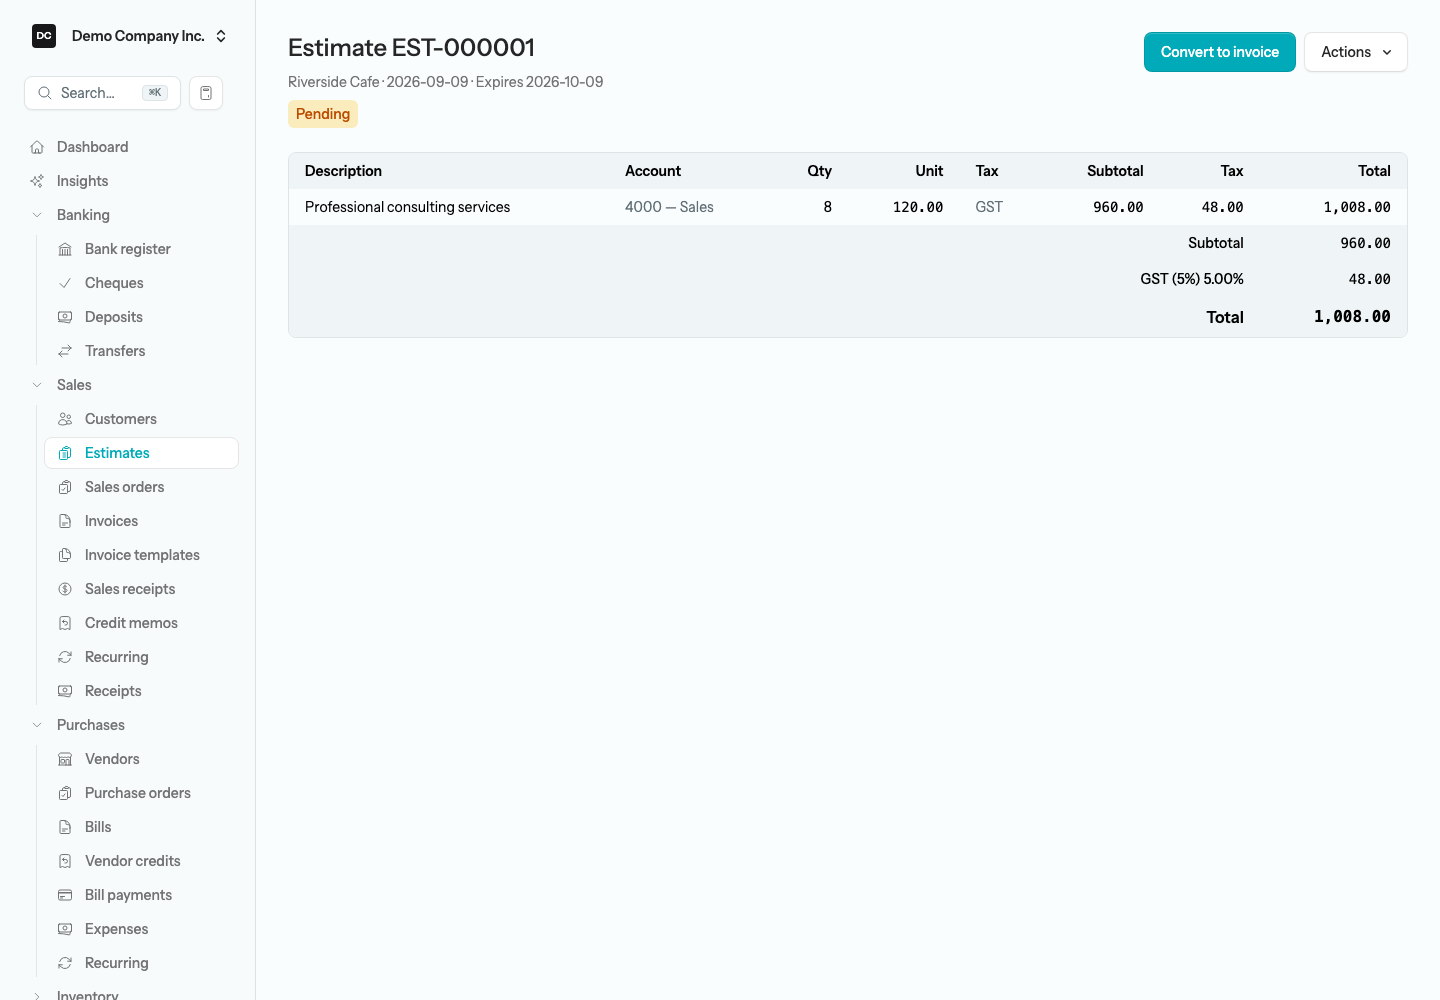
An estimate can be converted only once, in one direction. Convert to a sales order instead — from the Actions menu — when the customer has committed but you will fulfill and bill over time; see Sales orders. Either way the estimate is marked Converted and linked to whatever it became, so the trail stays clear.
Note. Converting is one-way and permanent. The estimate stays Converted and cannot be converted a second time — not even if the invoice or sales order it became is later voided or removed through the API. To bill the same quote again, create a new invoice.
Print an estimate
Estimates are not emailed from inside the app. To send one to a customer, print it to a PDF and attach that to your own email.
To print an estimate:
- Open the estimate.
- Open the Actions menu in the top-right corner and choose Print.
- The PDF opens in a new browser tab. Save it or print it from there.
The printed estimate carries an ESTIMATE title with the Date and Estimate #, Bill To and Ship To boxes filled from the customer’s billing and shipping addresses, and a strip showing Terms, Valid Until (the Expires on date), P.O. #, and Rep. The lines list the Description, Price Each, and Amount, followed by the Subtotal, one row per tax code with its rate, and the Total. A service date or line discount prints in small text under its line. The footer prints your GST/HST number, the Customer message, and the footer message.
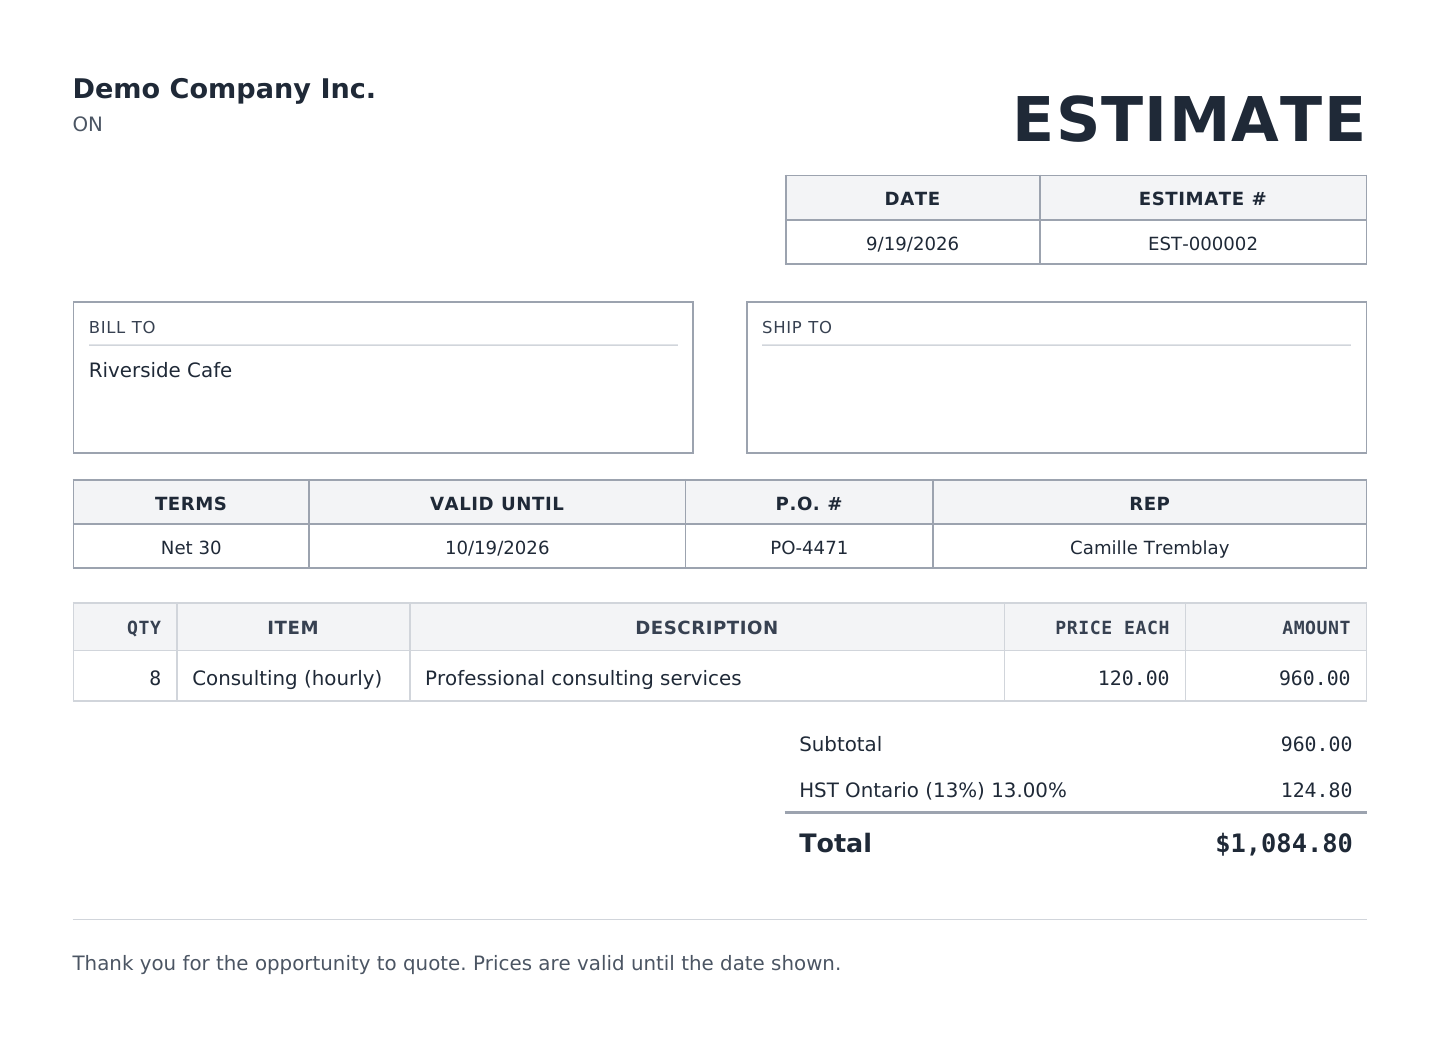
Note — Where the layout is set. The printed estimate shares its look with your invoices. Settings → Invoices controls the header — whether the document logo, name, legal name, address, phone, email, and website print — plus the optional Qty, Item, and Tax line columns, whether the tax registration number prints, and the footer message. Description, Price Each, and Amount always print. The logo itself is the Document logo on the organization’s edit page under Settings → Organizations.
Note — What an estimate does not do. There is no Delete action — mark an estimate Rejected instead, and it stays on file with its history. Estimates are not sent by email from the app, do not appear in the Customer portal, and are not available through the API; invoices do all three.