Welcome to your bookkeeping workspace. This guide is written like a manual: each area below walks you through what a feature is for, then gives you the exact steps — “To add a customer”, “To create an invoice”, “To customize your invoices” — with screenshots along the way. The examples all use a sample business, Demo Company Inc.; membership and fundraising examples use a sample charity, Demo Community Society. Start here for the lay of the land, then jump into whichever area you need.
The whole app wears the Tidewater design system — a teal-accented palette with light and dark modes. It opens in Light the first time you sign in on a browser; under Settings → Appearance you can switch to Dark, or to System so it follows your operating-system preference. Everything below works the same in either mode.
Tip — It’s free, permanently. LineLedger is open source under the AGPLv3 and runs on your own server, so there is no trial to expire, no plan to choose, and no feature held back. If you haven’t installed it yet, the installation guide walks through the Docker quick start.
Core concepts
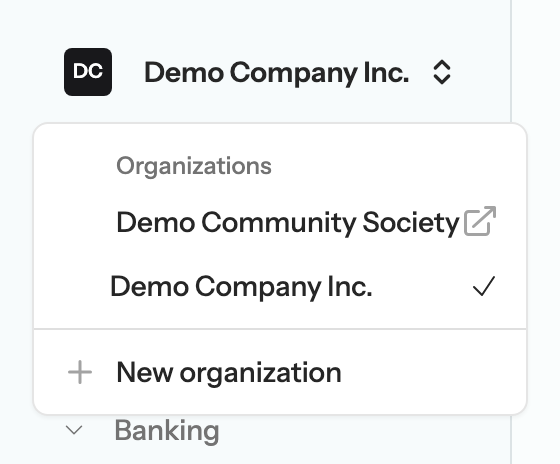
Every page lives inside an organization. Your accounting data, contacts, and reports are scoped to the organization you are working in, and the switcher at the top of the sidebar lists every organization you belong to under an Organizations heading, with a check mark beside the one you are in.
Picking a different organization opens it in a new browser tab and leaves the tab you are in alone, so you can keep two organizations open side by side — say, Demo Company Inc. in one tab and Demo Community Society in the other. New organization, at the bottom of the same menu, starts the setup wizard.
Underneath the app is a standard double-entry ledger. When you post an invoice, bill, payment, or journal entry, the system writes balanced debits and credits to the affected accounts. Reports read from those entries — nothing is calculated by hand.
Note — One person edits a record at a time. When several people work in the same organization, whoever opens a record for editing holds it until they save and leave. Anyone else who opens it sees who is editing instead of the form, and Owners and Admins can take over. There is nothing to set up — see Settings for how edit locks behave.
Creating your first organization
A new account starts empty — you create your first organization explicitly. When you do, you choose a country (Canada, the United States, or the United Kingdom). That choice seeds a starting chart of accounts, tax codes and tax agency, default payment methods, and currency, and sets the wording the app uses (Cheque vs. Check, GST/HST vs. Sales Tax vs. VAT). Pick carefully: the country can’t be changed once the organization exists.
An 8-step wizard walks you through your organization type, industry and chart of accounts, the features you want, sales tax, and how to start. See the full walkthrough — including examples for sole proprietorships, corporations, and non-profits — on the Create an organization page. If you are moving from another system and need to carry over balances after the wizard, the Opening balances workspace is where that happens.
The sidebar at a glance
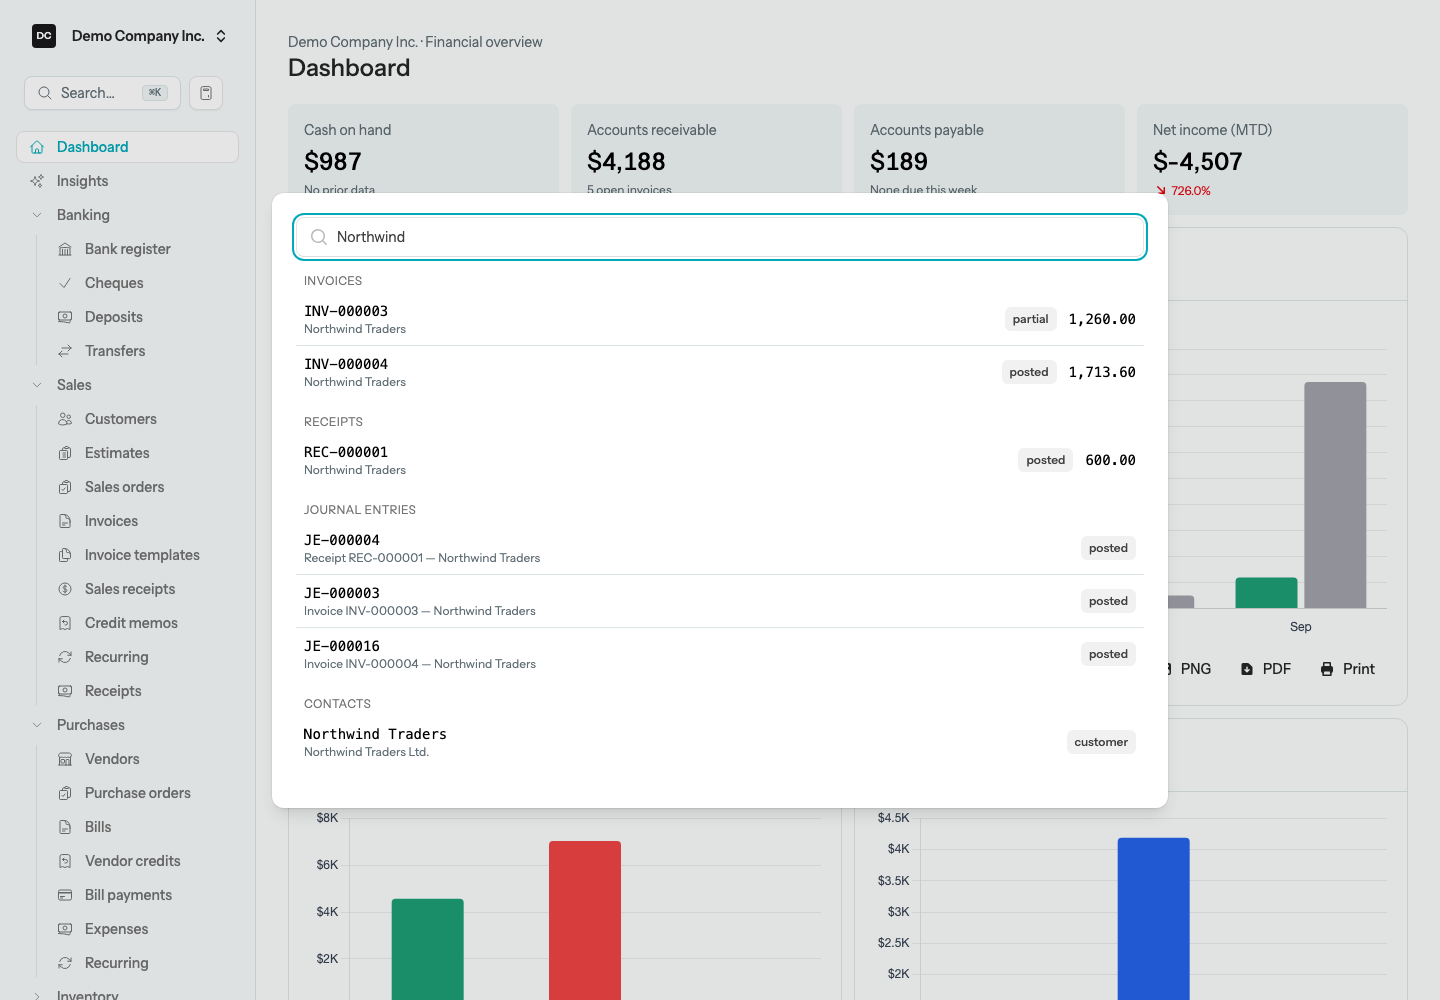
Everything you do lives in the left sidebar. Right under the organization switcher sit a Search… box (⌘K on a Mac, Ctrl+K on Windows) that finds invoices, bills, contacts, and more across the organization, and a small Calculator button. Dashboard and Insights always come next; below them the groups are arranged by what you are working on.
Demo Company Inc. sees the groups below. Your own list depends on the features you turned on when you created the organization and on your role — a group you have no access to simply does not appear, and a feature you switched off takes its links with it:
- Banking — Bank register, Cheques (labelled Checks in a US organization), Deposits, and Transfers.
- Fundraising — Donations, Grants, and, for registered charities, Donation receipts. Only organizations with fundraising turned on see this group; Demo Community Society does.
- Sales — Customers, Members (when membership is turned on), Estimates, Sales orders, Invoices, Invoice templates, Sales receipts, Credit memos, Recurring, and Receipts. Non-profits see this group labelled Revenues.
- Purchases — Vendors, Purchase orders, Bills, Vendor credits, Bill payments, Expenses, and Recurring.
- Inventory — Stock on hand and Adjustments.
- Employees — Employees and Reimbursements.
- Payroll — Overview, Employee setup, Staff calendar, and Pay runs, then a Reports list: Remittance history, PD7A, Workers’ comp, T4 slips, Record of Employment, and Calculation check. The group appears once payroll is turned on.
- Accounting — Chart of Accounts, Journal, Journal templates, Recurring entries, Fixed assets, and — for Owners only — Opening balances.
- Reports — All Reports and Budgets, followed by any reports you have starred, each as a link of its own.
- Documents — Repository and Attachment index.
- Inbox — Review queue, for receipts and bills you upload or email in.
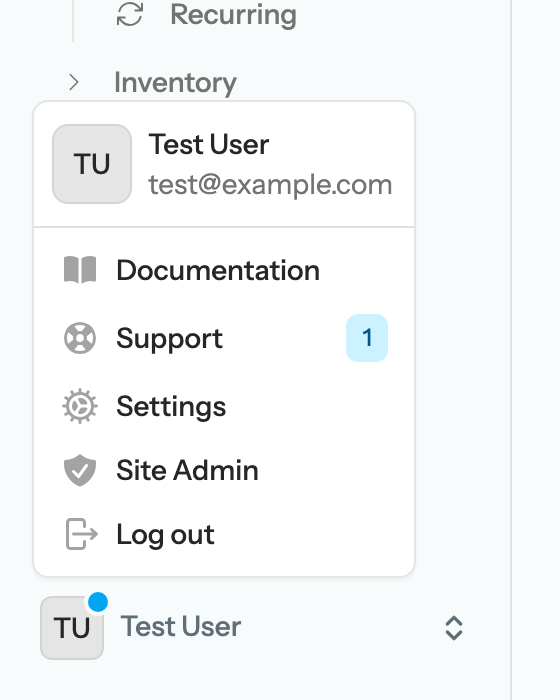
Banking, Sales, and Purchases start expanded; the other groups start collapsed, and clicking a group heading opens or closes it — the app remembers your choice. The account menu at the very bottom of the sidebar, under your name, holds Documentation, Support, Settings, Site Admin (site administrators only), and Log out.

Tip — Snap a receipt, skip the typing. The Inbox is the fastest way to capture a bill or expense: drag a PDF or photo onto the Review queue, or forward it to your organization’s email-in address once you have switched on Accept documents by email on the Inbox email settings page. That page is not listed in the Settings menu: go to /settings/inbox-email directly (the Inbox page linked below describes the other way in). With Read receipts automatically turned on, LineLedger reads the document and fills in what it found — vendor, date, amount, tax — before the item lands in Needs review; otherwise the item waits there blank for you to fill in. Nothing is created until you open the item, check the details, choose what to Create as — Vendor bill, Expense (paid now), or Employee reimbursement — and select Create draft. That opens the new draft, and you post it from the bill or expense page itself, not from the queue. The fourth choice, Match a bank transaction, is the exception: Record transaction posts the receipt straight against an imported bank line. The Inbox page has the details.
Handy keys and shortcuts
A handful of small behaviours work everywhere in the app and save a surprising amount of clicking once you know they are there:
- Search from anywhere — press ⌘K (Ctrl+K on Windows) or select the Search… box in the sidebar, then type at least two characters. Results are grouped by kind; select one to jump straight to it.
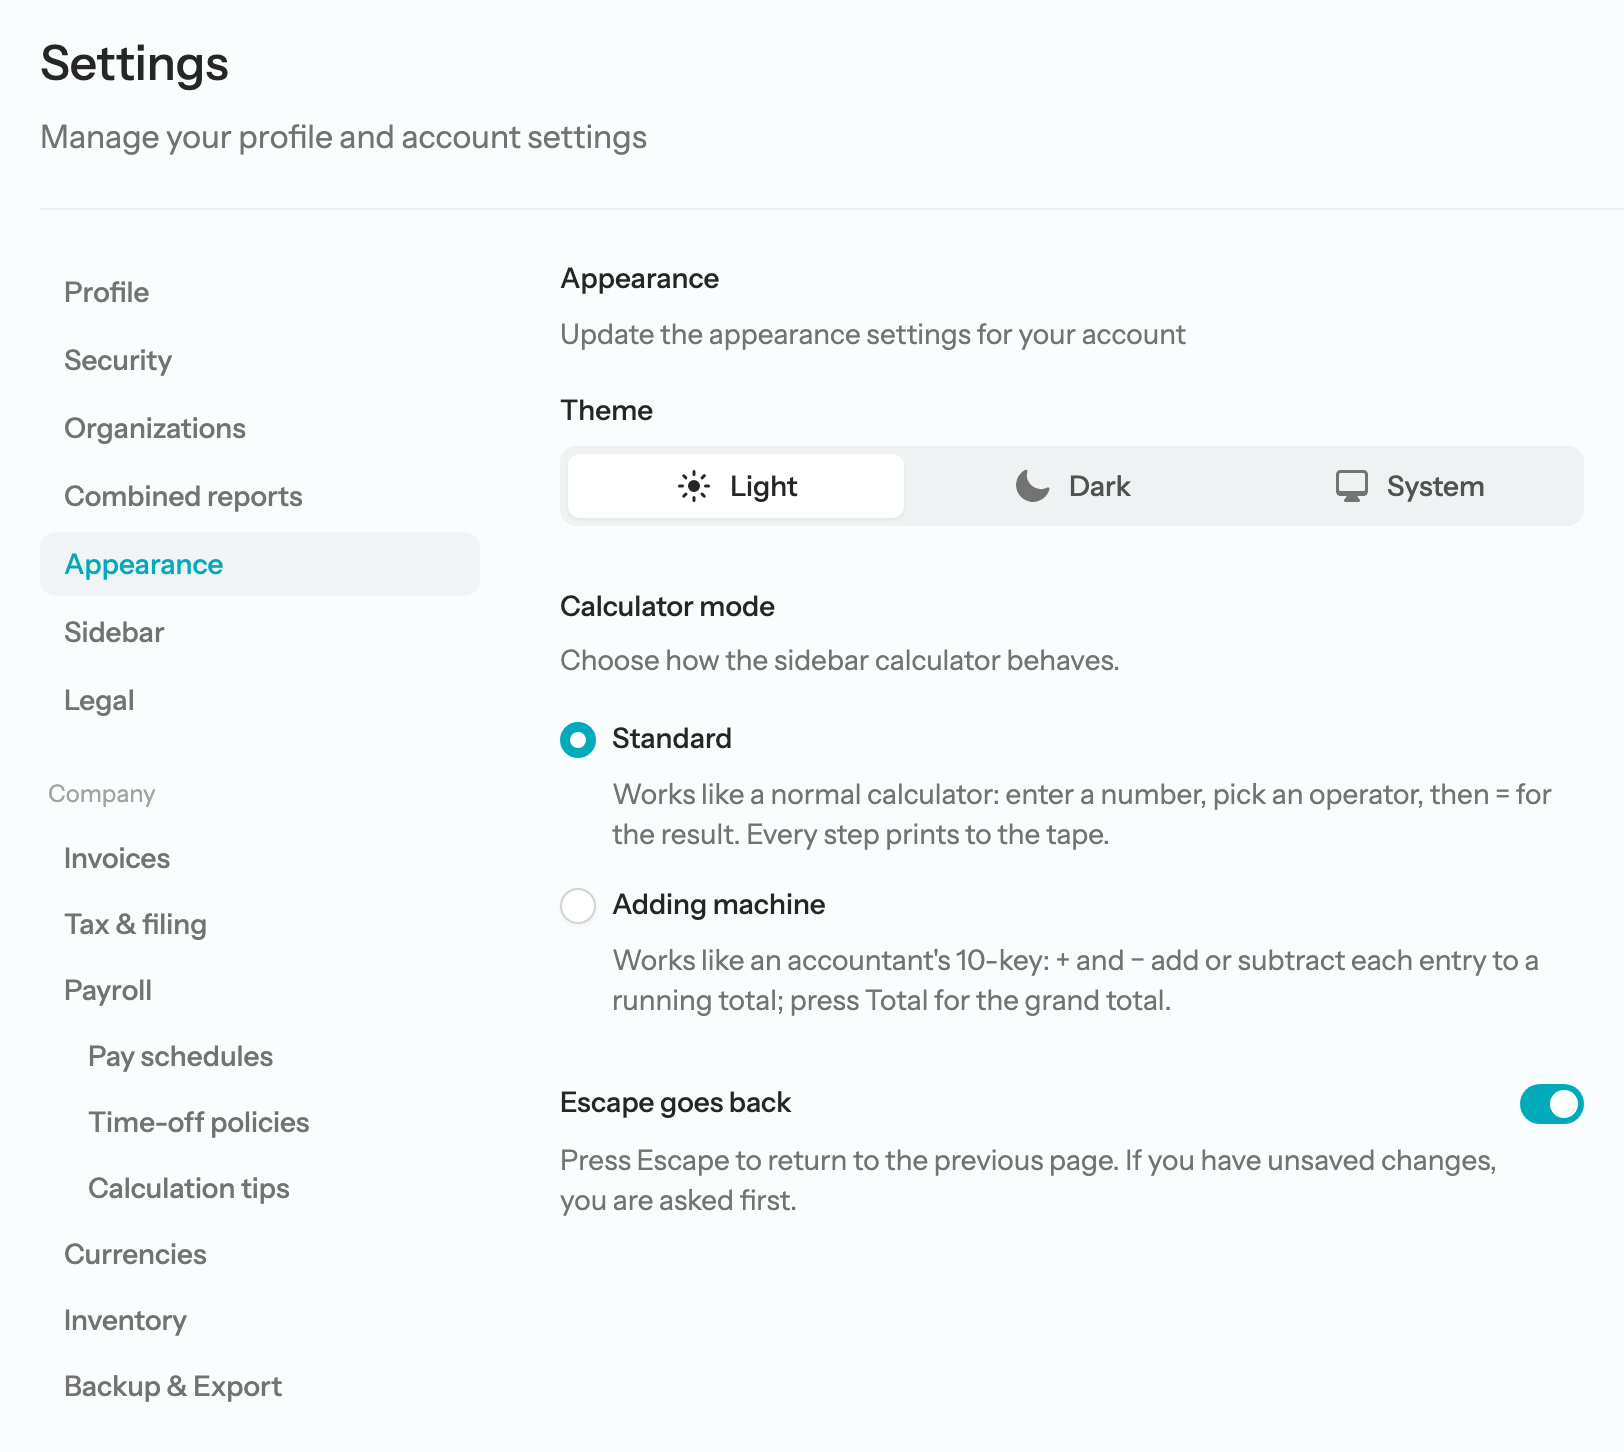
- Escape goes back — on any page, pressing Escape does what the browser’s Back button does. Anything that is open — a dialog, a menu, a picker, a calculator tape — closes first and the page stays put, and Escape never takes you out of the app. If you have typed into a form, you are asked “Leave this page?” before anything is lost.
- Click anywhere in a date field to open the calendar — not just the small icon at its edge. Tabbing into a date field does not pop the calendar, so typing a date stays the fast path.
- Every dollar cell is a calculator — type an expression such as 1050+52.50, 100*1.13, or 250/4 and a tape drops down showing each step. Press Enter to commit the result into the cell. Plus, minus, multiply (* or ×) and divide (/ or ÷) all work with normal precedence; dividing by zero shows Error on the tape and leaves the cell alone.
- The sidebar Calculator — the button beside the search box opens a tape calculator you can type into or click. Its Place in field button drops the result into whichever field you were last typing in, so you can work out a figure and land it without retyping.
- Type to pick an account — every Account box on a line is a search box. Type the start of a GL number (24 lists 2400, 2410… first) or any words from the name, in any order (bmo usd); case, accents, and punctuation are ignored. Arrow keys and Enter pick, Tab takes the highlighted match, Escape backs out, and emptying the box clears the account.
- Resize line columns — on a wide screen, drag the edge of a column heading in an invoice, bill, cheque, or other line-item table to make it wider or narrower; Description takes up the difference. Your browser remembers the widths for each form, and double-clicking the edge puts that column back to its default.
Note — Document numbers are yours to change. Invoices, bills, and the other numbered documents fill in the next number for you, but the number is an ordinary field: overwrite it if your numbering has a shape of its own. The app checks that the number is not already in use in the organization before it saves, so two documents can never share one.
Where to go next
- Dashboard — snapshot of your finances.
- Insights — the daily insight card and the history of past insights.
- Banking — bank register, statement import, reconciliation, cheques.
- Fundraising — donations, grants, and official receipts.
- Customers — billing the people you sell to — invoices, credit memos, and automated payment reminders.
- Members — your membership roster, dues, and renewals.
- Estimates — quotes before you bill.
- Sales orders — committed sales you fulfill over time.
- Recurring — invoices and bills on a schedule. An invoice schedule can post, or post and email, each invoice automatically; a bill schedule always creates drafts for you to review.
- Sales receipts — record a sale that is paid on the spot.
- Customer portal — let customers view and pay online.
- Vendors — tracking what you owe.
- Purchase orders — what you ordered before the bill arrives.
- Inventory — stock on hand, adjustments, history.
- Employees — reimbursements and expenses.
- Payroll — pay runs, CPP/EI, and T4 filings (Canada).
- Accounting — chart of accounts and journal entries.
- Opening balances — carry balances over from your old books after setup.
- Fixed assets — the equipment and property you own.
- Multi-currency — trade in foreign currencies.
- Reports — financial statements and tax reports.
- Budgets — set monthly targets per account and compare to actuals.
- Tax returns — record tax filings and payments.
- Documents — folders, file storage, and attachments to transactions.
- Inbox — capture receipts and bills by upload or email, then post the drafts.
- Lists — items, tax codes, payment terms, payment methods, other names.
- Settings — profile, security, appearance, team members, and organization configuration.
- Import from QuickBooks — bring an existing set of books in.
- API — programmatic access via REST.
- Self-hosting & upgrades — running LineLedger on your own server and keeping it current.
- Site administration — the operator’s portal: users, organizations, support tickets, site settings.
Note — Starred reports in the sidebar. Star a report on the All Reports page and it becomes a link of its own in the sidebar’s Reports group, listed after All Reports and Budgets (when budgets are turned on). There is no separate heading — starred reports simply sit beneath the group’s regular links for one-click access, and un-starring removes them. See Reports for the full list.
A typical workflow
- Add customers and vendors under the Sales and Purchases groups.
- Configure your chart of accounts, tax codes, and payment terms.
- If you are switching from another system, carry over your balances as of your conversion date — the trial balance, what each customer owed you, and what you owed each vendor — under Accounting → Opening balances.
- Create invoices for sales — or sales receipts for sales paid on the spot — and enter bills for purchases. You can also drop receipts into the Inbox and post the drafts it prepares.
- Record receipts and bill payments as money moves.
- Reconcile your bank accounts at month end.
- Run reports to review performance and file taxes.
Make it yours
Two pages under Settings shape how the app looks and feels for you alone — nothing on them affects your teammates. Open Settings from the account menu at the bottom of the sidebar.
- Settings → Appearance — pick a Theme (Light, Dark, or System, which follows your operating system), choose a Calculator mode for the sidebar calculator (Standard, or Adding machine, which works like an accountant’s 10-key with a running total and a Total key), and switch Escape goes back on or off.
- Settings → Sidebar — a switch for every group below Dashboard and Insights, and for every link in those groups. Dashboard and Insights have no switch and always show; starred reports have no switch either — un-star a report to take it off the sidebar. Turn off a whole group and all of its links go with it; select Save to apply, or Reset to defaults to bring everything back.
Prefer to work in French? Choose Français as your Interface language under Settings → Profile — see Languages.
Once you have hidden something, a Show all sections button appears at the bottom of the sidebar. It reveals everything temporarily — handy when you need a page you tucked away — and turns into Show fewer to put your tidy sidebar back, without touching your saved choices. See Settings for everything else you can configure.
Anyone can confirm the books always balance on the public Verification page — no login needed. It shows the results of automated accounting tests run against sample books: that the trial balance balances, ties to the balance sheet and income statement, and that the audit log verifies end to end, with the source data there to download and check yourself.
Getting help
The account menu at the bottom of the sidebar is where help lives. Documentation opens these pages. Support opens your ticket list, where you can ask a question, report a problem, or suggest a feature and read the replies — tickets go to the site administrators of your install, who reply from the Site Admin portal. Site administrators also see a Site Admin link to the operator’s portal.
To open a support ticket:
- Open the account menu at the bottom of the sidebar and select Support.
- Select New ticket.
- Enter a Subject, choose a Type — General, Bug or issue, or Feature request — and describe what you need under How can we help?
- Select Submit ticket. You land on the ticket itself, where every reply appears as a thread.
When someone replies, a blue dot appears on your avatar in the sidebar and a count badge beside Support in the account menu. Open the ticket, read the reply, and answer with Add a reply → Send reply. Feature ideas go in the same way — choose the Feature request type and they reach the same queue.
Running LineLedger on your own server? The Self-hosting & upgrades page covers installation and updates, and Site administration explains the portal where support tickets are answered and organizations are managed.