A sales order records a customer’s commitment to buy before you have delivered or billed it. It is a plan, not a sale: you fulfill it by generating invoices against it as you ship, and those invoices are what actually post to your books. The examples below use our sample business, Demo Company Inc.
Open Sales → Sales orders from the sidebar to see the list (a non-profit organization sees the group as Revenues → Sales orders). Each row shows the order Date, the Order #, the Customer, Expected (the delivery date you set on the order), the Total, and the live Status. The search box matches an order number or a customer name, and the status filter narrows the list to All, Open, Partial, Closed, or Cancelled orders.
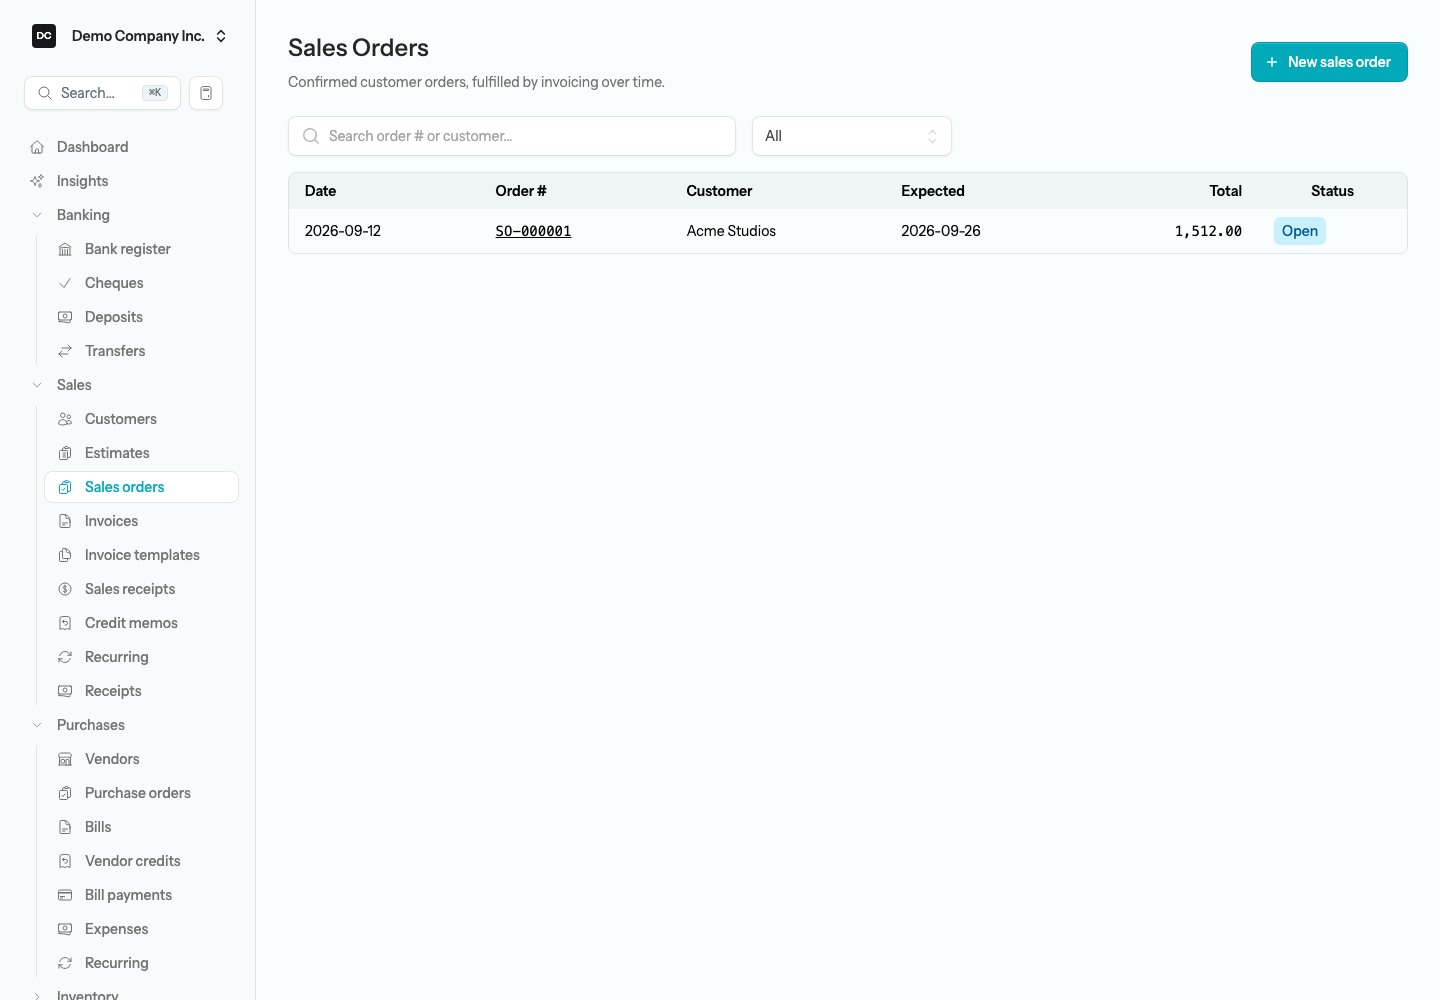
Note — Sales orders are an optional module. Whether Sales orders is switched on depends on how your organization was created. The setup wizard leaves it off for every industry, so a new organization has no Sales orders entry in the sidebar until you turn the module on — either on the wizard’s Features step or later. To change it at any time, open Settings → Organizations, open your organization, find the Features section, flip the Sales orders switch, and select Save. Turning it off only hides the module from the navigation: existing orders are kept, their pages still open from a link or bookmark, and an estimate’s Actions menu still offers Convert to sales order. Turn the switch back on and the sidebar entry returns. Feature toggles are covered under Settings.
Note — Sales orders never touch your books. A sales order is non-posting: creating or editing one does not create a journal entry, a receivable, or any inventory movement. Your books only change when you fulfill the order by posting the resulting invoice.
Create a sales order
Set up the order with everything the customer committed to. You can create one from scratch, or by converting an accepted estimate.
To create a sales order:
- Open Sales → Sales orders, then select New sales order in the top-right corner.
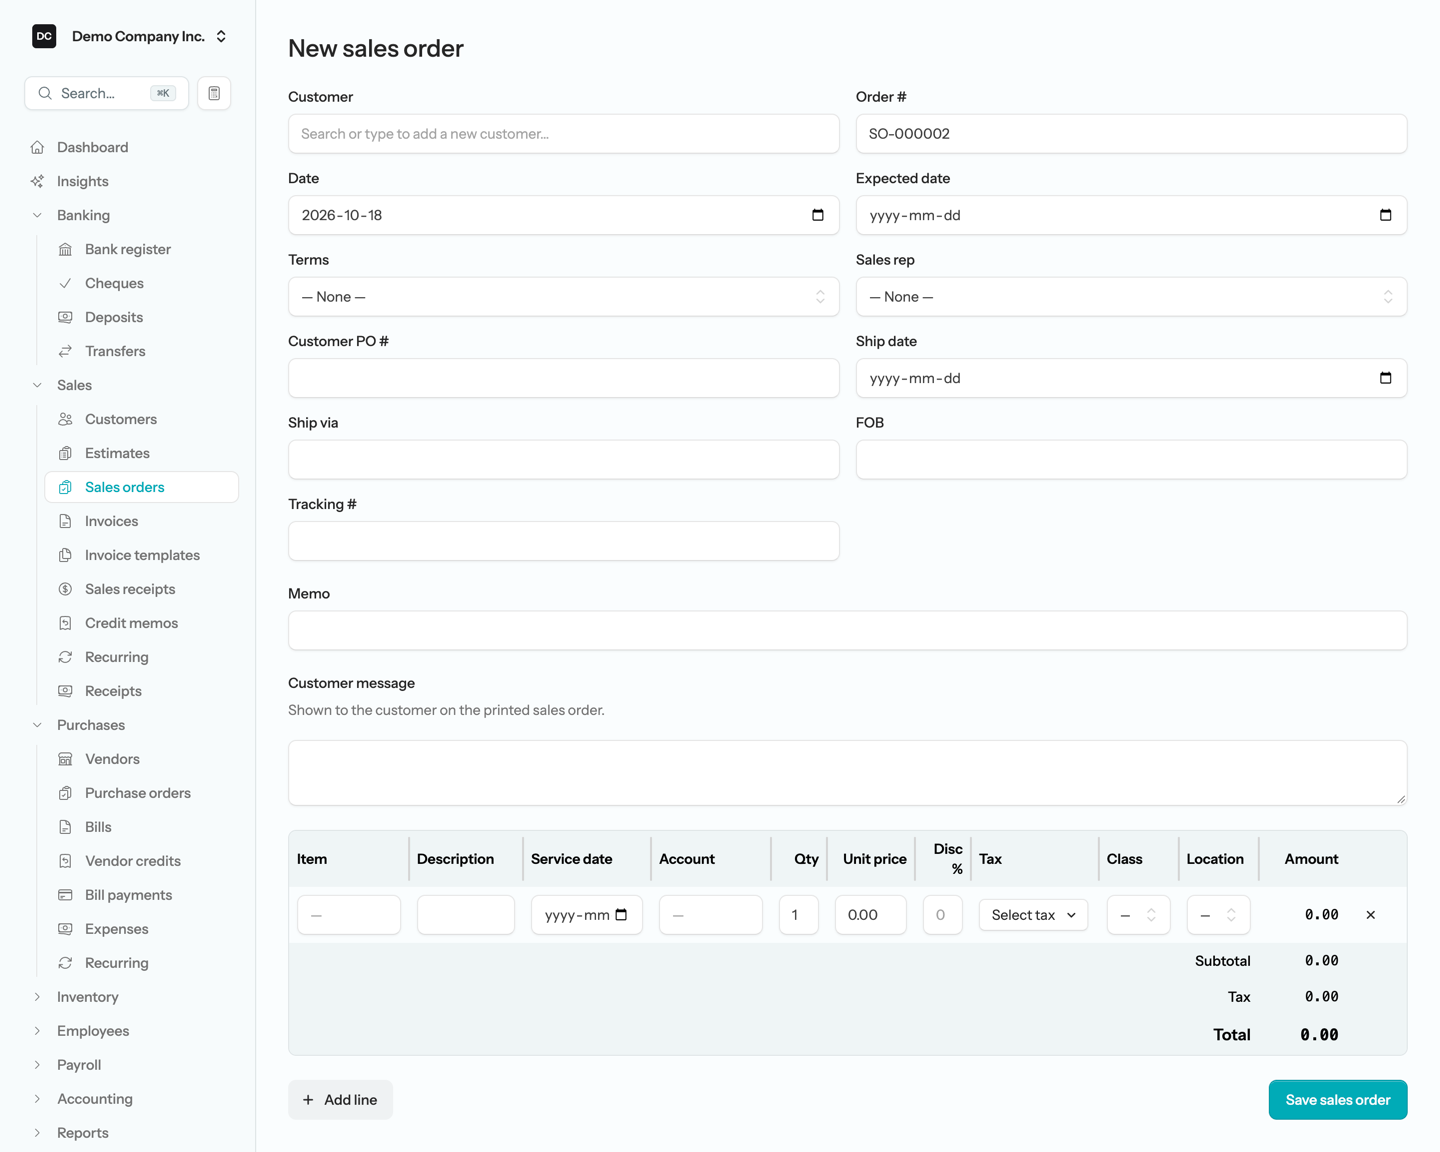
- Choose the Customer. Start typing to search, or type a name that is not on the list to add the customer on the spot — the record is created when you save the order, and its default terms and tax code are applied to the order.
- The Order # fills in with the next free number in your sequence and the Date defaults to today. You can change either — an order number must be unique within the organization, so a number that is already in use is rejected when you save. Set an Expected date for delivery.
- Optionally choose Terms and a Sales rep, and fill in a Customer PO # and the shipping fields: Ship date, Ship via, FOB, and Tracking #. Sales rep only appears when the Employees feature is on, and it lists your active employees.
- Add a Memo for yourself, or a Customer message — the message is shown to the customer on the printed sales order.
- On each line, pick an Item or choose an Account directly, type a Description, and enter the Qty and Unit price. Picking an item fills in its income account, description, unit price, and default tax codes for you. Add a Service date or a Disc % if you need them, and under Tax tick up to two codes — for example GST plus a provincial tax. Class and Location columns appear only if you have turned those dimensions on. The Amount column updates as you type.
- Select Add line for more than one thing on the order — pressing Tab from the last cell of the last line adds one too — then select Save sales order.
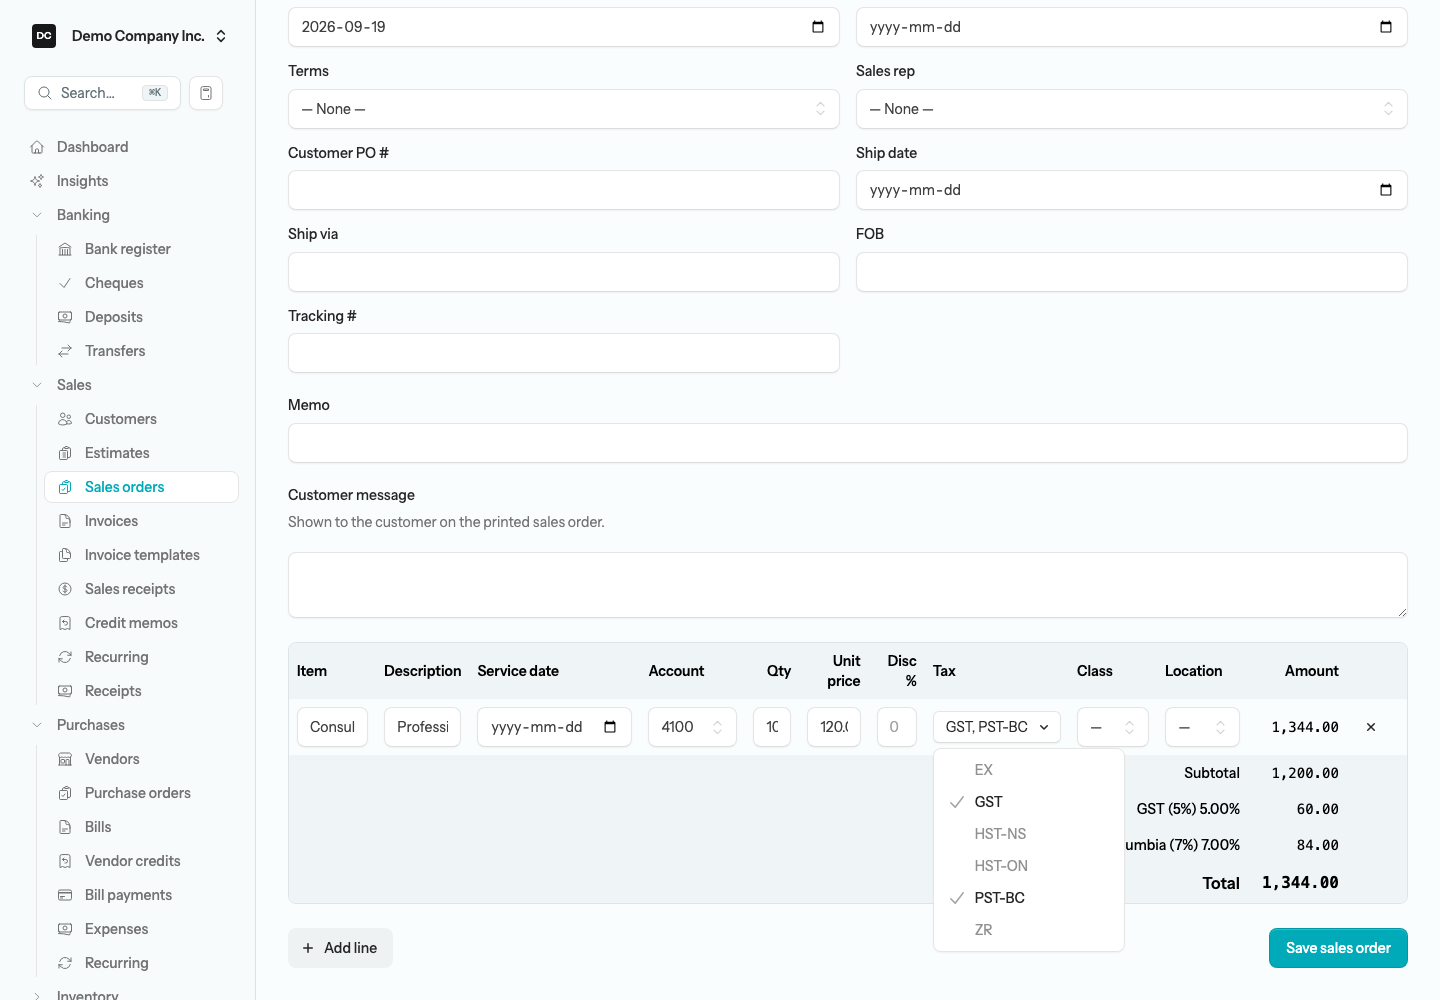
Tip — Faster data entry. The Unit price cell doubles as a calculator: type an expression such as 12*120 or 1050+52.50, review the tape that pops up, and press Enter to commit the result. A click anywhere in a date field — Date, Expected date, Ship date, or a line’s Service date — opens the calendar.
Note — One person edits an order at a time. If a teammate already has the order open for editing, the Edit page shows who is editing instead of the form, and Create invoice and Cancel order wait until they are done. Owners and Admins can take over. See Edit locks under Settings.
Tip — Already sent an estimate? When a customer accepts a quote, open that estimate, open its Actions menu, and choose Convert to sales order. The app copies the customer, lines, and amounts straight into a new order and marks the estimate Converted, with a link to the order it became. Converting is one-way: an estimate becomes either an invoice or a sales order, not both, and once it is marked Converted its Actions menu no longer offers either Convert option. Read more under Estimates.
Fulfill the order
Fulfilling means turning part or all of the order into a real invoice. This is the step that records the sale and, for inventory items, moves the stock — fulfill the whole order at once, or invoice it in pieces as you ship.
To generate an invoice from a sales order:
- Open the sales order you are shipping against.
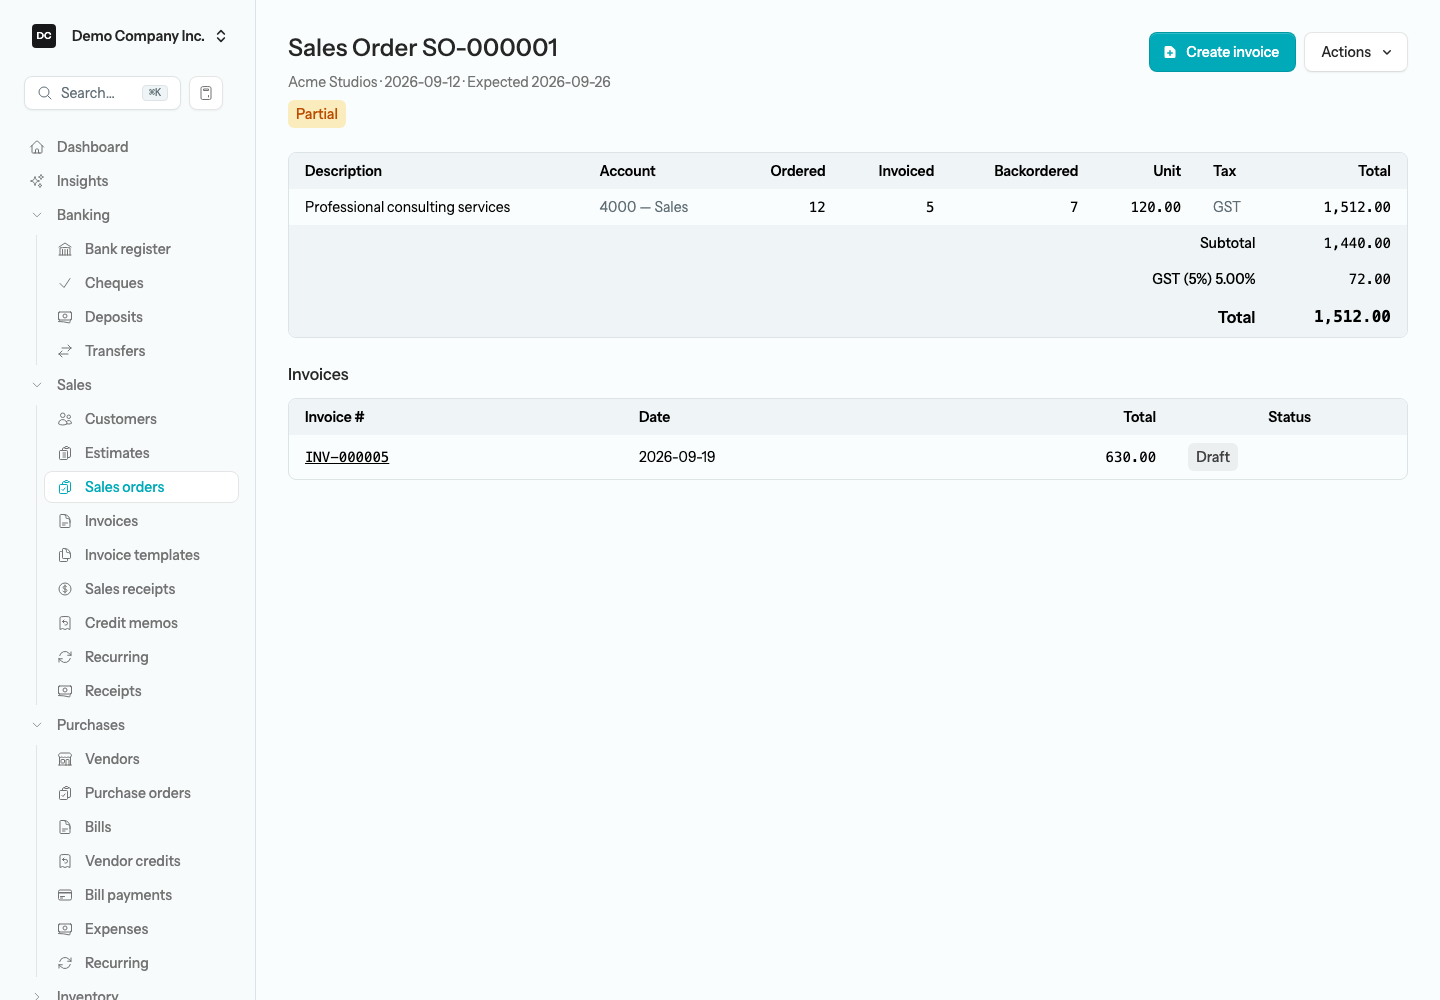
- Select Create invoice in the top-right corner (on a phone, choose it from the Actions menu). A panel titled “Create invoice for these quantities” opens, listing each line with its Ordered, Invoiced, and Backordered counts.
- In the Invoice now column, adjust each quantity. It is prefilled with the amount still outstanding, so leave it to bill everything owed or lower it to bill only what you are delivering now. A line that is already fully invoiced shows a dash instead of a box.
- Select Create draft invoice. The app builds a single Draft invoice linked back to the order and its lines, then opens it for you to review.
- Check the draft, fill in anything the order did not carry over (see below), and post the invoice when you are ready.
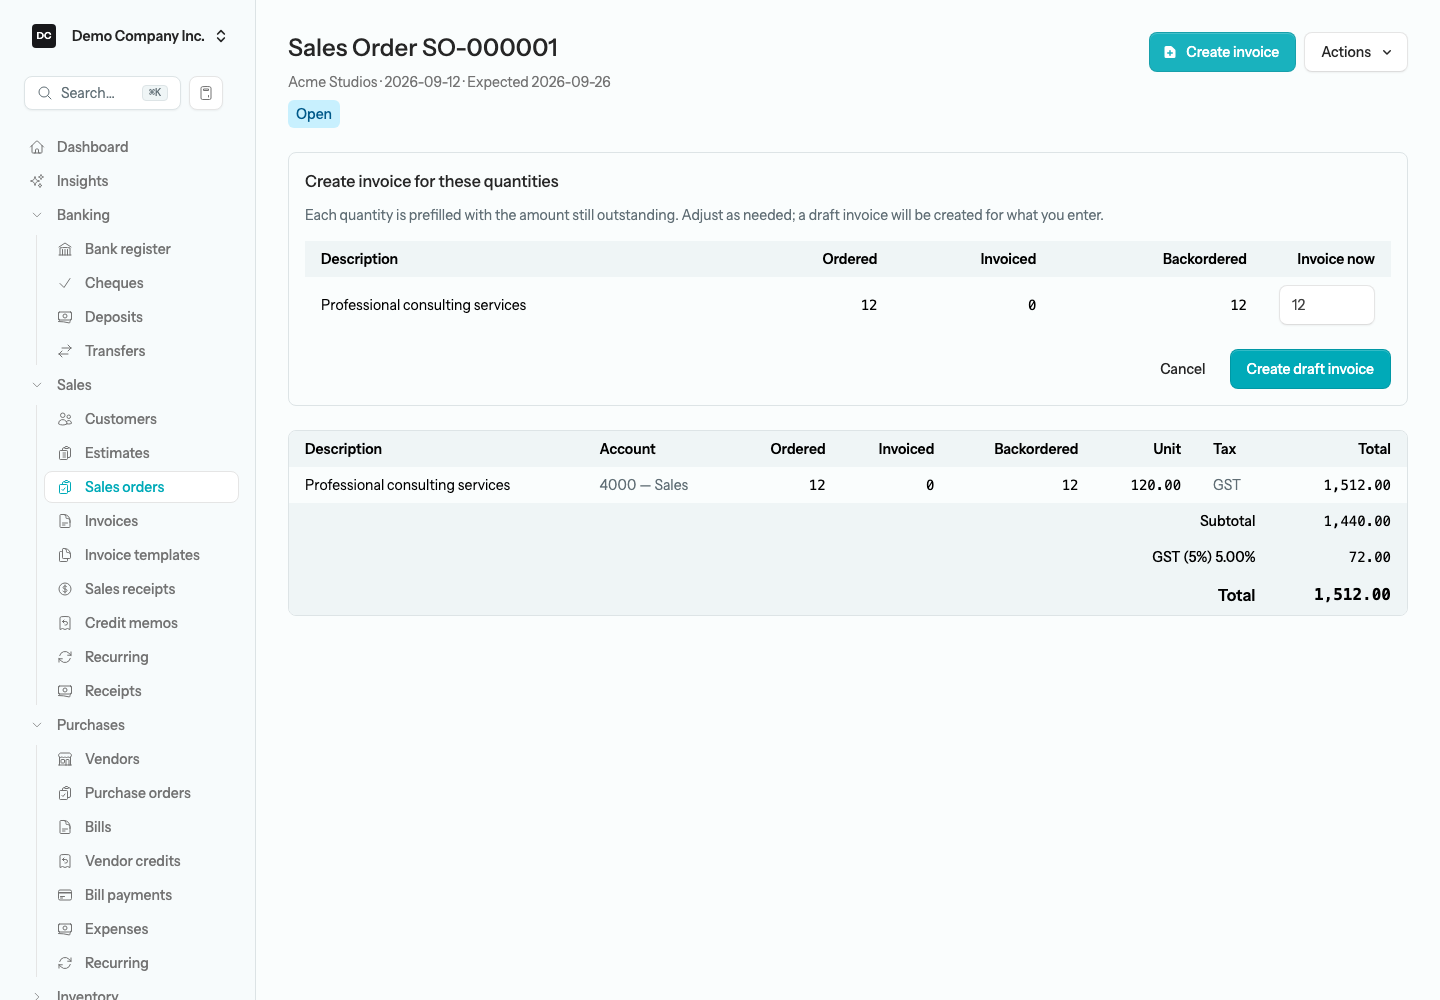
You cannot invoice more than a line still has outstanding, and you have to enter at least one quantity — the app refuses the draft with a message otherwise. Leave a line at zero to skip it this time.
What the generated invoice carries over
The draft is a starting point, not a copy of the whole order. It is dated today, numbered with your next invoice number, and its due date comes from the terms (or matches the invoice date if there are none). From the order it takes:
- Header — the Customer, the Terms, and the Memo.
- Each line — the Item, the Account, the Description, the quantity you entered under Invoice now, the Unit price, and the first Tax code.
It does not carry the Sales rep, the Customer PO #, the Customer message, or the shipping fields, and on each line it drops the second tax code, the Disc %, the Service date, and the Class and Location.
Heads up — Re-enter these on the draft before you post. If an order line carries two tax codes, the draft invoice bills only the first one, so a GST-plus-PST order needs its provincial tax ticked again on the invoice. Likewise, add the Sales rep back if you rely on the Sales by Rep report, re-apply any line discount, and set Class or Location again if you slice your reports by them. Do this while the invoice is still a Draft — it is far easier than voiding and re-issuing.
Note — What posting the invoice does. No posting or inventory movement happens at fulfillment — it all happens when you post the resulting invoice, which debits Accounts Receivable for the total, credits your revenue accounts, and credits the sales tax collected to its tax account. If a line uses an inventory-tracked item, posting also reduces that item’s quantity on hand and books its cost to cost-of-goods-sold. Voiding an invoice automatically drops it back out of the order’s fulfilled total, so the backorder quantity stays accurate.
Print and track the order
The sales order page keeps a running record of how the order is being filled. Under the heading it shows the customer, the order date, the Expected date, and the status badge, plus the Sales rep, PO #, Ship date, Ship via, FOB, and Tracking # whenever you filled them in. The line table lists each line’s Description, Account, Ordered, Invoiced, Backordered, Unit (the unit price, with any discount noted beneath it), Tax (its tax codes), and Total, with each tax on its own row in the totals. Its Actions menu, in the top-right corner, gives you everything else you need:
- Create invoice — on a phone or small tablet, this is where the fulfillment button lives; on a wider screen it sits beside the menu instead.
- Print — opens a print-ready PDF of the order in a new tab to send or file. The customer message prints on it; the memo does not.
- Edit — change the order; offered only while it is still Open, because nothing has been invoiced yet.
- Cancel order — offered while the order is Open or Partial; it asks you to confirm and then closes the order out for good (see the warning below).
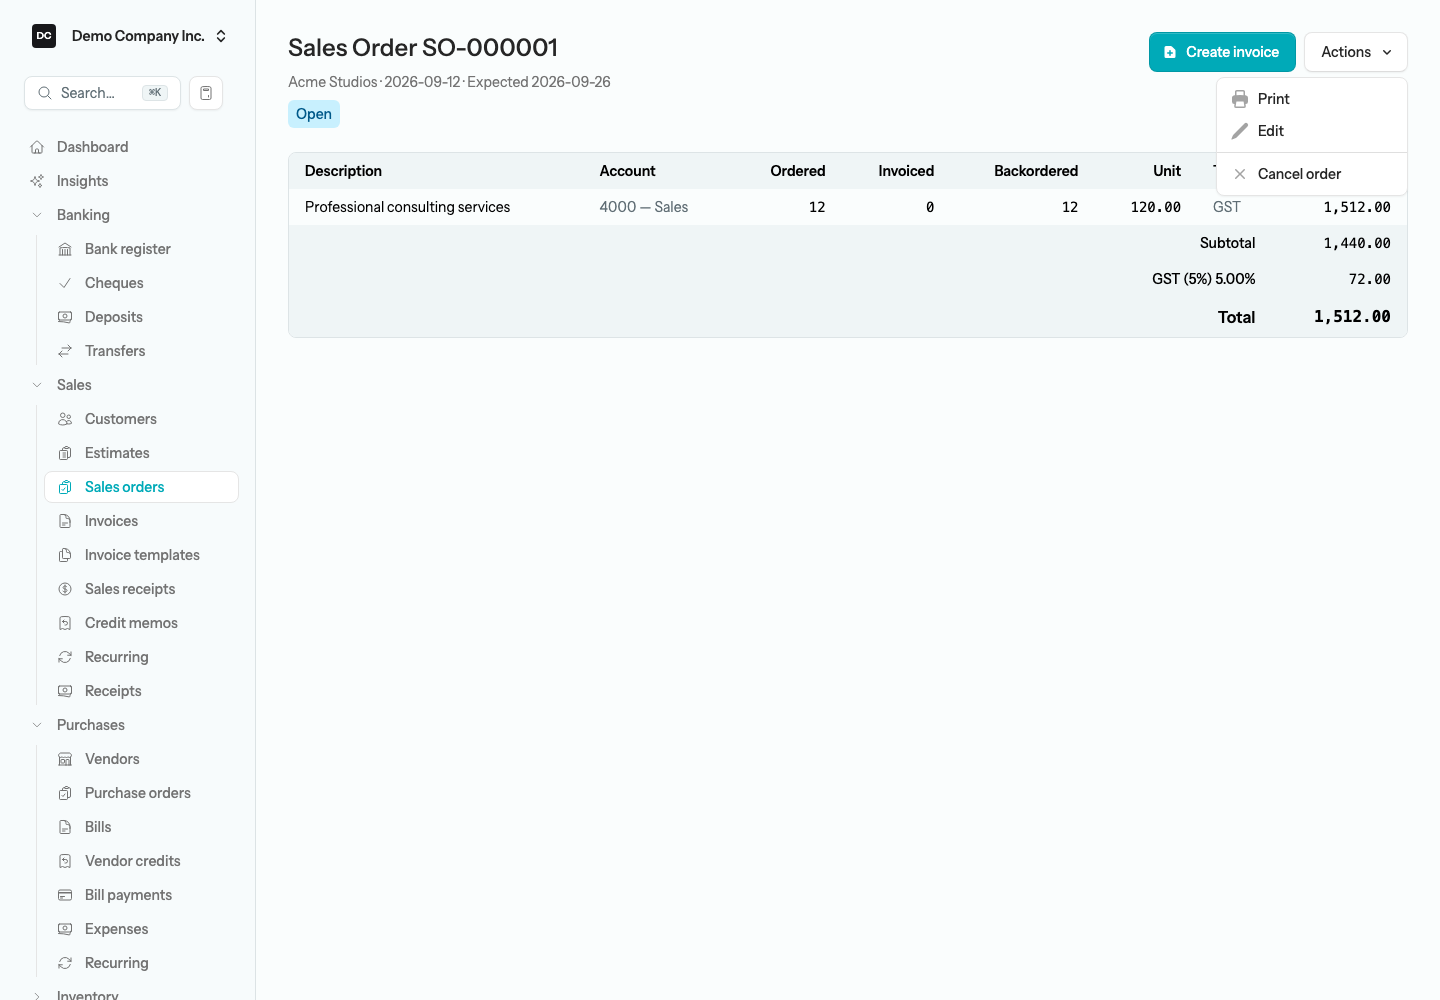
Below the line table, the Invoices list shows every invoice generated from the order — its Invoice #, Date, Total, and Status — so you can jump straight to anything you have already billed. The customer message and your memo appear underneath.
Statuses and backorder
A sales order’s status is derived live from its invoices, so it always reflects what has actually been billed. A Draft invoice counts as soon as it is created; a voided one stops counting.
- Open — nothing has been invoiced yet.
- Partial — some quantity is invoiced, but some is still outstanding.
- Closed — every line has been fully invoiced.
- Cancelled — the order was cancelled and is no longer being filled.
The backorder quantity on each line is simply ordered minus invoiced. Because editing an order rebuilds its lines, only an Open order can be edited — once anything has been invoiced, the order is locked. Open and Partial orders can still be invoiced. Only Cancelled is final: Closed is never saved on the order but worked out from its invoices, so if you void an invoice generated from a Closed order, the order drops back to Partial — or to Open, if no other invoice on it still counts — and you can invoice it again. Once it is back to Open, you can edit it again too.
Heads up. Cancelling a sales order is permanent: a cancelled order stays cancelled regardless of its invoices, and no further invoicing is allowed against it. Invoices you already generated from it are untouched.
Reports tied to this area
Because a sales order never posts, it appears on no financial report. The Sales Orders list filtered to Open or Partial is your backorder view; once you fulfill an order, the resulting invoices show up in the usual places:
- Sales by Customer and Sales by Item — revenue from the invoices you generated, once posted.
- Sales by Rep — revenue per sales rep, if you re-entered the rep on each invoice.
- AR Aging — the open balance of each posted invoice by how overdue it is.
Integrations can list, create, fulfill, and cancel sales orders over the REST API — see the API documentation.