The Site Admin portal is the operator’s side of LineLedger. Where everything else in the app is scoped to one organization, the pages under /admin see the whole platform at once — every user, every organization (including deleted ones), every support ticket, and every security event. If you host LineLedger for other people, or you are the person who installed it for your own team, this page is for you. Everyone else can skip it: the portal is invisible unless you are a site admin.
One naming note before you start. The portal labels organizations as Companies — the Companies page, the Companies tile, the Company filter — because that is what the underlying records are called. They are the same thing the rest of the app calls an organization, and the buttons on the detail page (Restore organization, Permanently delete this organization?) say so.
Who can get in
Site admin is a flag on a user account, not a role inside an organization. Being an Owner of every organization on the server does not make you a site admin, and being a site admin does not make you a member of any organization — you still switch into an organization the normal way to see its books.
There are only two ways to become one. The very first person to register on a fresh install is made the site admin automatically, so the platform can always be bootstrapped; that first sign-up also ignores the New registrations switch and the sign-up rate limit. After that, an existing site admin grants the flag from the Users page with Make admin (see Grant or revoke site admin below). In the seeded demo, test@example.com / password is already a site admin, so once you enrol that account in two-factor you can explore the portal right after php artisan migrate —seed.
To open the Site Admin portal:
- Turn on two-factor authentication for your own account under Settings → Security. The portal refuses to open without it: an admin who has not enrolled is sent to the Security page with the message “Enable two-factor authentication to access the site admin area.”
- Open the user menu at the bottom of the left sidebar — it shows your initials and your name — and choose Site Admin. The entry only appears for site admins. On a phone, the same menu opens from your initials in the top bar.
- Confirm your password when asked. The portal re-checks it on entry even though you are already signed in.
The portal has its own left-hand navigation with six pages: Overview, Security, Feature toggles, Users, Support, and Companies. The Support entry carries an amber badge with the number of tickets waiting for a reply.
Note — Cross-tenant, and on the record. Nothing in the portal is filtered to an organization — every list shows every tenant on the server, and the Security page can filter by any of them. In exchange, the sensitive actions are written to the immutable security log with your email as the actor: disabling or enabling a user, editing a user’s profile, resetting their two-factor, sending a password reset, and marking an organization deleted, restoring it, or purging it. Anyone who is not a site admin gets a 404 from every /admin address, so the portal stays undiscoverable.
Overview
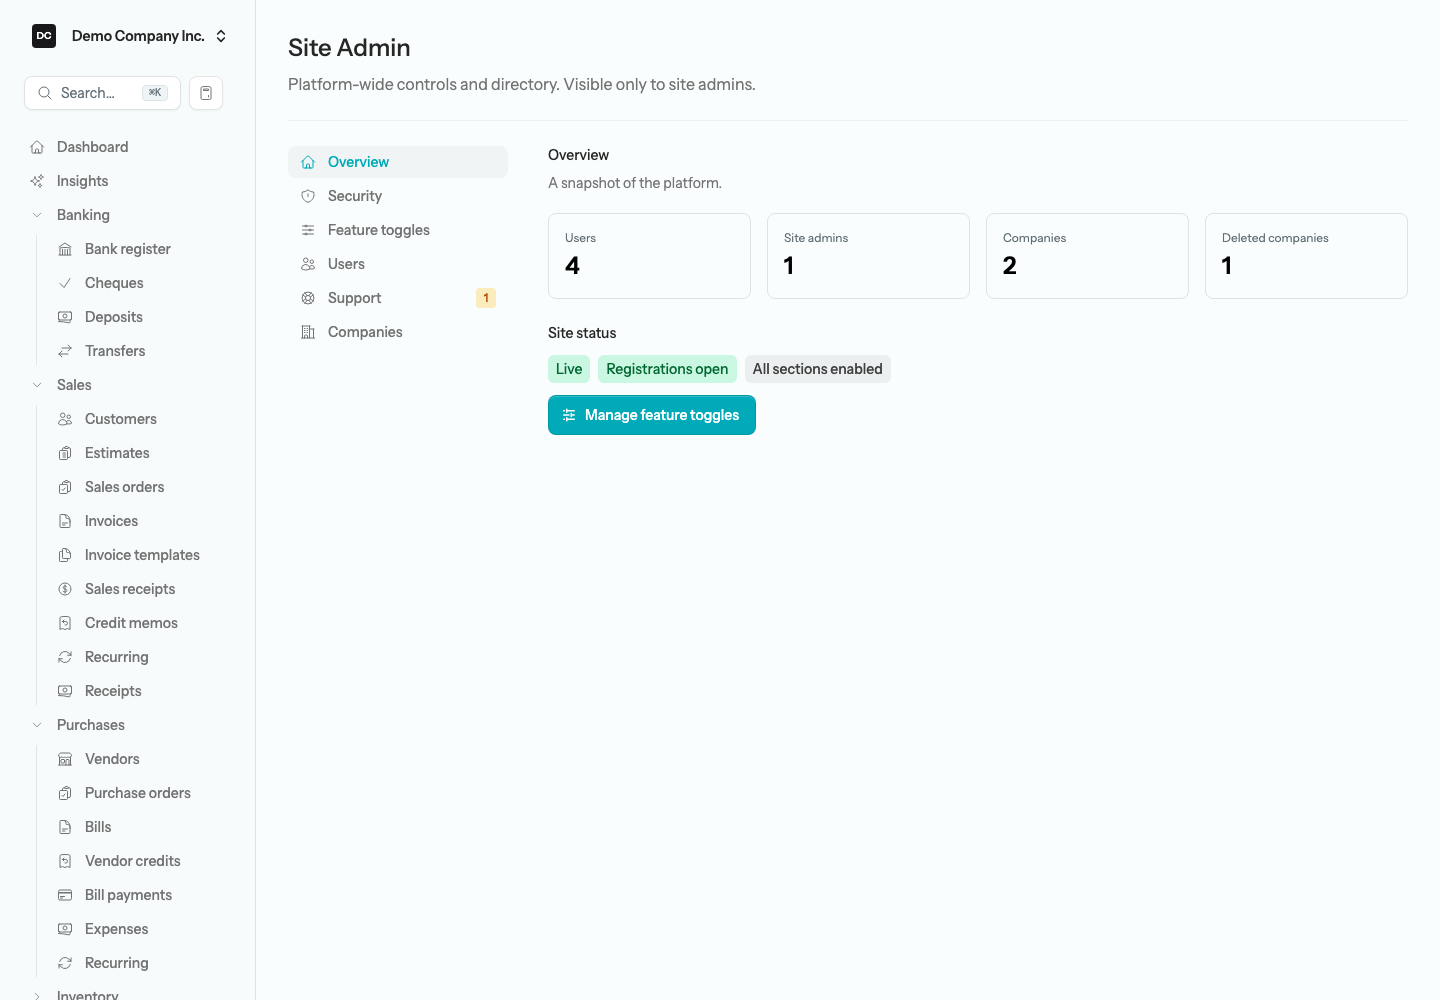
Overview is the landing page. Four tiles count Users, Site admins, Companies, and Deleted companies across the platform. Below them, Site status shows the state of the switches from Feature toggles as badges: Live or Maintenance mode ON, Registrations open or Registrations closed, and either All sections enabled or one amber badge per section you have switched off (Payroll disabled, for example). Manage feature toggles jumps to the page where you change them.
Feature toggles
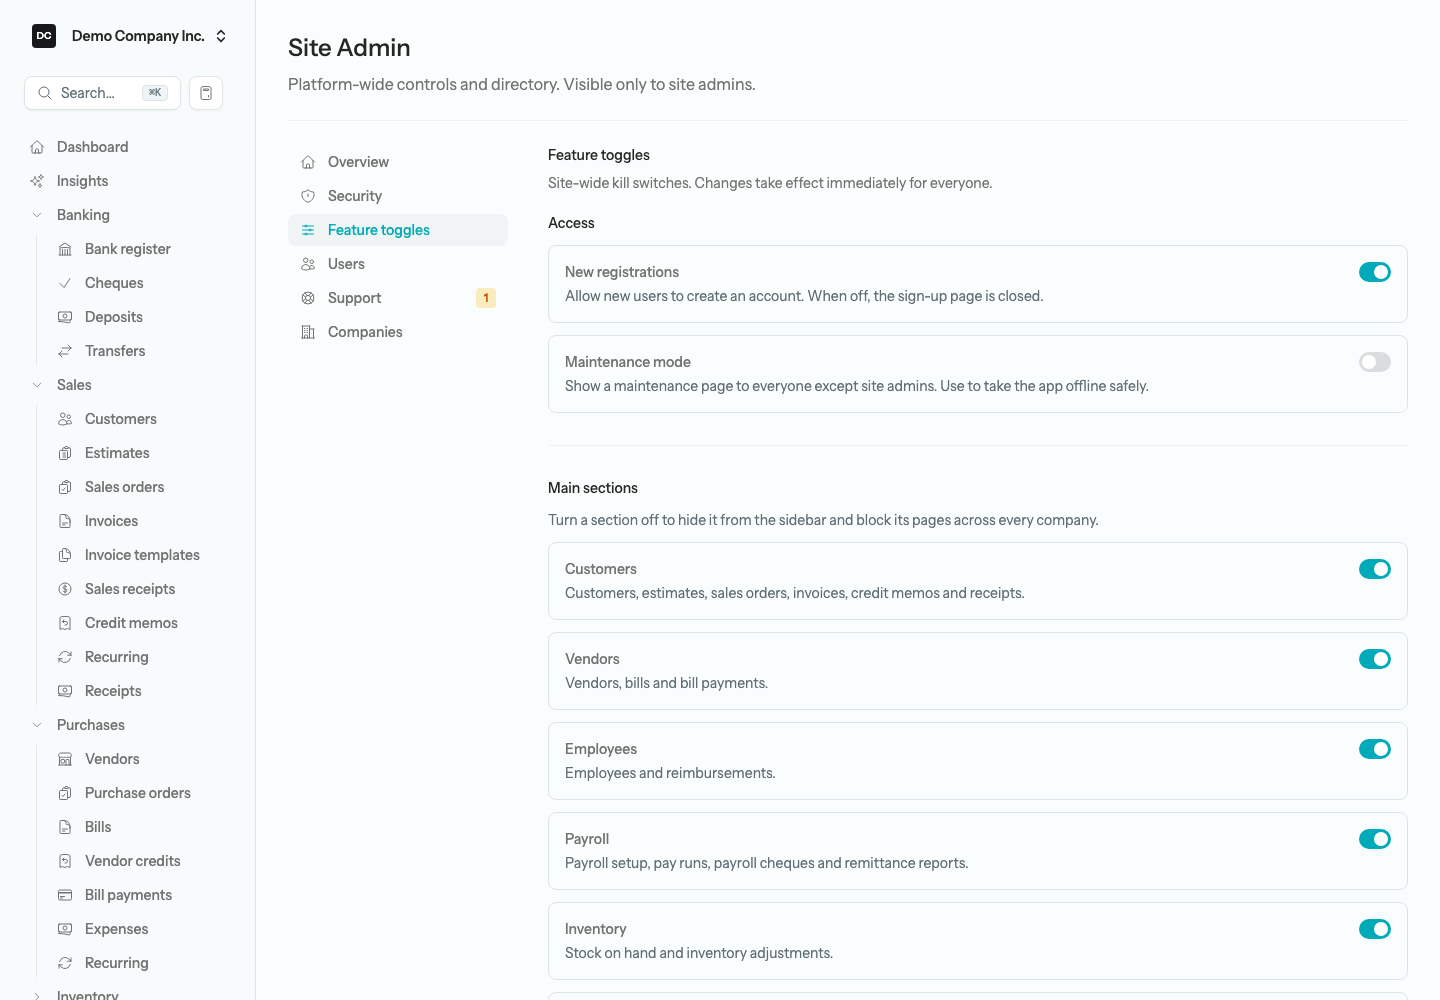
Feature toggles holds the site-wide kill switches. Every switch saves the moment you flip it (a Saved toast confirms) and takes effect immediately for everyone — there is no publish step. The page has two groups, Access and Main sections.
New registrations
On by default. Switch it off and the sign-up page is replaced by a “Registration is closed” notice, the Sign up link disappears from the login page, and any sign-up request is refused with “Registration is currently closed.” Existing users are unaffected and can still sign in, and the one exception is a server with no users at all, which always accepts its first registration. Closing registrations is not an invitation-only mode: accepting an invitation means signing in first, so an invitation only works for someone who already has an account, and a person without one has no way to create it while registrations are closed. Close them when your list of users is complete; to bring in someone new later, open registrations long enough for them to sign up, then close them again.
Maintenance mode
Off by default. When it is on, everyone except site admins who opens LineLedger in a browser sees a “We’ll be right back” page instead of the app, with a 503 status so monitors and search engines know the outage is deliberate. Site admins pass straight through, and the login, logout, password-reset, and two-factor pages stay reachable, so you can always sign in and switch it back off. This is LineLedger’s own switch rather than Laravel’s artisan down, which would lock you out of the portal too.
To put the web app into maintenance mode:
- Open Site Admin → Feature toggles.
- Turn on Maintenance mode. The change is live as soon as the Saved toast appears; the Overview badge switches to Maintenance mode ON.
- Do the work. Other people using LineLedger in a browser are bounced to the maintenance page on their next click, but nothing they had already saved is lost.
- Turn Maintenance mode off again. Users can carry on where they were.
Heads up — The API keeps running. Maintenance mode covers the web app only. The REST API (/api/v1) and the MCP endpoints that AI assistants connect to never check it, so integrations using an API key and connected assistants keep reading and writing organizations’ books the whole time it is on. If your work needs the books to hold still, plan around those integrations separately.
Main sections
Each row is one of the app’s main sections — Customers, Vendors, Employees, Payroll, Inventory, Accounting, Banking, Inbox, Fundraising, Reports, Lists, and Documents — with a one-line description of what it covers and a switch. Turning a section off hides it from the sidebar and blocks its pages for every organization on the platform; anyone who follows an old link gets a 404. Settings is deliberately not on the list, because switching it off would lock every organization out of its own configuration.
Tip. A platform-wide switch is a blunt instrument, so Payroll has a per-organization override. Turn the Payroll section off here and then grant it back to the organizations that need it from their Companies detail page (Payroll access, below). That lets you roll payroll out to a few organizations at a time, or keep it off for everyone except the ones you have set up.
Users
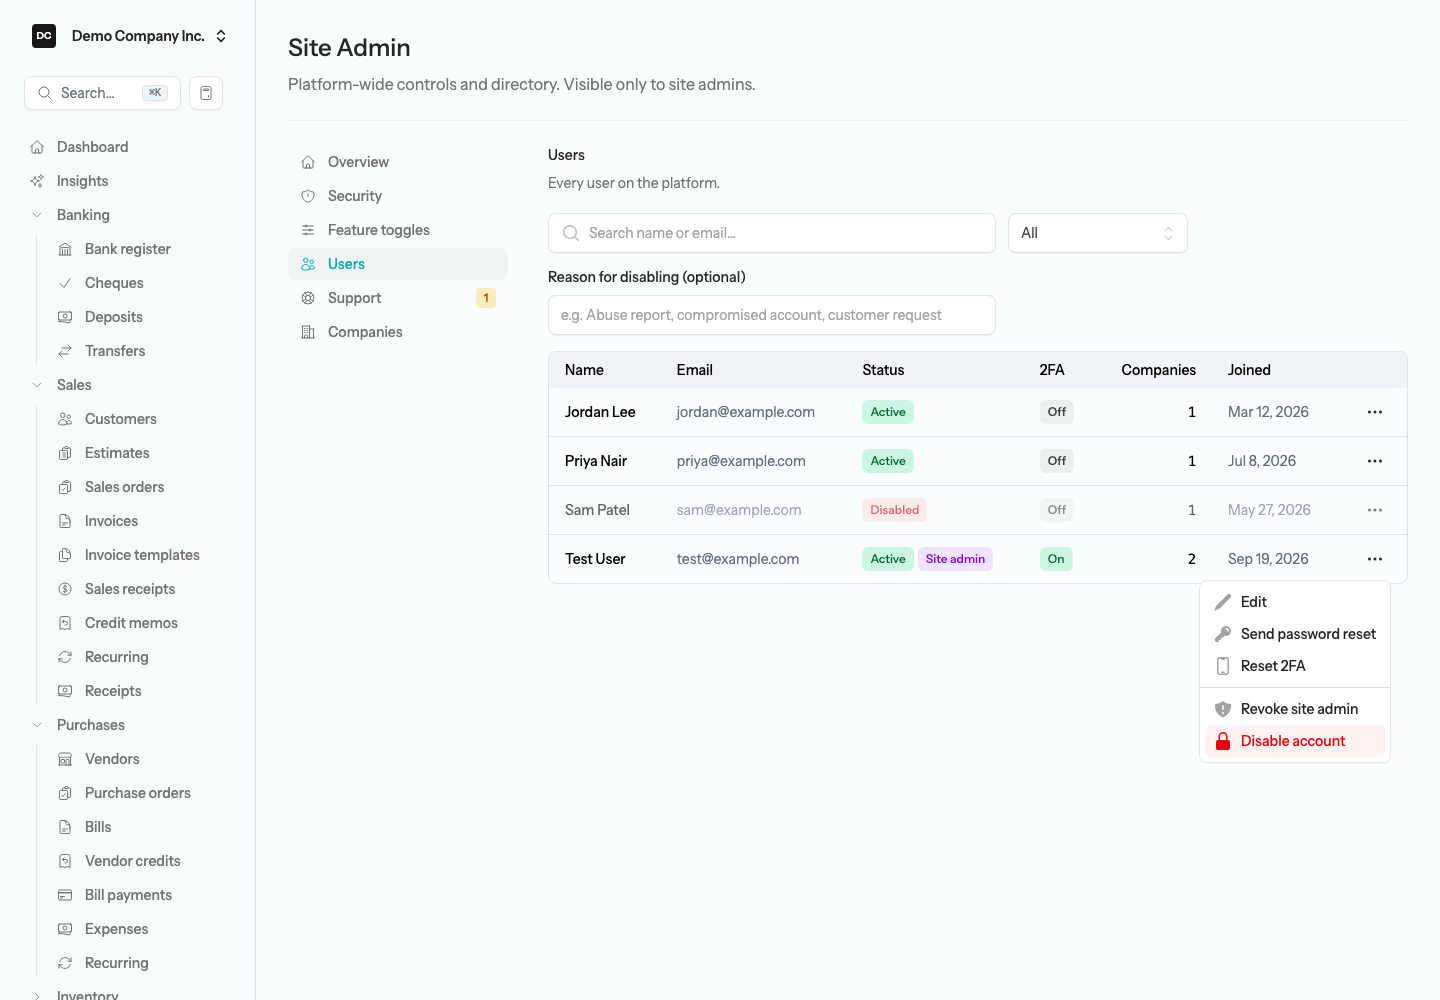
Users lists every account on the platform, 25 per page, with columns for Name, Email, Status (Active or Disabled, plus a purple Site admin badge), 2FA (On or Off), Companies (how many organizations they belong to), and Joined. Search by name or email, and use the filter to show All, Active, or Disabled accounts. The Reason for disabling (optional) box above the list is read when you disable someone — fill it in first if you want the reason kept with the account.
Each row ends in a menu of operator actions: Edit, Mark email verified and Re-send verification (only while the address is unverified), Send password reset, Reset 2FA (only while it is on), Make admin or Revoke site admin, and Enable account or Disable account. You never see or set anyone’s password from here — the most you can do is email them the standard reset link.
Disable an account
Disabling is a platform-wide lockout: it applies to every organization the person belongs to, not just one. Use it for a compromised account, an abuse report, or a customer who has asked you to shut their access off. It is reversible, but not everything comes back.
To disable a user:
- Open Site Admin → Users and find the person.
- Optionally type a note in Reason for disabling (optional), such as “Abuse report” or “Customer request”. It is kept with the account; the stacked card view on a narrow screen shows it, while the desktop table shows only the Disabled badge.
- Open the row menu and choose Disable account, then confirm. The confirmation spells out the consequences: they are signed out everywhere, and their API keys and connected apps are revoked for good.
The moment you confirm, every one of their sessions is dropped and their remember-me cookie is invalidated, every connected app (for example an MCP client authorized through OAuth) loses its tokens, and every API key they created — in any organization — is revoked. The next time they try to sign in they see “This account has been disabled. Contact support if you believe this is a mistake.” The row dims and shows a Disabled badge; the date, the admin who did it, and the reason are kept with the account and shown on the stacked card view on narrow screens. Enable account lets them sign in again, but the revoked API keys and app connections stay revoked: they create new ones once they are back in.
Heads up. Two guardrails apply. You cannot disable your own account, and you cannot disable the last enabled site admin — the portal would have nobody left to run it. Disabling is also what actually enforces the lockout on the API: an API key identifies an organization, not a person, so revoking the keys they made is the only way to stop their integrations, which is why re-enabling does not restore them.
Grant or revoke site admin
Make admin turns any user into a site admin after a confirmation that reminds you they will be able to manage the whole platform. They still need two-factor authentication before the portal will open for them. Revoke site admin takes the flag away again. The portal insists on keeping at least one site admin who can actually sign in, so revoking the last one (or the last one who is not disabled) is refused with “At least one site admin is required.” Keep at least two admins on any server that matters, so one can recover the other.
Help someone who is locked out
The rest of the row menu is for support requests. Send password reset emails the same reset link the login page offers; you never handle the password itself. Reset 2FA clears a user’s authenticator enrolment and recovery codes when they have lost both — it also forgets their trusted devices, leaves any passkeys in place, and is refused if they are the last site admin with two-factor on, since that would lock every operator out of the portal. Mark email verified and Re-send verification unstick a new account whose verification mail never arrived. Edit changes the name or email; changing the email clears its verified status, so the user has to confirm the new address. Edit, Send password reset, Reset 2FA, and Mark email verified are each recorded in the security log as user_updated_by_admin against the user, with you as the actor; Re-send verification only sends the email and leaves no entry.
Support tickets
Support is the in-app help desk. Any signed-in user can raise a ticket from their user menu — Support → New ticket — with a Subject, a Type (General, Bug or issue, or Feature request), and a description under How can we help? Feature ideas come in the same way as bugs. The ticket is tagged with the organization they were working in, every site admin gets an email, and the user is told “We usually reply within 24 hours.” Tickets are platform records: they never touch any organization’s ledger.
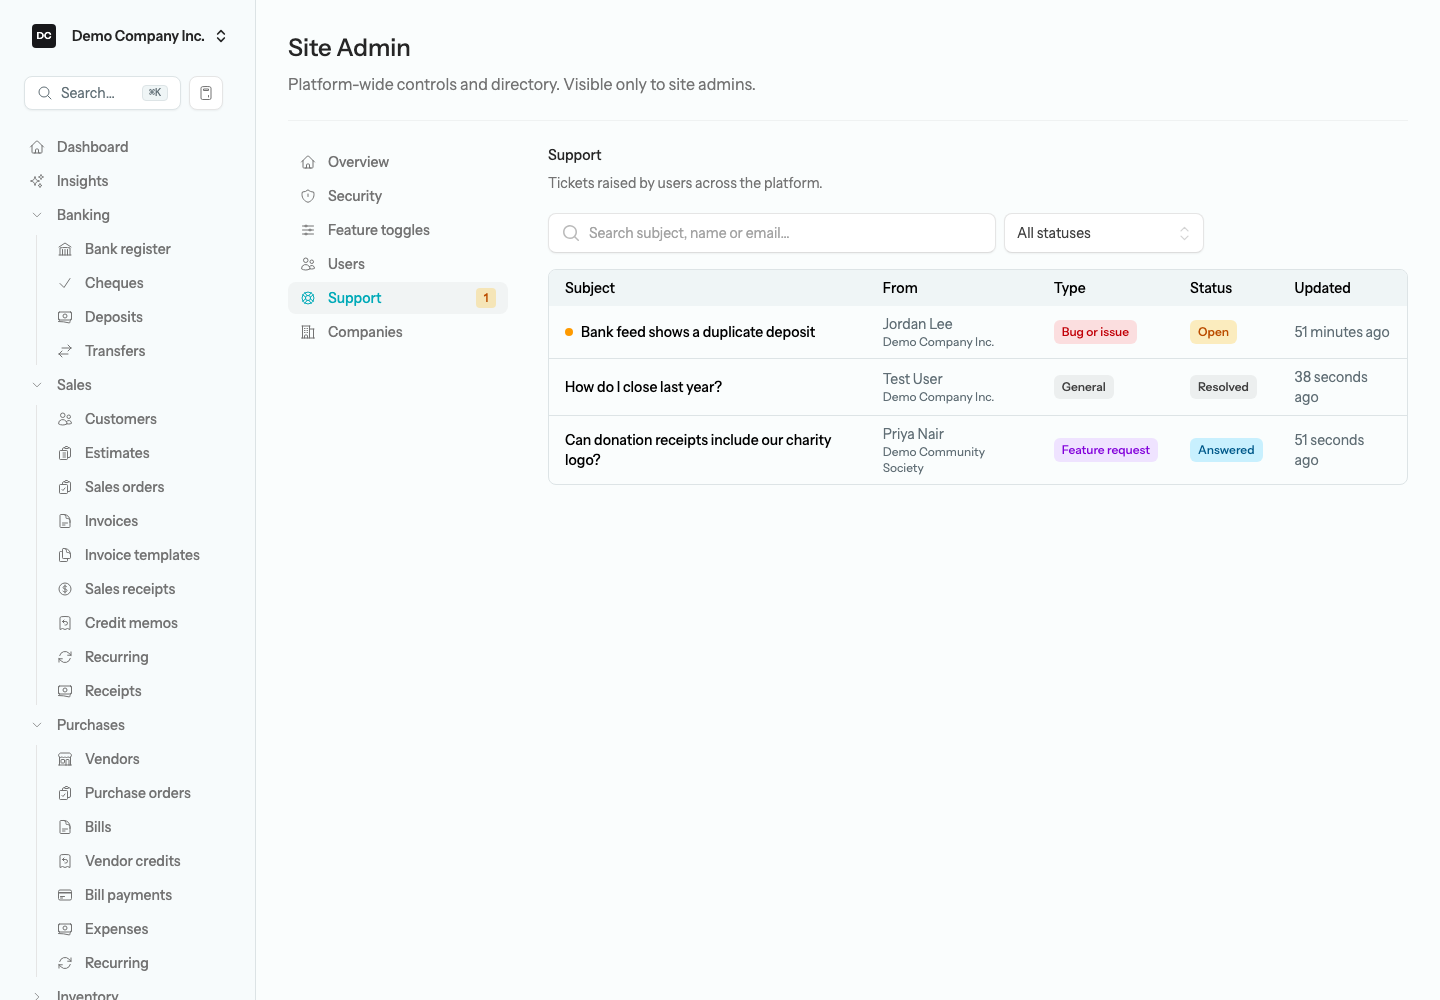
Site Admin → Support lists every ticket with its Subject, From (the person and their organization), Type, Status, and Updated time. Open tickets sort to the top, and an amber dot next to the subject means the user has written something you have not read yet. Search by subject, name, or email, and filter by All statuses, Open, Answered, or Resolved.
To answer a ticket:
- Open Site Admin → Support and select the ticket. Opening it marks the user’s messages as read and clears the dot.
- Read the thread. The user’s messages sit on the left; replies from any site admin sit on the right, labelled Support.
- Type your answer in Reply to (the user’s name) and select Send reply. The ticket moves to Answered and the user receives your reply by email, with a link back to the ticket.
- When the question is settled, select Mark resolved. The button disappears once the ticket is Resolved.
A ticket is Open whenever it is your turn: when it is new, and again whenever the user replies — even to a Resolved ticket — because a user reply always reopens it and emails the site admins. Answered means the ball is in the user’s court. The Support badge in the portal navigation counts Open tickets, so a clear badge means nothing is waiting on you.
Companies
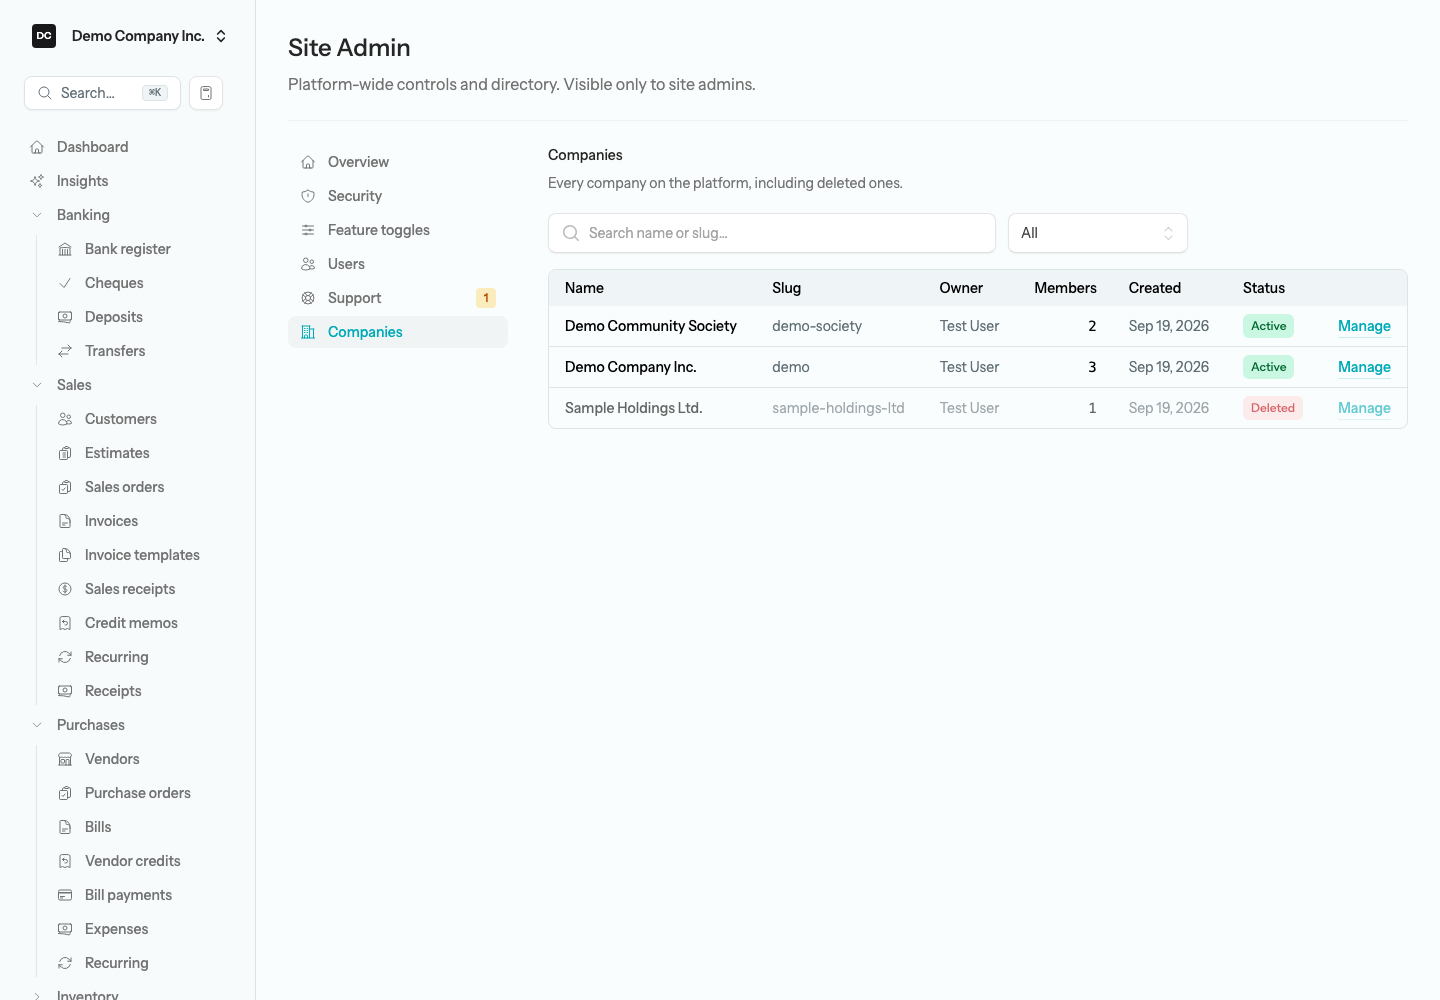
Companies lists every organization on the platform, including deleted ones, with its Name, Slug (the part of the address after /), Owner, Members count, Created date, and Status — Active, Personal (an organization flagged as someone’s personal one, which its owner cannot delete from inside the app), or Deleted. Search by name or slug, filter by All, Active, or Deleted, and select Manage to open the detail page. This is a directory and lifecycle page: it does not open the organization’s books, and there is no way to browse a tenant’s transactions from the portal.
The detail page opens with an Identity card — Slug, Owner, Created, and Country — followed by Payroll access and the Danger zone. All companies takes you back to the list.
Payroll access
The Payroll access switch grants payroll to this one organization even while the platform-wide Payroll section is turned off under Feature toggles, and it counts as the organization’s own payroll opt-in too, so their owner does not have to turn anything on. When it is on, the card shows Enabled and records when it was granted and by whom; switch it off to remove the override. Because it stands in for the owner’s opt-in, it still matters while the Payroll section is on for everyone: it turns payroll on for this organization even if its owner never switched it on. Payroll is Canadian-only, so the override does nothing for an organization set up for another country.
Delete, restore, and permanently delete an organization
Removing an organization is a two-step affair, and only the first step is reversible. Mark as deleted takes the organization offline without destroying anything; Delete permanently, which is only offered once it is marked deleted, destroys it for good. When an owner deletes their own organization from its settings page, it takes exactly the same first step, so it shows up here as Deleted and you can restore or purge it from this page.
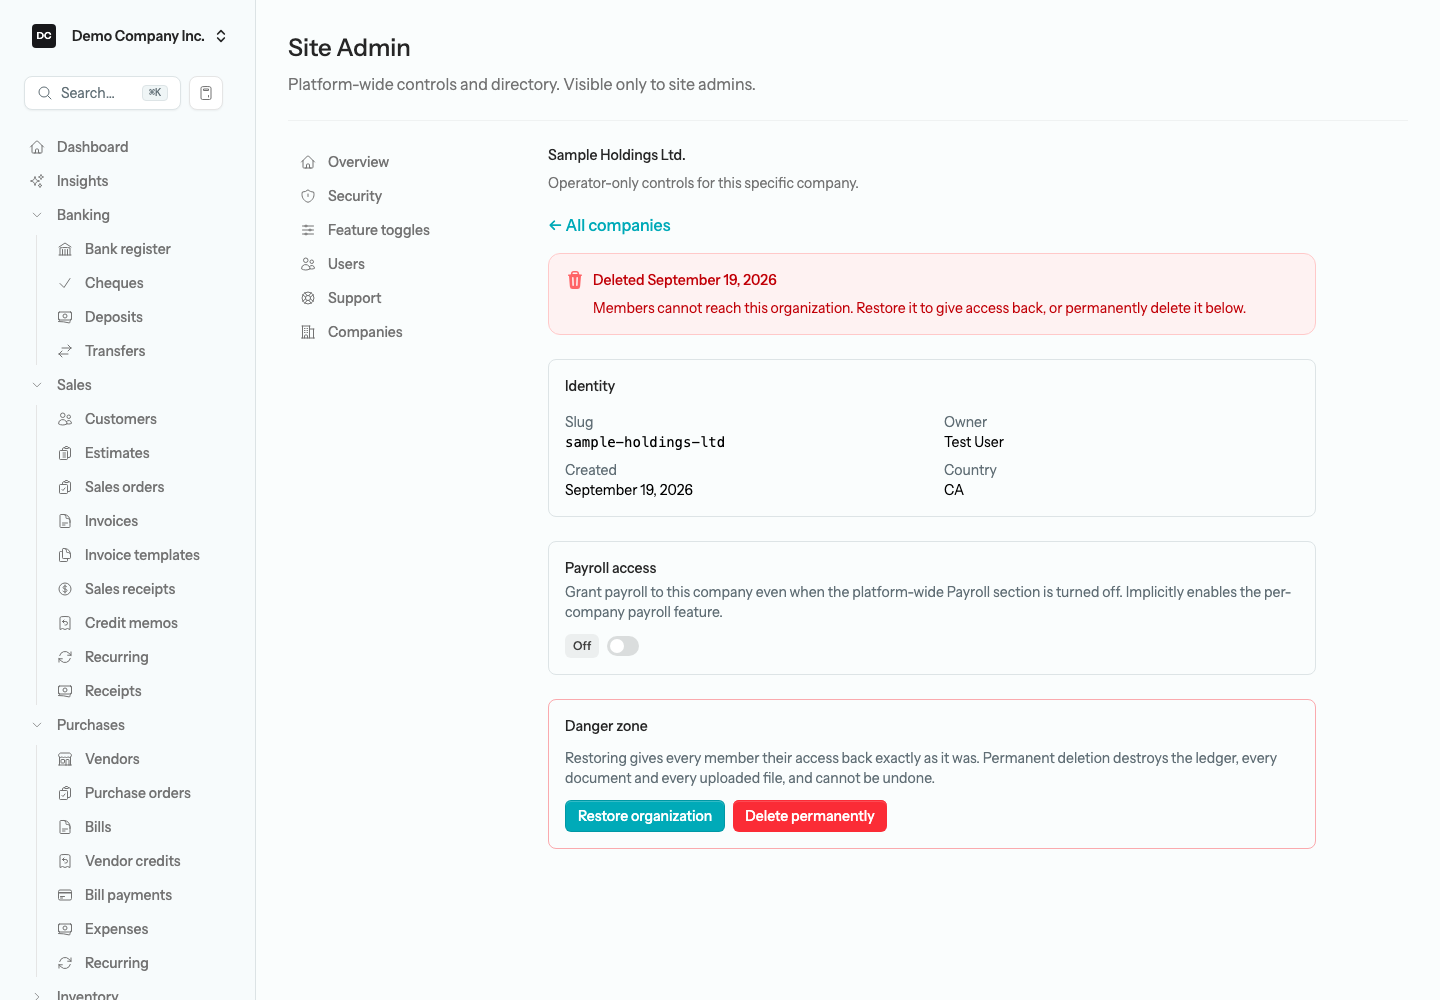
To mark an organization as deleted:
- Open Site Admin → Companies, find the organization, and select Manage.
- In the Danger zone, select Mark as deleted and confirm. Members lose access immediately: the organization vanishes from their switcher, and any page they still have open in it is refused. Anyone who was working in it is switched to their personal organization if they have one; otherwise LineLedger simply forgets where they were, and the next time they sign in they land on Select an organization — or, if this was their only organization, on the setup wizard to create a new one.
Nothing is destroyed at this stage. The ledger, documents, files, memberships, and roles all stay put, the organization is counted under Deleted companies on Overview, and a red Deleted banner with the date appears at the top of its detail page.
To restore a deleted organization:
- Open Site Admin → Companies, set the filter to Deleted, and select Manage on the organization.
- Select Restore organization and confirm. Every member gets their access back exactly as it was, with the same owner and roles.
Note. If the page shows a No owner on record warning, the organization was deleted by an older version of LineLedger that removed memberships as part of the delete. Restoring it brings the data back but gives nobody access; an owner has to be re-attached by hand on the server.
To permanently delete an organization:
- Mark it as deleted first. Delete permanently is only offered on a deleted organization; there is no way to purge a live one.
- In the Danger zone, select Delete permanently.
- In the dialog, type the organization’s exact name in the Type “…” to confirm box. A mismatch is refused with “The organization name does not match.”
- Select Delete permanently. You are returned to the Companies list, and the organization is gone.
Heads up — Permanent means permanent. Purging destroys the general ledger, every document, every uploaded file, and every backup of that organization, and it cannot be undone — there is no recycle bin behind the recycle bin. Take a backup you keep somewhere else first if there is any chance you will need the data again. Three things deliberately survive with their link to the organization cleared: the security log (including the record of the purge itself, which is written before the delete and is the only trace of the organization afterwards), the backup-restore history, and the members’ support tickets.
Security
Security is the cross-tenant view of the security log — the append-only record of sign-ins, failed attempts, lockouts, password and two-factor changes, membership and role changes, API-key events, and the operator actions described on this page. Rows can never be edited or deleted, which is what makes the log usable as evidence.
The page opens with four tiles — Failed logins (24h), Lockouts (7d), API key events (7d), and Role changes (7d) — and a red Anomalies (last 24h) box when the scanner has found something: a failed-login spike from one IP address, an account lockout, a burst of API-key revocations, or a role change that raised someone’s privileges. Below that, Failed logins (14 days) draws a bar per day; hover a bar for the date and count. The same checks run on the server every hour (the scheduled security:monitor task) and email any finding to the address in the SECURITY_ALERT_EMAIL environment variable — not OPS_ALERT_EMAIL, which covers failed background jobs. If SECURITY_ALERT_EMAIL is not set, alerts go to EXCHANGE_RATE_HEALTH_ALERT_EMAIL, and if that is not set either, to the LineLedger project’s own inbox, so set it to your address. The box on this page runs those checks over the last 24 hours.
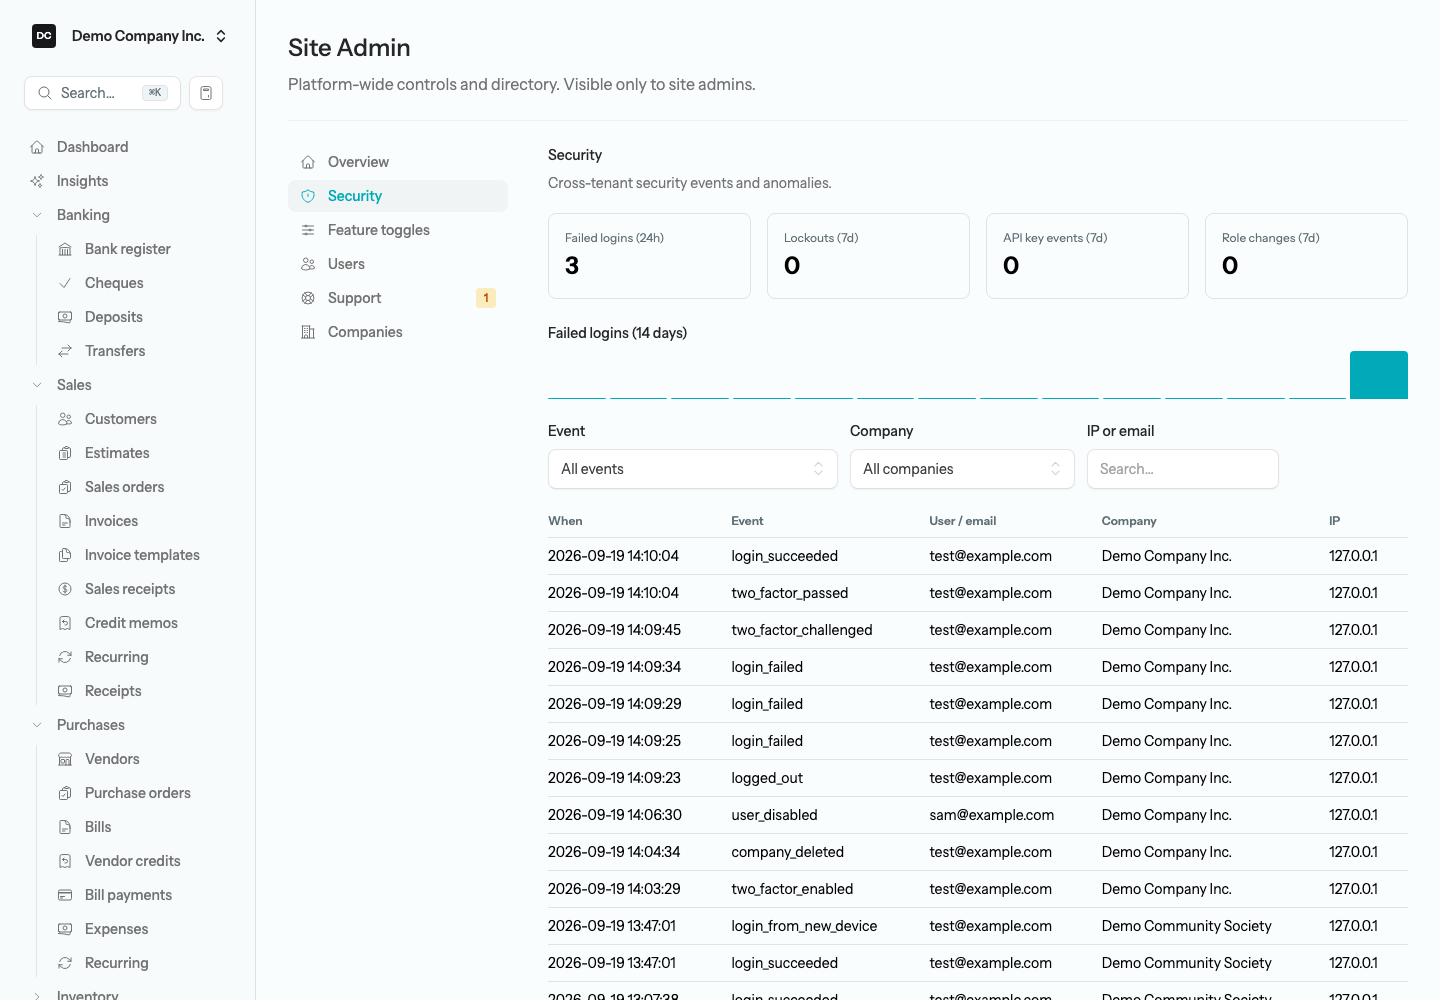
The log table lists When, Event, User / email, Company, and IP, newest first, 50 per page. Narrow it with the Event list (every event name the app records, such as login_failed or user_disabled), the Company list (which includes deleted organizations, so you can still investigate one after it is gone), or the IP or email box, which matches the address or the email that was typed at a failed sign-in. The operator actions read differently. For user_disabled, user_enabled, and user_updated_by_admin, the User / email column is the person the action was taken on. For company_deleted, company_restored, and company_purged, it is the admin who did it, and the Company column shows that admin’s own current organization, not the one acted on. The acting admin’s email (and, for the company events, the organization acted on) is stored with the row, but this page does not display it.
Tip. Two quick checks worth doing after any incident: filter Event to login_failed and search the IP that appears in the anomaly box to see what it was aiming at; then filter to company_member_role_changed to confirm no one quietly promoted themselves. Owners can see their own organization’s events on the Audit Logs report inside the app, but only this page shows the whole server side by side.
Related pages
- Self-hosting & upgrades — installing the server, and the scheduler and queue worker that the hourly security scan and ticket emails depend on.
- Settings — turning on two-factor authentication for your own account (Settings → Security), which the portal requires, and the per-organization security options owners control themselves.
- Create an organization — the setup wizard a new user goes through after registering, which is where every organization in the Companies list starts.